
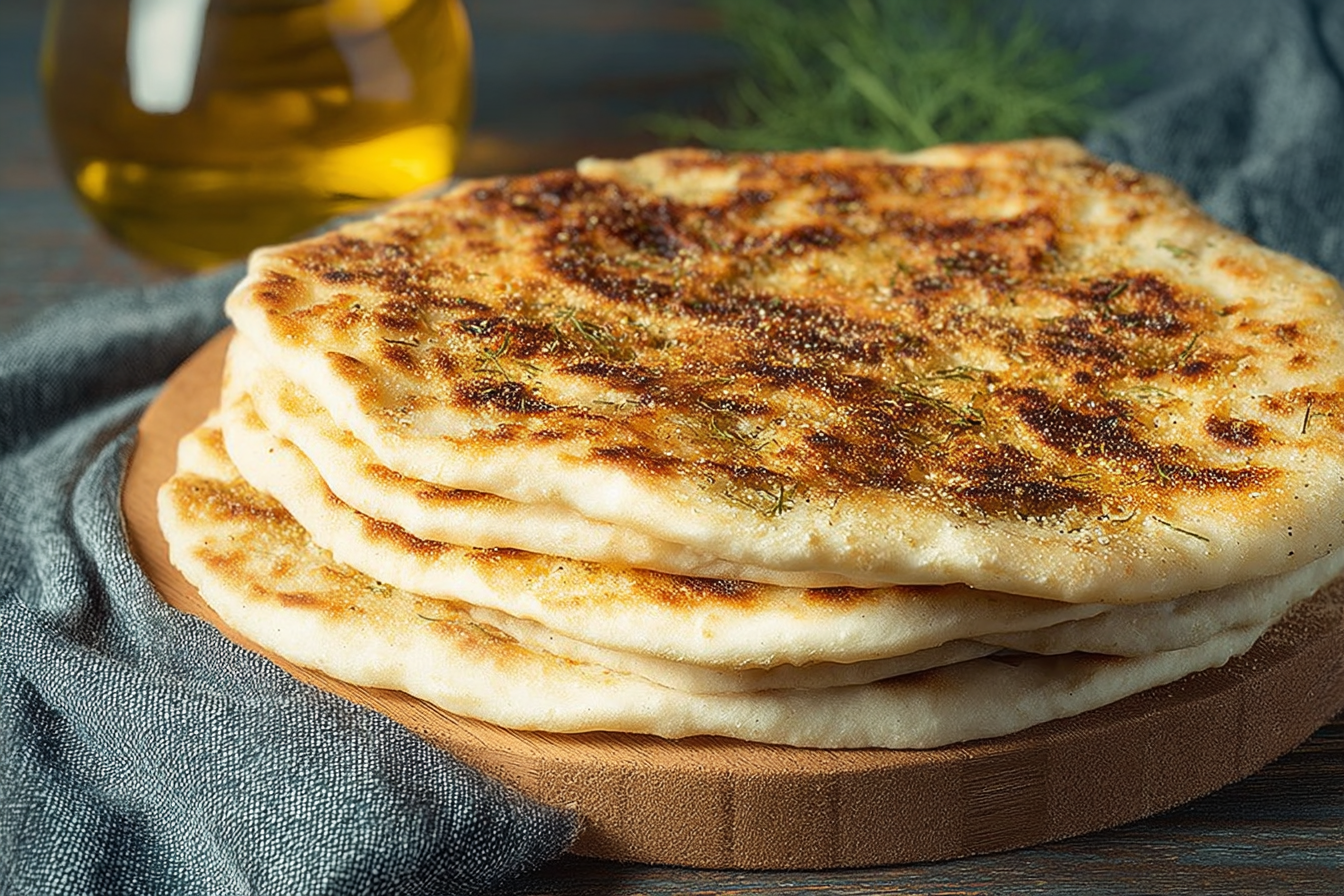
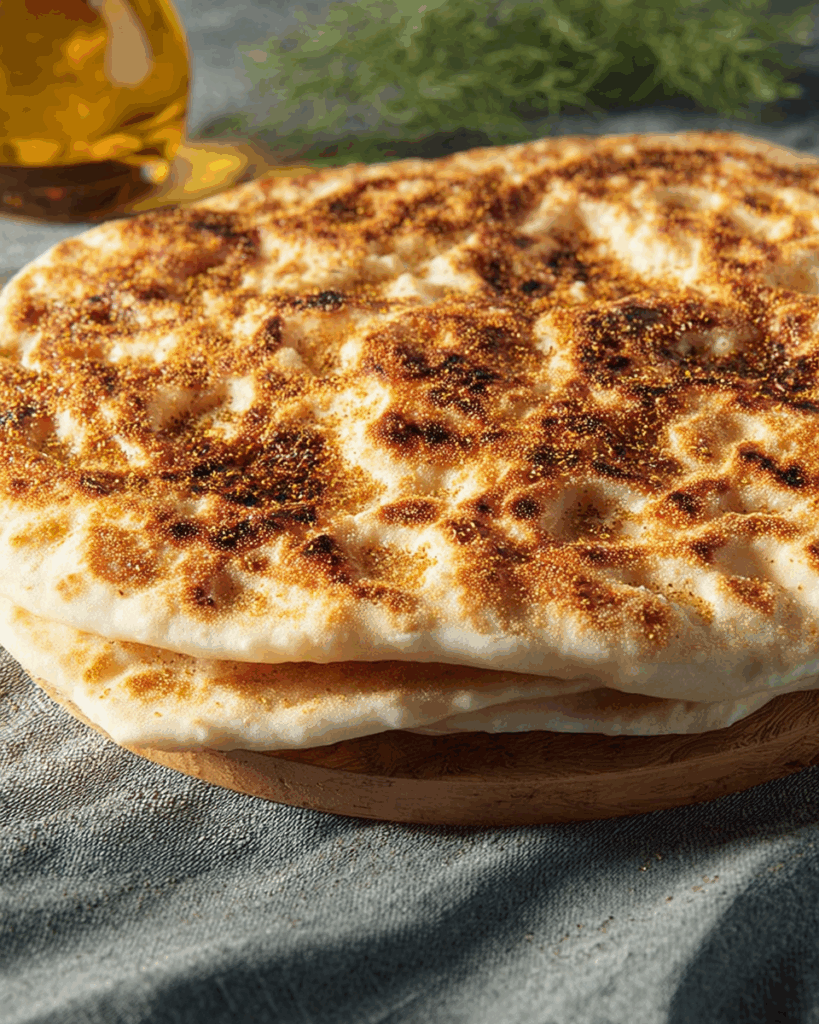
When you want a bread recipe that’s quick, easy, and unbelievably good, this 20-Minute Skillet Flatbread delivers every single time. There’s no yeast, no long waiting, and no baking—just a hot skillet and a few pantry staples. The result? Soft, chewy flatbreads with a hint of char that tastes amazing with just about anything. Trust me, after one bite, you’ll be making these on repeat.
Why You’ll Love 20-Minute Skillet Flatbread
This recipe isn’t just about convenience—it’s about flavor and texture. Here’s why it’s going to be your new go-to:
- Fast – only 20 minutes from start to finish.
- Flexible – great as wraps, pizza bases, or for dipping.
- Budget-friendly – made with simple ingredients.
- Incredibly soft – with that perfect skillet-seared edge.
Chef’s Pro Tips for Perfect Results
Want to nail this dish on your very first try? Here’s how:
- Use full-fat yogurt for a tender, flavorful dough.
- Don’t over-knead – just enough to bring it together.
- Get the skillet hot so you achieve golden spots without overcooking.
- Cover with a towel to keep them soft while you finish the batch.
- Brush with garlic butter after cooking for a restaurant-style touch.
Ingredients
- 1 1/2 cups all-purpose flour (plus extra for rolling)
- 1 teaspoon baking powder
- 1/2 teaspoon salt
- 2/3 cup plain yogurt (or milk for a softer dough)
- 1 tablespoon olive oil (plus more for cooking)
- Optional: 1 teaspoon garlic powder or herbs for added flavor
Instructions
- In a bowl, mix flour, baking powder, salt, and optional seasonings.
- Stir in yogurt and olive oil until a dough forms.
- Knead lightly on a floured surface for 2–3 minutes until smooth.
- Divide the dough into 4–6 equal pieces and roll each into a thin circle or oval.
- Heat a skillet (cast iron works best) over medium-high heat.
- Lightly brush with oil and place one piece of dough in the skillet.
- Cook for 1–2 minutes until bubbles form and the underside has golden spots.
- Flip and cook for another 1–2 minutes.
- Repeat with remaining dough, keeping cooked flatbreads covered under a towel.
- Brush with garlic butter or olive oil before serving, if desired.
Texture & Flavor Secrets
The charm of this flatbread comes from its soft interior with a slight chew, plus a hint of smokiness from the skillet. Adding olive oil keeps it moist, while yogurt gives it a subtle tang. Want to elevate it even more? Mix herbs or cheese right into the dough.
How to Serve 20-Minute Skillet Flatbread
Serve it warm with hummus, curries, soups, or stews. Use it as a wrap for grilled meats, as a pizza base with your favorite toppings, or enjoy it with a simple spread of butter. This bread works with everything!
Creative Leftover Transformations
Don’t let any go to waste! You can:
- Make chips by cutting into wedges, brushing with oil, and baking until crispy.
- Use for quesadillas by adding cheese and fillings, then toasting.
- Turn into sandwiches by layering with your favorite deli ingredients.
Additional Tips
- Whole wheat flour works too, but add a bit more moisture.
- Add a drizzle of honey to the dough for a sweeter version.
- Keep a towel over cooked bread to trap steam and keep them extra soft.
Make It a Showstopper (Presentation Ideas)
Want to impress? Stack the flatbreads on a wooden board, drizzle with herb-infused olive oil, sprinkle with flaky sea salt, and serve with a variety of dips like tzatziki, baba ganoush, or spicy harissa. They’ll disappear in no time.
FAQ’s
-
Can I make the dough ahead of time?
Yes, wrap it well and refrigerate for up to 24 hours. Bring to room temperature before cooking. -
Do I need a cast-iron skillet?
No, any heavy-bottomed skillet works, but cast iron gives the best char. -
Can I use self-rising flour?
Yes, skip the baking powder and reduce salt slightly. -
Can I make it dairy-free?
Yes, use dairy-free yogurt or swap with water and a little more oil. -
Can I freeze cooked flatbreads?
Absolutely! Freeze between parchment layers and reheat in a skillet. -
What makes this different from naan?
Naan is yeast-based and fluffier, while this is quicker and cooked purely on the stovetop. -
Can I add toppings before cooking?
Yes! Sprinkle cheese, herbs, or spices before placing on the skillet. -
How do I keep it from sticking?
Lightly flour your surface and ensure your skillet is hot enough. -
Can I double the recipe?
Definitely—keep cooked flatbreads warm under a towel as you work through the batch. -
What’s the best oil for cooking?
Olive oil adds great flavor, but any neutral oil works.
Conclusion
20-Minute Skillet Flatbread proves that homemade bread can be quick, easy, and unbelievably delicious. With its soft texture, subtle char, and endless versatility, this recipe is perfect for busy weeknights or weekend feasts. Once you try it, you’ll never want to go back to store-bought!
Print
20-Minute Skillet Flatbread
- Prep Time: 5 minutes
- Cook Time: 15 minutes
- Total Time: 20 minutes
- Yield: 1 small loaf (or 6–8 rolls) 1x
- Category: Bread
- Method: Baking
- Cuisine: American
- Diet: Vegetarian
Description
Need bread fast? This Bread in 20 Minutes recipe is soft, fluffy, and ready in a flash! Perfect for busy weeknights, last-minute meals, or whenever you’re craving fresh bread without the wait.
Ingredients
- 2 cups all-purpose flour
- 1 tablespoon baking powder
- ½ teaspoon salt
- 1 tablespoon sugar (optional)
- ¾ cup milk (whole or 2%)
- ¼ cup water
- 2 tablespoons vegetable oil or melted butter
Instructions
- Preheat your oven to 425°F (220°C). Line a baking sheet with parchment paper or lightly grease it.
- In a large bowl, whisk together the flour, baking powder, salt, and sugar.
- Pour in the milk, water, and oil (or melted butter). Stir until a soft dough forms — do not overmix.
- Turn the dough onto a lightly floured surface. Shape it into a round loaf or divide it into smaller rolls.
- Place the dough on the prepared baking sheet. Bake for 15–18 minutes, or until the bread is golden brown and sounds hollow when tapped on the bottom.
- Let cool for a few minutes before slicing. Enjoy warm with butter, jam, or alongside your favorite meal!
Notes
- For a richer flavor, brush the top of the dough with a little melted butter before baking.
- Add-ins like shredded cheese, chopped herbs, or garlic powder can be mixed into the dough for extra flavor.
- This bread is best enjoyed fresh but can be stored in an airtight container for up to 2 days.
Nutrition
- Serving Size: 1 slice
- Calories: ~130 kcal
- Sugar: ~2g
- Sodium: ~210mg
- Fat: ~4g
- Saturated Fat: ~1g
- Unsaturated Fat: ~3g
- Trans Fat: ~0g
- Carbohydrates: ~20g
- Fiber: ~1g
- Protein: ~3g
- Cholesterol: ~2mg