
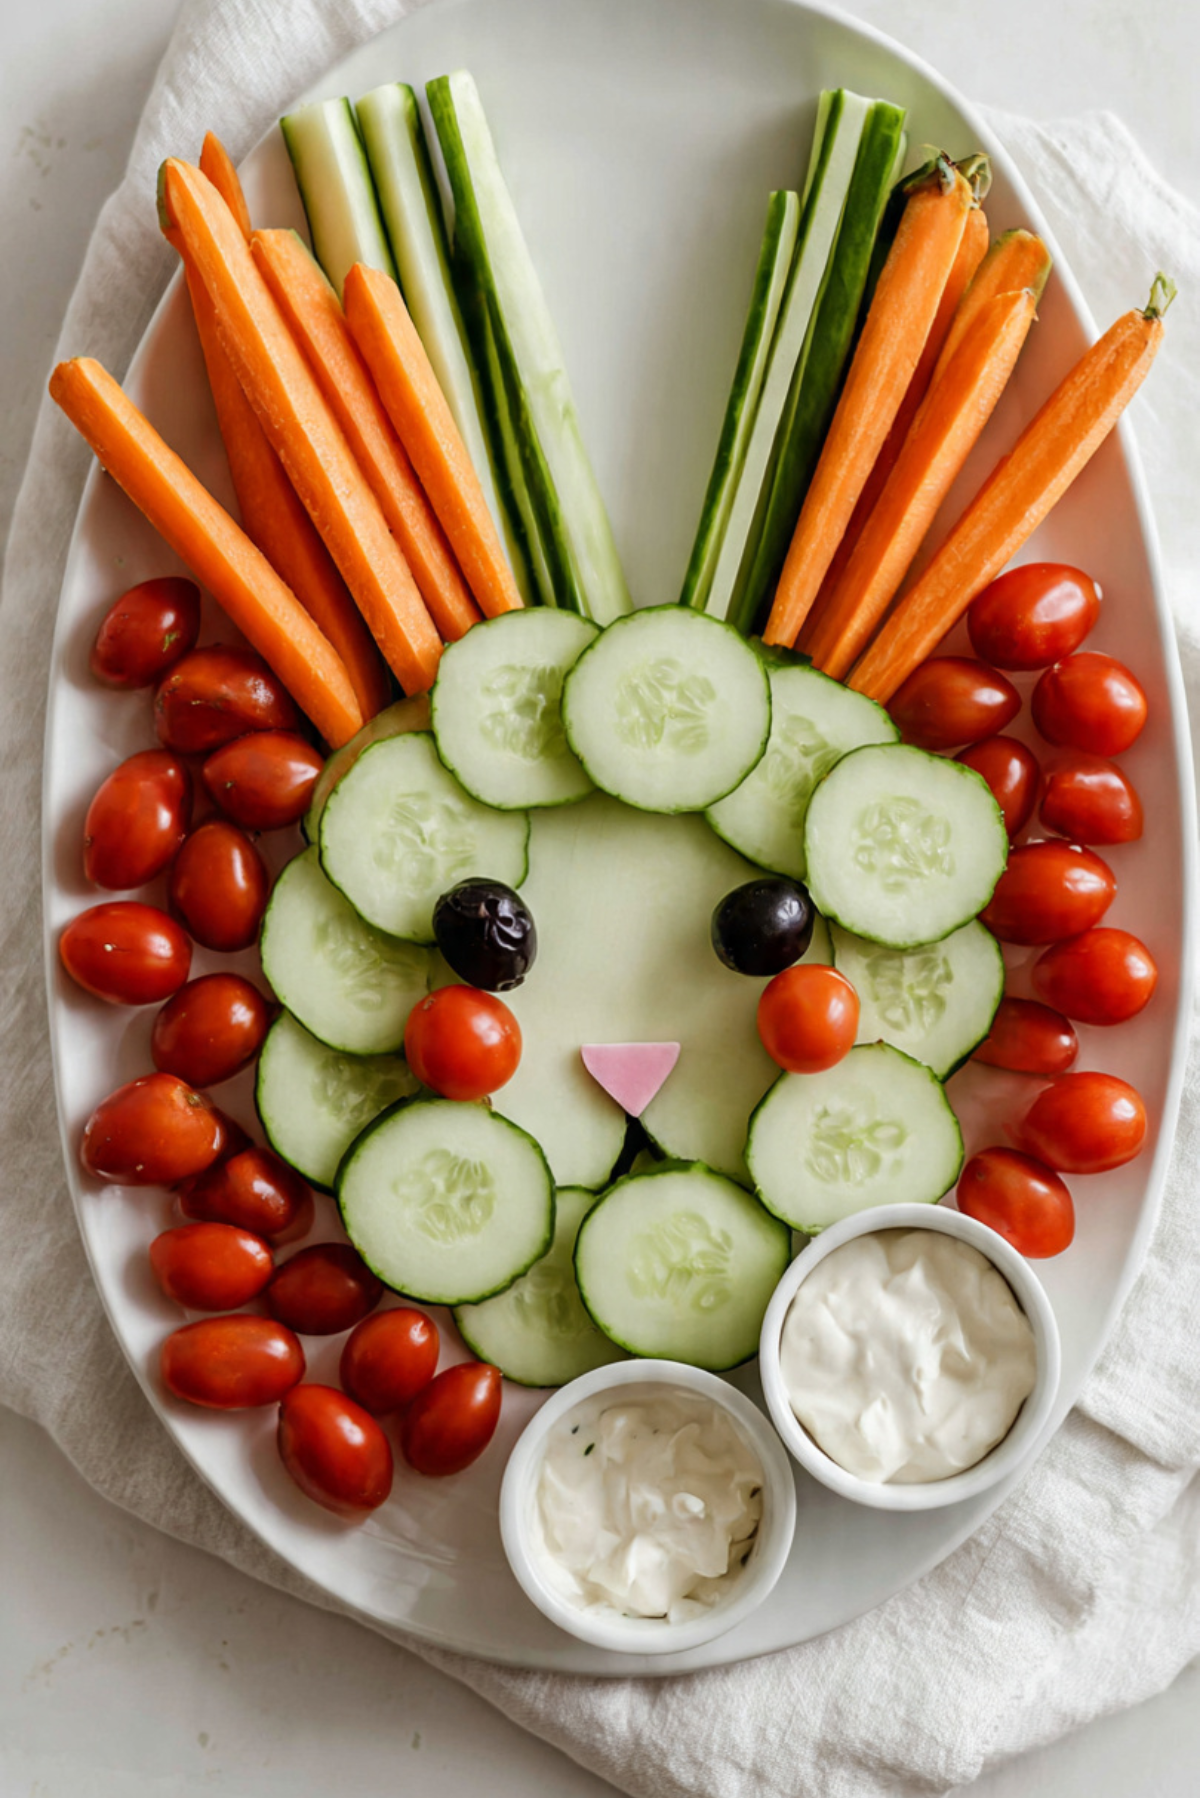
Spring gatherings always feel a little more joyful when colorful food is part of the table. This Adorable Easter Bunny Veggie Tray is one of those dishes that instantly brings smiles before anyone even takes a bite. Fresh vegetables are arranged into a cute bunny face, turning simple ingredients into a playful centerpiece.
It is bright, crisp, and full of natural flavor. Crunchy cucumbers, sweet cherry tomatoes, and fresh carrots surround a creamy dip that ties everything together. Trust me, you are going to love this. It is fun to make, easy to serve, and it disappears quickly at Easter parties.
A Festive Snack That Everyone Notices
Sometimes the simplest recipes make the biggest impression. This veggie tray is proof of that. By arranging colorful vegetables into a bunny shape, an ordinary snack suddenly becomes the highlight of the table.
Kids love the playful design, while adults appreciate the fresh and healthy ingredients. It feels light, refreshing, and perfect for spring gatherings. And now let us explore where creative vegetable trays like this became so popular.
A Fun Tradition of Creative Party Platters
Decorative food trays have been around for decades. Party hosts began arranging fruits and vegetables into shapes and patterns to make appetizers more visually exciting.
Holiday themed trays became especially popular because they add personality to the table. For Easter celebrations, bunny shaped snacks quickly became a favorite.
The idea is simple. Take everyday ingredients and arrange them creatively. The result feels festive without requiring complicated cooking.
Why This Recipe Is So Loved
Before we begin building the bunny tray, here are a few reasons people love this recipe.
Versatile: Works for Easter brunch, family gatherings, school parties, or spring picnics.
Budget-Friendly: Vegetables are affordable and easy to find.
Quick and Easy: Assembly takes only a few minutes once everything is sliced.
Customizable: You can swap vegetables depending on what you like.
Crowd-Pleasing: Fresh veggies and dip appeal to both kids and adults.
Make-Ahead Friendly: The vegetables can be cut earlier and arranged later.
Great for Leftovers: Extra vegetables can be used in salads or wraps.
Smart Tips for Building the Bunny
A few small tricks make the tray look extra adorable.
Use evenly sliced vegetables: Uniform slices create a neat bunny shape.
Dry vegetables before arranging: This keeps the platter clean and tidy.
Start with the face shape first: Build the bunny outline before adding small details.
Place dip bowls strategically: They can act as decorative features like cheeks.
Kitchen Tools That Help
This recipe is simple, but a few tools make prep easier.
Cutting Board: Provides a stable surface for slicing vegetables.
Sharp Knife: Ensures clean slices that look neat on the tray.
Large Serving Platter: Gives enough space to create the bunny shape.
Small Bowls: Perfect for holding dip and adding structure to the design.
Ingredients You Will Need for This Tray
Fresh vegetables provide color, texture, and natural sweetness.
- Cucumber: 2 large cucumbers sliced into rounds. These form the main bunny face.
- Cherry Tomatoes: 1 cup. They create bright pops of color and cute bunny cheeks.
- Carrot Sticks: 1 cup. These form whiskers and add a crunchy texture.
- Black Olives: ¼ cup sliced. Used to create the bunny eyes and nose details.
- Celery Sticks: 1 cup sliced. Perfect for extra crunch around the tray.
- Bell Peppers: 1 cup sliced. Adds vibrant color and sweetness.
- Vegetable Dip: 1 cup creamy dip placed in small bowls for serving.
Easy Ingredient Substitutions
If you want to change things up, these swaps work well.
Cucumbers: Zucchini slices can work in a similar way.
Cherry Tomatoes: Radishes add a fun pop of color.
Celery: Snap peas offer a sweet crisp texture.
Vegetable Dip: Hummus can be used as an alternative dip.
A Closer Look at Key Ingredients
Cucumbers: These mild, refreshing slices form the main bunny face and provide a cool crunch.
Carrots: Their bright color adds personality and makes perfect bunny whiskers.

Let’s Build the Bunny Tray
Now comes the fun part. Here are the steps you are going to follow.
- Preheat Your Equipment: Prepare a large serving platter and gather all sliced vegetables.
- Combine Ingredients: Place vegetables into small bowls so they are easy to arrange.
- Prepare Your Cooking Vessel: Position the platter on a flat surface where you can clearly see the design.
- Assemble the Dish: Arrange cucumber slices in a large oval shape to form the bunny face. Use long slices to create ears.
- Cook to Perfection: Add cherry tomatoes for cheeks and olives for eyes and nose.
- Finishing Touches: Place carrot sticks as whiskers and fill empty spaces with celery and bell peppers.
- Serve and Enjoy: Add bowls of dip to the tray and serve immediately.
Texture and Flavor Balance
This tray is all about fresh textures. Crisp cucumbers and celery provide refreshing crunch, while sweet peppers and tomatoes add juiciness.
The creamy dip adds richness that balances the vegetables. Together they create a snack that feels light but still satisfying.
Helpful Tips
- Arrange vegetables tightly so the bunny shape stays clear.
- Use bright vegetables to create contrast and color.
- Keep dip chilled until serving.
What to Avoid
- Overcrowding the platter which hides the bunny shape.
- Using uneven slices that make the design messy.
- Placing dip too early which can make vegetables soggy.
Nutrition Snapshot
Servings: 6
Calories per serving: 120
Note: These values are approximate.
Preparation Time Overview
Prep Time: 15 minutes
Cook Time: 0 minutes
Total Time: 15 minutes
Make Ahead and Storage Tips
You can slice the vegetables several hours before assembling the tray. Store them in airtight containers in the refrigerator.
Assemble the bunny design shortly before serving to keep everything crisp and vibrant.
Leftover vegetables can be stored for up to two days and used in salads or wraps.
How to Serve This Festive Tray
Place the bunny tray in the center of the table so the design stands out. It works beautifully alongside Easter brunch dishes, sandwiches, or light spring salads.
Creative Leftover Transformations
Extra vegetables can be tossed into a fresh salad, added to a stir fry, or blended into vegetable soup.
Additional Tips
Keep paper towels nearby while assembling the tray to dry vegetables if needed.
Small edible decorations like extra olives can add extra character to the bunny face.
Make It a Showstopper
Use a large white platter so the colorful vegetables pop visually. The contrast between the bright vegetables and the white background makes the bunny shape stand out beautifully.
Variations to Try
Rainbow Bunny Tray: Use different colored peppers for extra brightness.
Garden Veggie Version: Add broccoli florets and snap peas.
Mini Bunny Plates: Create individual bunny trays for kids.
Dip Trio: Add hummus, ranch dip, and yogurt dip.
FAQ’s
Q1: Can I make this tray ahead of time?
Yes. Slice vegetables earlier and assemble shortly before serving.
Q2: What dip works best with this tray?
Creamy vegetable dip, ranch dip, or hummus all work well.
Q3: How do I keep vegetables fresh?
Store them in the refrigerator and cover the tray until serving.
Q4: Can kids help assemble the bunny?
Yes. Kids often enjoy arranging the vegetables.
Q5: What platter size works best?
A large round or oval platter provides enough space for the design.
Q6: Can I add more vegetables?
Yes. Broccoli, snap peas, or radishes work well.
Q7: Can I make a smaller version?
Yes. Simply use fewer vegetables on a smaller platter.
Q8: How long can it sit out?
About two hours at room temperature.
Q9: Can I add fruit?
Yes. Grapes or berries can add sweetness.
Q10: Is this good for kids?
Absolutely. The playful bunny shape makes vegetables more fun to eat.
Conclusion
This Adorable Easter Bunny Veggie Tray proves that simple ingredients can become something truly special with a little creativity. The colorful vegetables, crisp textures, and playful bunny design make it a perfect centerpiece for any spring gathering.
It is fresh, healthy, and incredibly fun to assemble. Once it hits the table, everyone will want to grab a piece. Let me tell you, it is worth every crunchy bite.
Print
Adorable Easter Bunny Veggie Tray
- Prep Time: 15 minutes
- Cook Time: 0 minutes
- Total Time: 15 minutes
- Yield: 6 servings 1x
- Category: Appetizer
- Method: Assembling
- Cuisine: American
- Diet: Vegetarian
Description
A fun and colorful Easter bunny veggie tray made with fresh cucumbers, carrots, tomatoes, and peppers arranged into a playful bunny shape with creamy dip.
Ingredients
- 2 large cucumbers sliced into rounds
- 1 cup cherry tomatoes
- 1 cup carrot sticks
- 1/4 cup sliced black olives
- 1 cup celery sticks
- 1 cup sliced bell peppers
- 1 cup vegetable dip
Instructions
- Slice all vegetables and prepare them in separate bowls.
- Place a large serving platter on a flat surface.
- Arrange cucumber slices into an oval shape to create the bunny face.
- Add long cucumber slices to form bunny ears.
- Place cherry tomatoes as cheeks and olives for the eyes and nose.
- Add carrot sticks to form bunny whiskers.
- Fill the remaining platter space with celery and bell peppers and place bowls of dip on the tray before serving.
Notes
- Dry vegetables before arranging to keep the platter neat.
- Use bright vegetables for a colorful presentation.
- Assemble shortly before serving for the best freshness.
Nutrition
- Serving Size: 1 portion
- Calories: 120
- Sugar: 5g
- Sodium: 210mg
- Fat: 6g
- Saturated Fat: 1g
- Unsaturated Fat: 4g
- Trans Fat: 0g
- Carbohydrates: 12g
- Fiber: 3g
- Protein: 3g
- Cholesterol: 5mg