
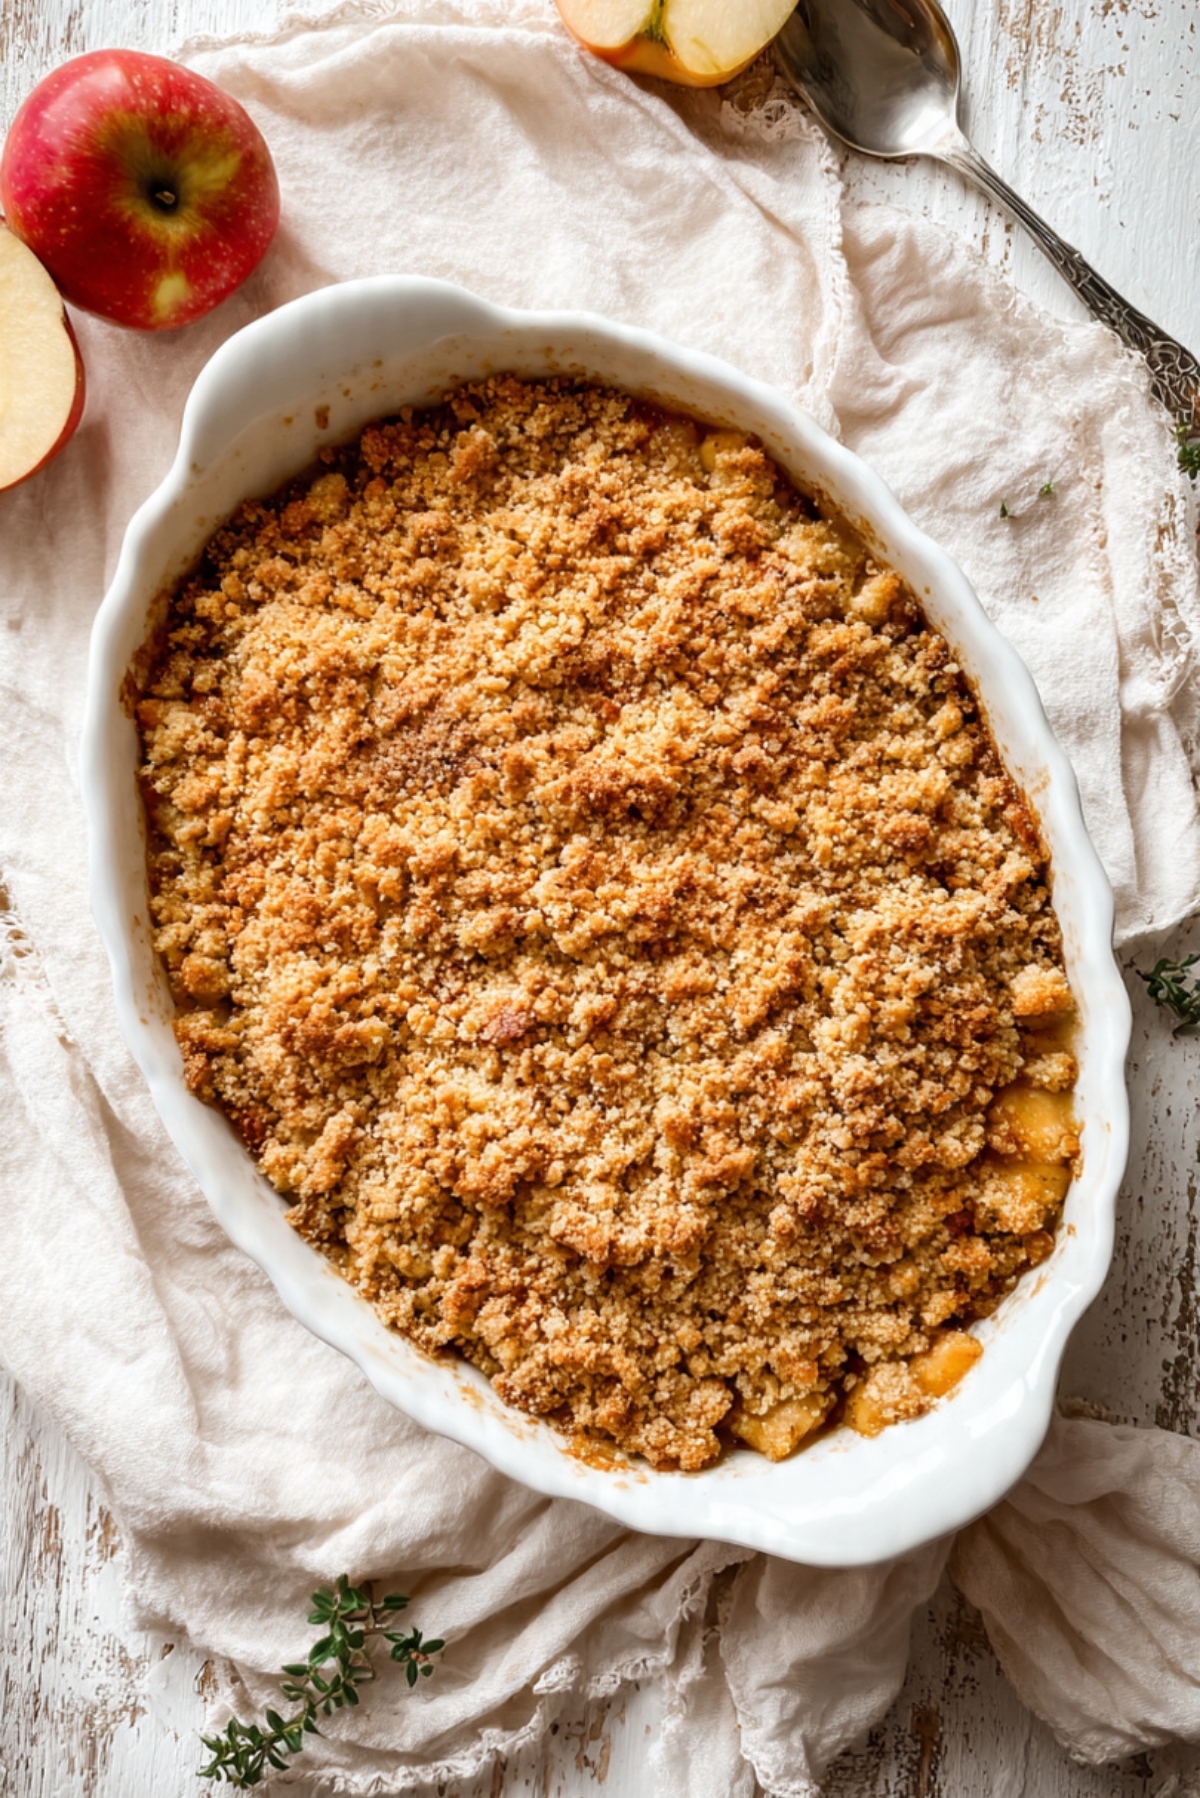
There’s something timeless about the smell of warm apples mingling with cinnamon and butter as they bake into golden perfection. That scent wraps around your kitchen like a comforting hug, whispering that something special is coming out of the oven. Apple Brown Betty is one of those cozy desserts that feels like home, no matter where you are. With its crunchy topping and soft, spiced apples underneath, it strikes the perfect balance between rustic simplicity and irresistible indulgence.
Why Everyone Falls in Love With This Apple Delight
This dessert draws people in with its old-fashioned charm, but it’s the first spoonful that truly seals the deal. The contrast of textures, the warmth of spice, and the hint of caramelized sweetness make each bite deeply satisfying. Whether you’re serving it on a chilly evening or after a big Sunday lunch, it always brings people back for seconds.
A Little Slice of Americana: Where Apple Brown Betty Comes From
Long before crisps and cobblers took over dessert menus, there was the humble Brown Betty. This dish dates all the way back to colonial America, believed to have been named after a cook named Betty who baked it regularly. While the exact origin remains a bit hazy, it’s rooted deeply in American kitchens. Traditionally made with layers of sweetened crumbs and baked apples, it was a practical and comforting way to use up day-old bread and fruit.
What Makes This Dish So Reliable (and So Loved)
Once you make this once, you’ll understand why it’s stood the test of time. Here’s what makes it shine in any kitchen:
Versatile: Great with any type of apple and easily pairs with pears or berries if you want to mix things up.
Budget-Friendly: Uses pantry staples and fruit that might already be sitting on your counter.
Quick and Easy: Comes together fast with just a few simple steps.
Customizable: Adjust the spice level or sweetness to suit your mood.
Crowd-Pleasing: That warm, cinnamon-sugar combo wins over everyone.
Make-Ahead Friendly: Assemble it in advance, pop it in the fridge, and bake when ready.
Great for Leftovers: Reheats beautifully the next day and is arguably even better.
Pro Tips for Getting It Just Right
Before we head into the baking, let’s pause for a moment of wisdom from the kitchen. These little details will make your Apple Brown Betty extra memorable.
- Choose the Right Apples: A mix of tart and sweet like Granny Smith and Honeycrisp gives balance and texture.
- Don’t Skip the Lemon Juice: It lifts the flavor and keeps the apples from tasting flat.
- Toast the Breadcrumbs: Give them a light toast with butter before layering to keep them crisp and flavorful.
- Bake Until Bubbly: The apples should be tender and the top deeply golden brown.
- Let It Rest: A short cool-down lets the juices settle so you don’t end up with a runny bottom.
Tools That Make It Easier (and More Fun)
You don’t need fancy gadgets, but having the right tools on hand makes the process smoother and more enjoyable.
Mixing Bowls: For tossing the apple slices and breadcrumbs.
Baking Dish (8×8 or similar): Ideal size for even cooking and serving.
Apple Peeler or Paring Knife: Speeds up prep and keeps slices uniform.
Zester or Microplane: For that fresh hit of lemon zest if you’re feeling extra.
Rubber Spatula: Helps spread the layers without crushing the apples.
Ingredients You’ll Need to Make Apple Brown Betty
This recipe is a beautiful medley of ingredients you likely already have. Together, they create something far more comforting than the sum of their parts.
- Apples: 6 cups, peeled, cored, and thinly sliced. Choose a mix of sweet and tart for depth.
- Breadcrumbs: 2 cups, preferably fresh and lightly toasted. They soak up flavor and give that crunchy top.
- Brown Sugar: ¾ cup, packed. Adds rich, molasses-like sweetness that pairs perfectly with apples.
- Ground Cinnamon: 1 teaspoon, for warm, comforting spice.
- Nutmeg: ¼ teaspoon, just enough for subtle depth.
- Butter: ½ cup, melted. Helps brown the topping and gives it that irresistible richness.
- Lemon Juice: 1 tablespoon, to balance sweetness and enhance the apple flavor.
- Salt: ¼ teaspoon, to bring all the flavors into harmony.
Swaps That Still Taste Amazing
Out of something? No worries, this dessert is wonderfully forgiving.
Breadcrumbs: Crushed graham crackers or oats.
Brown Sugar: Coconut sugar or white sugar with a touch of molasses.
Butter: Vegan butter or refined coconut oil.
Lemon Juice: Apple cider vinegar or orange juice.
Nutmeg: Pumpkin pie spice or clove.
Ingredient Spotlight: Apples and Brown Sugar
Apples: These are the stars of the show. Their natural sweetness and slight tartness soften beautifully in the oven, giving the dish its signature comfort factor.
Brown Sugar: It’s not just sweet—it’s rich, warm, and slightly smoky, adding depth to every bite.

Let’s Bake This Beauty Together
There’s something satisfying about assembling a dessert that feels like it’s been passed down through generations. Let’s walk through it step by step.
-
Preheat Your Equipment:
Set your oven to 375°F and lightly grease an 8×8 baking dish. -
Combine Ingredients:
In a large bowl, toss the apple slices with lemon juice, cinnamon, nutmeg, and half the brown sugar. -
Prepare Your Cooking Vessel:
In a separate bowl, mix the breadcrumbs with the remaining brown sugar, melted butter, and a pinch of salt. -
Assemble the Dish:
Spread half the breadcrumb mixture on the bottom of the baking dish. Layer the apples over it evenly. Finish with the remaining breadcrumb mixture on top. -
Cook to Perfection:
Bake for 40 to 45 minutes until the apples are tender and the top is crisp and golden. -
Finishing Touches:
Let it cool slightly so the juices settle. You can sprinkle a touch of powdered sugar or add a scoop of vanilla ice cream if you like. -
Serve and Enjoy:
Spoon it warm into bowls and watch everyone’s face light up with that first bite.
Texture and Flavor: A Dessert Worth Savoring Slowly
From the first spoonful, you get that perfect pairing of soft, warm apples and the buttery crunch of the topping. The brown sugar caramelizes just slightly, and the spices bloom into something that feels like fall. The slight zing of lemon cuts through the richness, making every bite balanced and exciting.
Smart Tips to Elevate Every Bite
Even the simplest recipes can benefit from a few clever tweaks:
- Use a mix of apple types for more complex flavor.
- Toast the breadcrumbs in a dry skillet before mixing for added crunch.
- Sprinkle chopped nuts into the topping for extra texture.
- A tiny pinch of salt in the topping enhances all the flavors.
Watch Out for These Common Mistakes
Don’t worry, they’re easy to fix:
- Overbaking: Apples can go mushy and dry out. Stick to 40–45 minutes.
- Too much sugar: Adjust to taste if your apples are especially sweet.
- Skipping lemon juice: It’s the secret to brightening all the other flavors.
- Soggy topping: Make sure breadcrumbs aren’t too fine or wet.
Nutrition Breakdown
Servings: 6
Calories per serving: 320
Note: These are approximate values based on standard ingredients.
Time Breakdown
Prep Time: 15 minutes
Cook Time: 45 minutes
Total Time: 1 hour
Storing and Prepping Ahead Tips
This is a dessert that fits easily into your schedule. You can slice the apples and mix the topping earlier in the day. Store unbaked in the fridge and pop it in the oven when dinner’s done. Leftovers keep well for up to 3 days in the fridge and reheat beautifully in the microwave or oven. You can also freeze individual portions and warm them for a treat on busy nights.
Best Ways to Serve It Up
You can’t go wrong with a scoop of vanilla ice cream or a dollop of whipped cream on the side. It also pairs wonderfully with a drizzle of caramel sauce or a little crème fraîche if you’re feeling fancy. Serve it in individual ramekins for a dinner party, or just spoon it out family-style from the baking dish.
Leftovers You’ll Look Forward To
Turn leftovers into something exciting:
- Reheat and spoon over pancakes or waffles.
- Layer into a yogurt parfait for breakfast.
- Use as a warm filling for crepes.
- Add a spoonful to oatmeal for a cozy start.
A Few Final Touches That Go a Long Way
Here’s how to make your Apple Brown Betty stand out even more:
- Add a hint of orange zest for a citrusy note.
- Sprinkle chopped pecans or walnuts into the topping.
- Drizzle maple syrup just before serving for extra richness.
Make It a Centerpiece Dessert
For presentation that wows, serve it in a cast iron skillet or a beautiful ceramic baking dish. Garnish with a few thin apple slices or a dusting of powdered sugar. A sprig of fresh mint or thyme can add a little elegance too.
Variations That Keep It Interesting
- Pear Brown Betty: Use ripe pears instead of apples.
- Berry Betty: Mix in blueberries or blackberries for a juicy twist.
- Oat Topping: Sub half the breadcrumbs for rolled oats for extra crunch.
- Nutty Betty: Add pecans or walnuts for texture.
- Spiced Up: Try cardamom or ginger for a different flavor profile.
FAQ’s
Q1: Can I use canned apples?
A1: You can, but fresh apples give a better texture and brighter flavor.
Q2: Is this dish vegan?
A2: Not as written, but you can use vegan butter to make it plant-based.
Q3: Can I make it gluten-free?
A3: Yes, just use gluten-free breadcrumbs or oats.
Q4: What apples work best?
A4: Granny Smith, Honeycrisp, or a mix for balance.
Q5: Can I prep it a day in advance?
A5: Absolutely. Assemble and refrigerate, then bake the next day.
Q6: How do I keep the topping crunchy?
A6: Toast the breadcrumbs and don’t overdo the butter.
Q7: What’s the difference between Brown Betty and Apple Crisp?
A7: Brown Betty uses breadcrumbs while crisps use oats or flour-based toppings.
Q8: Can I add raisins?
A8: Definitely. They add sweetness and texture.
Q9: Should it be served hot or cold?
A9: Warm is best, but cold leftovers are tasty too.
Q10: Can I double the recipe?
A10: Yes, just use a larger baking dish and extend baking time slightly.
Conclusion
There’s something magical about a dessert like this. It feels like a warm memory brought to life in your kitchen. Apple Brown Betty might be simple, but it delivers layers of flavor, comfort, and joy that you’ll come back to again and again. Trust me, you’re going to love this.
Print
Apple Brown Betty
- Prep Time: 15 minutes
- Cook Time: 45 minutes
- Total Time: 1 hour
- Yield: 6 servings 1x
- Category: Dessert
- Method: Baking
- Cuisine: American
- Diet: Vegetarian
Description
A cozy, old-fashioned dessert made with tender spiced apples and a golden, buttery breadcrumb topping. Apple Brown Betty is warm, comforting, and perfect with a scoop of vanilla ice cream.
Ingredients
- 6 cups apples, peeled, cored, and thinly sliced
- 2 cups fresh breadcrumbs, lightly toasted
- 3/4 cup brown sugar, packed
- 1 teaspoon ground cinnamon
- 1/4 teaspoon nutmeg
- 1/2 cup butter, melted
- 1 tablespoon lemon juice
- 1/4 teaspoon salt
Instructions
- Preheat oven to 375°F and lightly grease an 8×8 baking dish.
- In a large bowl, toss apple slices with lemon juice, cinnamon, nutmeg, and half the brown sugar.
- In another bowl, mix breadcrumbs with the remaining brown sugar, melted butter, and salt.
- Spread half the breadcrumb mixture on the bottom of the baking dish.
- Layer the seasoned apples evenly over the crumbs.
- Top with the remaining breadcrumb mixture.
- Bake for 40 to 45 minutes until the apples are tender and topping is golden brown.
- Cool slightly before serving. Enjoy warm with ice cream or whipped cream.
Notes
- Use a mix of sweet and tart apples for better flavor balance.
- Toasting the breadcrumbs adds a richer texture and flavor.
- Try adding chopped nuts to the topping for crunch.
- Great make-ahead dessert for holidays or gatherings.
Nutrition
- Serving Size: 1 portion
- Calories: 320
- Sugar: 29g
- Sodium: 160mg
- Fat: 15g
- Saturated Fat: 9g
- Unsaturated Fat: 5g
- Trans Fat: 0g
- Carbohydrates: 48g
- Fiber: 4g
- Protein: 2g
- Cholesterol: 30mg