
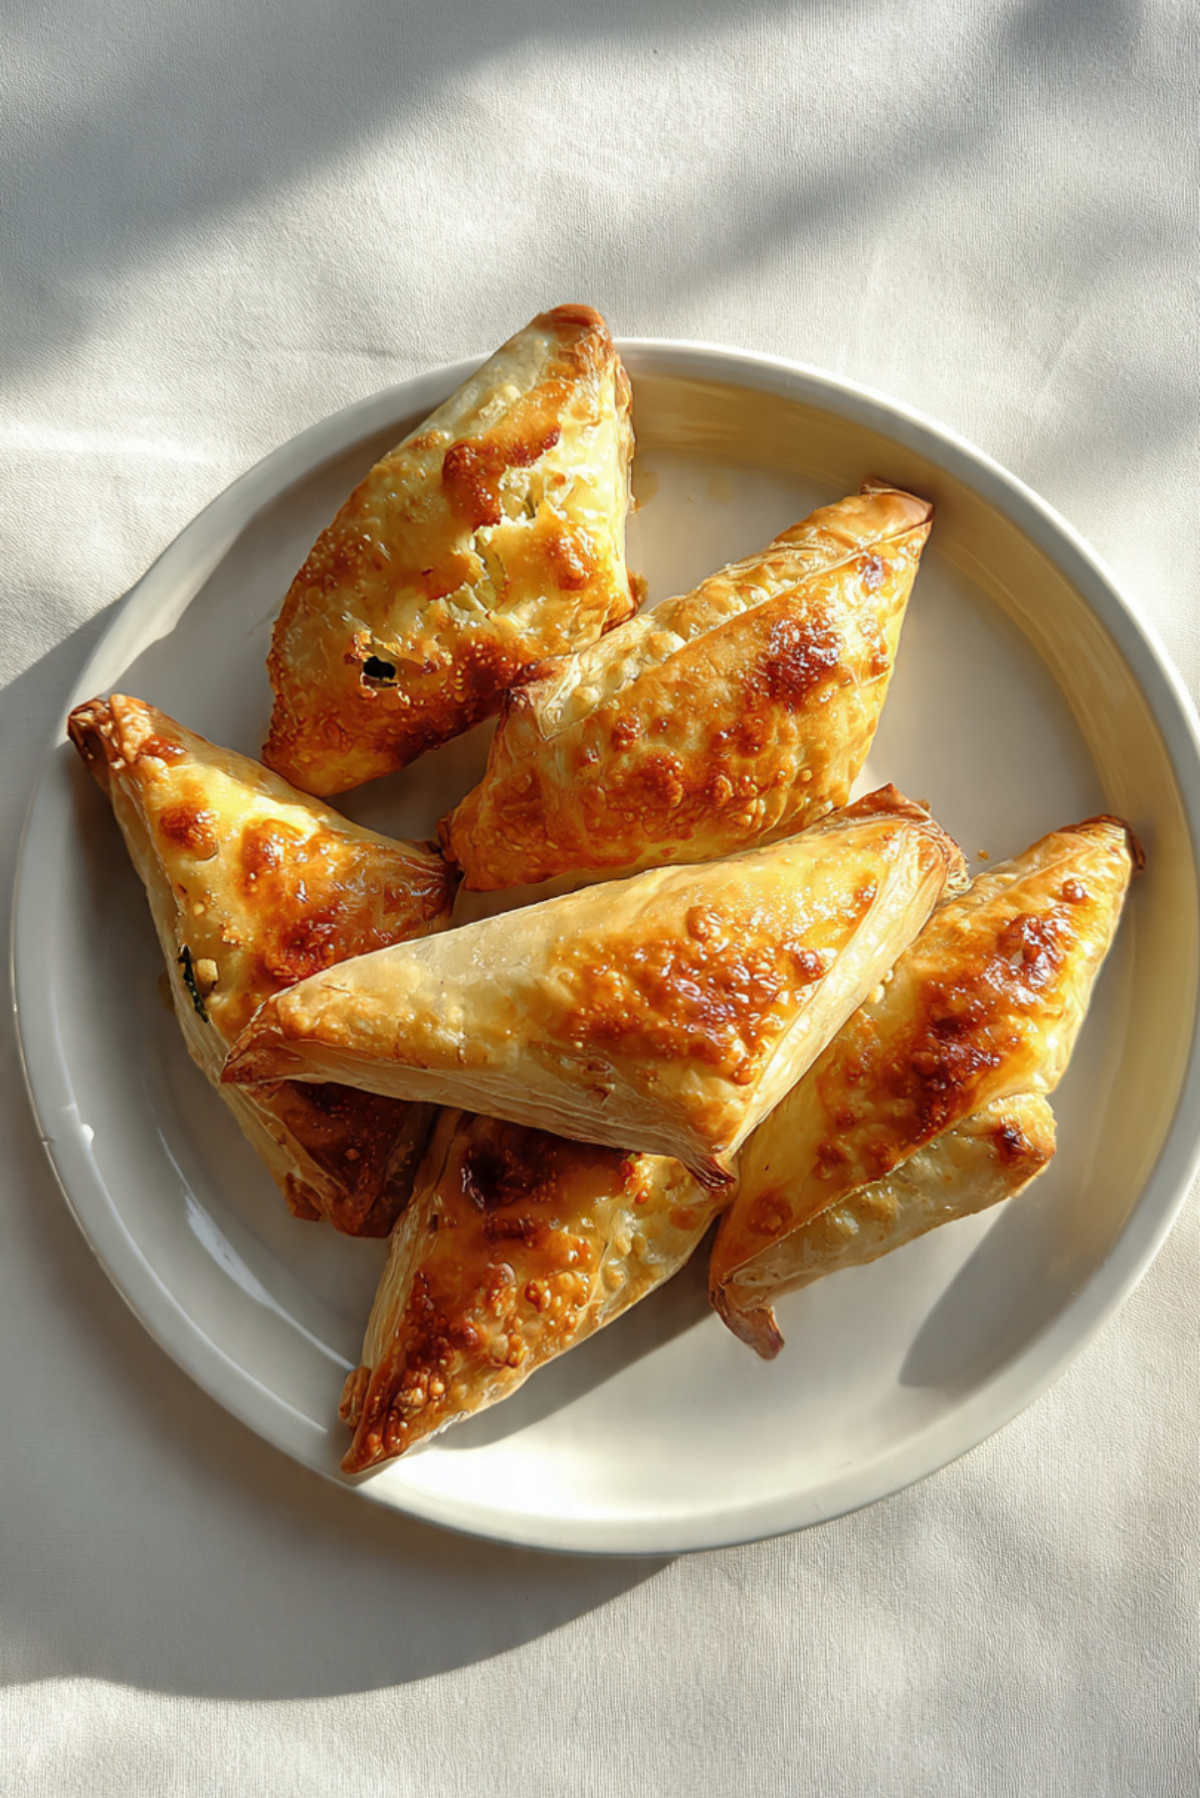
There’s a kind of magic in that first bite of a freshly baked Bourekakia — the buttery, crisp pastry giving way to a soft, savory filling that warms your whole spirit. These bite-sized golden rolls are the kind of thing you can’t stop reaching for. Whether filled with cheese, minced meat, or vegetables, they always disappear faster than you expect. And let me tell you, once you’ve made them at home, you’ll never go back to the store-bought version.
Behind the Recipe
I still remember the first time I made Bourekakia. It was for a small get-together with friends, and I wanted to serve something nostalgic but impressive. What started as a “let’s see how this goes” moment turned into a tradition. The tray came out of the oven, and before I could even put it on the table, half of them were gone — flaky, golden, and devoured within minutes. Now, it’s the one appetizer I always bring to parties, and there are never any leftovers.
Recipe Origin or Trivia
Bourekakia are a beloved finger food in many Mediterranean and Middle Eastern cultures, especially common in Greece, Turkey, and North Africa. The name comes from “börek,” a broader category of filled pastries that dates back to the Ottoman Empire. Bourekakia simply means “little börek,” and their fillings vary widely — from tangy cheeses to ground meat and herbs. They’re perfect for entertaining because they can be made in batches and eaten hot or at room temperature.
Why You’ll Love Bourekakia
These little rolls may be small, but they pack a punch in both flavor and versatility.
Versatile: Fill them with anything from feta to spinach to ground beef or mushrooms.
Budget-Friendly: Uses simple, affordable ingredients like phyllo dough and pantry staples.
Quick and Easy: Once you get the rolling rhythm down, you can make a whole tray in no time.
Customizable: Spice them up with herbs, add different cheeses, or even go sweet with cinnamon and nuts.
Crowd-Pleasing: Everyone loves a flaky pastry with a warm, savory center.
Make-Ahead Friendly: Assemble and refrigerate or freeze until ready to bake.
Great for Leftovers: Reheat in the oven and they’re just as crisp and delicious.
Chef’s Pro Tips for Perfect Results
Bourekakia are easier than they look, but a few tricks will make yours unforgettable.
- Keep phyllo covered: Always keep unused phyllo sheets under a damp towel to prevent drying out.
- Brush with melted butter or oil: This gives each layer that crispy, golden finish.
- Don’t overfill: A little goes a long way. Too much filling can tear the dough.
- Seal the edges: A dab of water helps secure the ends and keeps filling from leaking.
- Bake until deep golden: Don’t take them out too early — they should be deeply golden and crisp.
Kitchen Tools You’ll Need
You don’t need much to create this flaky goodness:
Baking Sheet: For even cooking and crisp bottoms.
Pastry Brush: To coat the phyllo layers with butter or oil.
Sharp Knife or Pizza Cutter: To cut the phyllo into uniform strips.
Mixing Bowl: For combining your filling ingredients.
Clean Towel: To cover your phyllo sheets and keep them from drying.
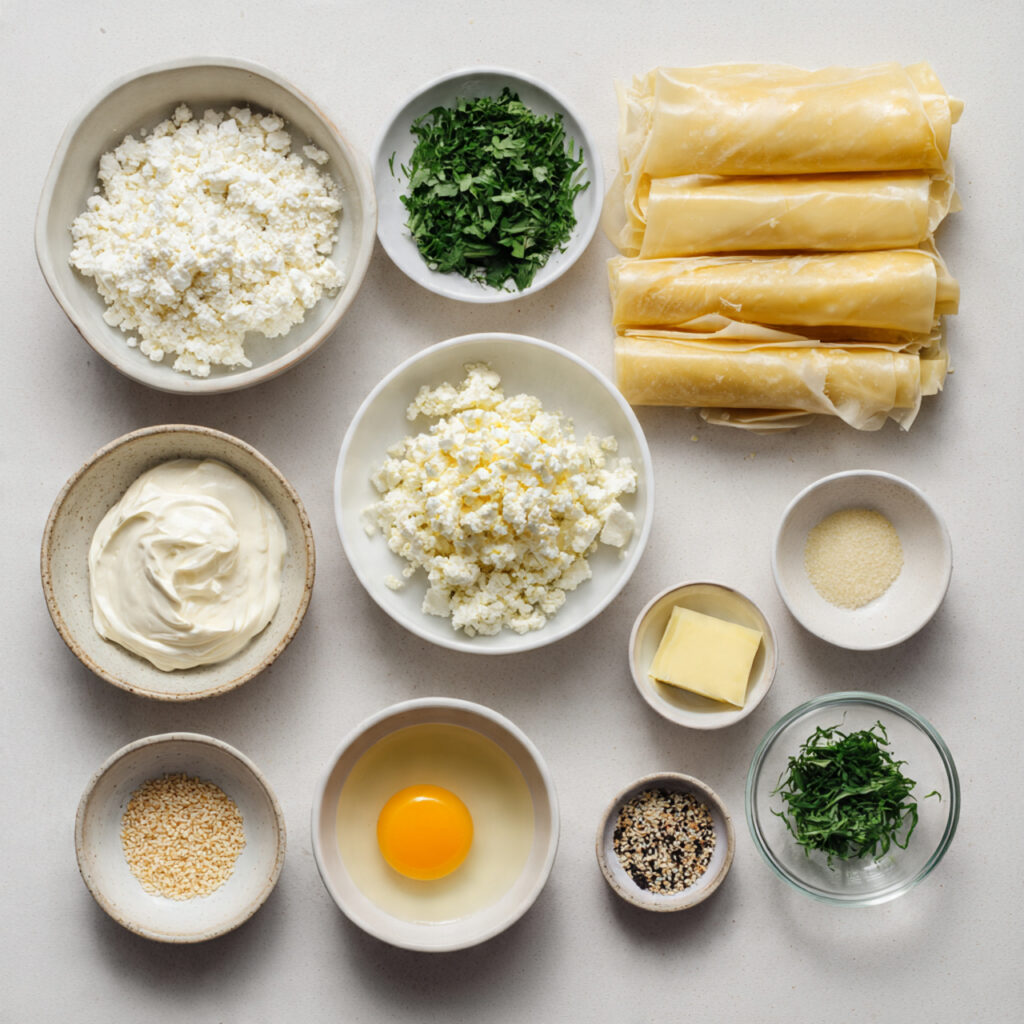
Ingredients in Bourekakia
Each component has a purpose in building that perfect bite — crisp outside, soft inside, full of flavor.
- Phyllo Dough: 1 package (about 12 sheets). The thin, delicate pastry that crisps up beautifully.
- Feta Cheese: 1 cup, crumbled. Brings tang and creaminess to the filling.
- Cream Cheese: ½ cup. Softens and binds the filling for a rich texture.
- Fresh Parsley: 2 tablespoons, chopped. Adds freshness and balance.
- Egg Yolk: 1, mixed into the filling for richness and structure.
- Black Pepper: ¼ teaspoon. Gives a mild kick and enhances the cheese.
- Butter or Olive Oil: ½ cup, melted. Brushed between layers to crisp and flavor.
- Sesame Seeds (optional): 1 tablespoon. Sprinkled on top for texture and a nutty note.
- Water: A small bowl to help seal the edges.
Ingredient Substitutions
Feel free to tweak the ingredients to match your pantry or preferences.
Feta Cheese: Try ricotta, goat cheese, or a shredded cheese blend.
Cream Cheese: Use Greek yogurt or mascarpone.
Parsley: Swap with dill, chives, or mint.
Phyllo Dough: If unavailable, use puff pastry but adjust baking time.
Butter or Olive Oil: Either works, but butter gives a richer flavor.
Ingredient Spotlight
Phyllo Dough: This paper-thin pastry is essential to Bourekakia. It bakes into layers of light, crispy texture that shatter with each bite. Handling it gently and keeping it moist is key to perfect rolls.
Feta Cheese: Salty, tangy, and creamy when warm, feta adds bold flavor and melts into the other ingredients for a filling that’s rich without being heavy.
Instructions for Making Bourekakia
Now comes the fun part — rolling and baking these golden beauties. Let’s do it together.
-
Preheat Your Equipment:
Set your oven to 375°F (190°C). Line a baking sheet with parchment paper. -
Combine Ingredients:
In a bowl, mix crumbled feta, cream cheese, parsley, egg yolk, and pepper until smooth. -
Prepare Your Cooking Vessel:
Melt your butter or olive oil and get a small bowl of water ready for sealing edges. -
Assemble the Dish:
Lay out one sheet of phyllo and brush lightly with butter. Top with another sheet and repeat until you have 2 or 3 layers. Cut into strips about 3 inches wide. Place a spoonful of filling at one end of each strip. Roll up like a cigar, folding in sides as you go. Seal the edge with water. -
Cook to Perfection:
Place rolls on the baking sheet. Brush tops with more butter and sprinkle with sesame seeds if using. Bake for 20–25 minutes or until golden and crisp. -
Finishing Touches:
Let cool slightly on a rack before serving so they crisp up fully. -
Serve and Enjoy:
Serve warm with a side of yogurt, a squeeze of lemon, or just as they are. They’re perfect every time.
Texture & Flavor Secrets
The best Bourekakia are crispy on the outside, creamy inside, and bursting with flavor. The combo of salty cheese, soft herbs, and flaky pastry is comforting yet elegant. When done right, they crunch with every bite, then melt into a savory, cheesy finish.
Cooking Tips & Tricks
These little tips make a big difference:
- Preheat your oven fully for crisp pastry.
- Chill the filling for 15 minutes before rolling to make assembly easier.
- Don’t crowd the pan — give space so they crisp evenly.
- Double the batch and freeze half before baking for later.
What to Avoid
Let’s keep your Bourekakia from turning soggy or bland:
- Skipping butter/oil layers: It’s essential for flakiness.
- Overstuffing: Leads to tearing and leaking in the oven.
- Phyllo drying out: Work fast and keep unused sheets covered.
Nutrition Facts
Servings: 15 pieces
Calories per serving: 140
Note: These are approximate values.
Preparation Time
Prep Time: 20 minutes
Cook Time: 25 minutes
Total Time: 45 minutes
Make-Ahead and Storage Tips
You can assemble Bourekakia a day ahead and keep them covered in the fridge, unbaked. They also freeze beautifully — freeze on a tray, then store in bags and bake straight from frozen, adding a few minutes to the cook time. Reheat leftovers in the oven to restore crispness.
How to Serve Bourekakia
Serve them warm with a cooling yogurt dip, tzatziki, or a light salad on the side. They’re perfect for parties, lunchboxes, or even as a brunch addition. For a mezze spread, pair with olives, hummus, and roasted veggies.
Creative Leftover Transformations
If you’ve somehow got extras, here are fun ways to repurpose them:
- Crumble into a salad for a savory crunch.
- Reheat and serve with poached eggs for a breakfast twist.
- Chop and toss into cooked pasta with a drizzle of olive oil.
Additional Tips
- Always bake on parchment for easier cleanup.
- For extra color, brush with egg wash instead of butter before baking.
- Use different fillings in the same batch to keep things interesting.
Make It a Showstopper
Present Bourekakia stacked high on a white platter with a sprig of parsley or lemon wedges for a pop of color. Serve alongside small dipping bowls for a more interactive touch. Garnish with sesame seeds or sumac for extra flair.
Variations to Try
- Spinach & Feta Bourekakia: Add sautéed spinach to the cheese filling.
- Ground Beef Version: Cook minced meat with onion, garlic, and spices.
- Sweet Bourekakia: Fill with cinnamon, sugar, and chopped nuts.
- Zaatar & Cheese: Add zaatar spice to the filling for a herby twist.
- Vegan Version: Use vegan cheese or mashed potatoes as filling.
FAQ’s
Q1: Can I use store-bought phyllo dough?
A1: Yes, it’s the best and most convenient option for home cooks.
Q2: Can I freeze Bourekakia before baking?
A2: Absolutely. Freeze them raw and bake straight from frozen when needed.
Q3: What’s the best way to reheat leftovers?
A3: Reheat in a 350°F oven for 10 minutes to bring back the crispiness.
Q4: Can I make them in advance?
A4: Yes, they hold up well assembled in the fridge or frozen before baking.
Q5: What fillings work best?
A5: Cheese, spinach, or ground beef are most common, but mushrooms and potatoes are great too.
Q6: Do I need to thaw phyllo before using?
A6: Yes, thaw overnight in the fridge and bring to room temperature before use.
Q7: Why is my phyllo tearing?
A7: It may be too dry. Keep it covered with a damp towel while working.
Q8: Can I use puff pastry instead?
A8: You can, but it will be more doughy and less flaky than traditional Bourekakia.
Q9: Are these good for parties?
A9: They’re perfect! Make-ahead friendly and bite-sized.
Q10: Can I serve them cold?
A10: They’re best warm but still tasty at room temp.
Conclusion
Bourekakia are the kind of finger food that brings people together — warm, flaky, full of flavor, and always gone too fast. Whether you’re serving them as a snack, appetizer, or centerpiece of a mezze spread, they’ll always steal the spotlight. Trust me, once you try making them yourself, they’ll become a permanent favorite.
Print
Bourekakia
- Prep Time: 20 minutes
- Cook Time: 25 minutes
- Total Time: 45 minutes
- Yield: 15 pieces 1x
- Category: Appetizer
- Method: Baking
- Cuisine: Mediterranean
- Diet: Vegetarian
Description
Crispy, golden Bourekakia filled with creamy feta and herbs, wrapped in flaky phyllo dough and baked to perfection. A bite-sized savory pastry perfect for entertaining or snacking.
Ingredients
- 1 package phyllo dough (about 12 sheets)
- 1 cup feta cheese, crumbled
- 1/2 cup cream cheese
- 2 tablespoons fresh parsley, chopped
- 1 egg yolk
- 1/4 teaspoon black pepper
- 1/2 cup melted butter or olive oil
- 1 tablespoon sesame seeds (optional)
- Small bowl of water (for sealing)
Instructions
- Preheat oven to 375°F (190°C) and line a baking sheet with parchment paper.
- In a mixing bowl, combine feta, cream cheese, parsley, egg yolk, and pepper until well blended.
- Melt butter or pour olive oil into a small bowl. Prepare a second small bowl with water for sealing.
- Lay out one sheet of phyllo and brush with butter. Add a second sheet and repeat until 2–3 layers are stacked. Cut into 3-inch wide strips.
- Place a spoonful of filling at one end of each strip. Roll up, folding in the sides, and seal the end with a dab of water.
- Place on baking sheet, brush tops with butter, and sprinkle with sesame seeds if using.
- Bake for 20–25 minutes, or until golden and crisp. Cool slightly before serving.
Notes
- Keep unused phyllo sheets covered with a damp towel to prevent drying out.
- Do not overfill to avoid tearing the dough.
- Freeze unbaked rolls for easy prep ahead.
- Use parchment paper for easy cleanup and even browning.
Nutrition
- Serving Size: 1 piece
- Calories: 140
- Sugar: 0g
- Sodium: 190mg
- Fat: 10g
- Saturated Fat: 5g
- Unsaturated Fat: 4g
- Trans Fat: 0g
- Carbohydrates: 10g
- Fiber: 0g
- Protein: 3g
- Cholesterol: 25mg