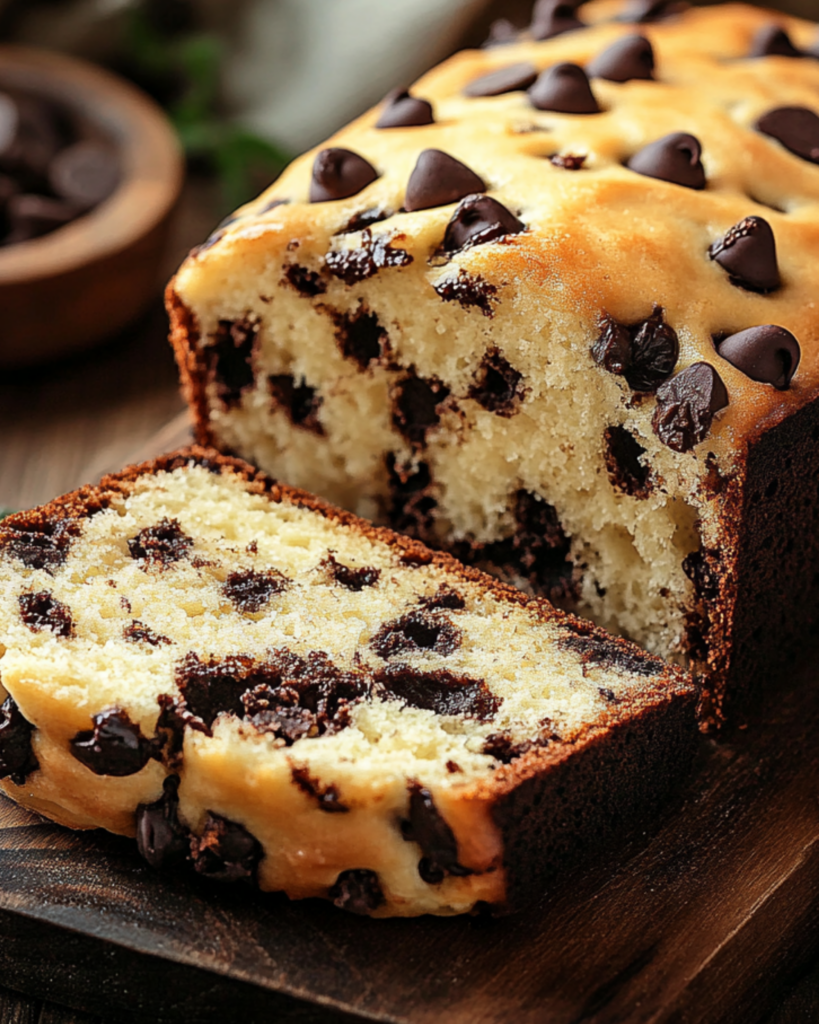
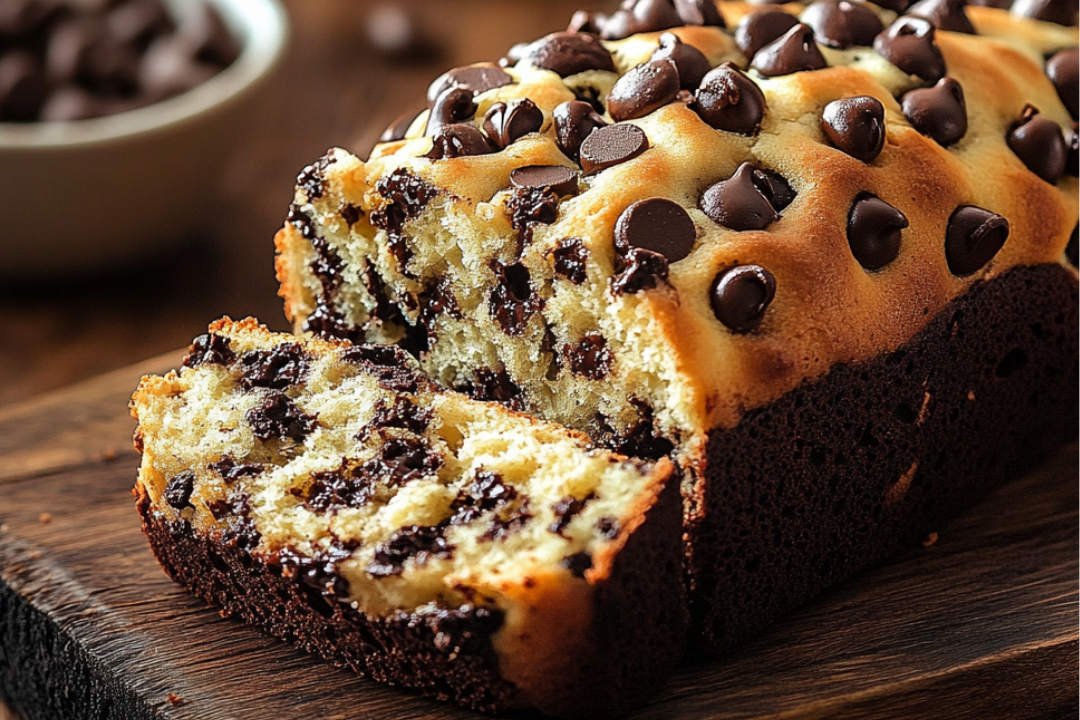
Oh, you guys, do I have something sweet and irresistible for you today! If you’re looking for a treat that’s equal parts comforting and indulgent, this Chocolate Chip Pop Bread is the answer. Picture a soft, tender bread with pockets of gooey chocolate chips scattered throughout—every bite feels like a hug. It’s the perfect blend of sweetness, softness, and a little bit of crispy texture on the outside. Whether you’re baking for a cozy weekend morning, a potluck, or just because you’ve got a sweet craving, this bread is here to impress. Trust me, once it comes out of the oven, you’ll be tempted to devour the entire loaf. Let’s dive into why you’ll fall head over heels for this recipe!
Why You’ll Love Chocolate Chip Pop Bread
This recipe isn’t just about the ingredients—it’s about creating moments. Whether you’re cooking for a casual family breakfast, hosting a fun brunch, or simply treating yourself, this dish is versatile enough to fit the occasion. Here’s why it’s a favorite:
- Versatile: Perfect for breakfast, an afternoon snack, or even dessert. You can serve it warm with butter, drizzle a little honey on top, or just enjoy it as-is. It’s perfect for any time of day!
- Budget-Friendly: With simple pantry ingredients and a handful of chocolate chips, this bread proves that you don’t need fancy, expensive ingredients to make something truly delicious.
- Quick and Easy: Don’t worry, this one is a breeze to make! A few bowls, a quick stir, and you’re well on your way to a fresh loaf of heaven. Even if you’re new to baking, you’ll have no trouble with this one.
- Customizable: Love nuts? Toss in some chopped walnuts or pecans for added crunch. Want to switch up the chocolate? Try dark chocolate chips or even white chocolate for a fun twist.
- Crowd-Pleasing: This recipe is a guaranteed hit with both kids and adults. It’s one of those dishes where people keep coming back for more. Whether you’re baking for a family gathering or just having a quiet moment to yourself, this bread won’t last long.

Ingredients
Let’s talk about the ingredients that come together to create this melt-in-your-mouth treat. There’s no need for anything fancy, just a few pantry staples that make this bread taste so special.
- All-Purpose Flour: The base of our bread. It gives the structure and soft, fluffy texture that you’ll love with each bite.
- Baking Powder: A key ingredient for a nice, light rise. It ensures the bread isn’t too dense and gives it that perfect, airy texture.
- Sugar: A little sweetness goes a long way. It’s the magic that helps balance out the richness of the chocolate chips.
- Salt: A pinch of salt enhances all the flavors. It might seem small, but it makes everything taste even more delicious.
- Eggs: These help to bind everything together, adding a rich, smooth texture to the batter.
- Butter: Melted butter brings richness and a slightly crisp crust to the bread. It adds that irresistible buttery flavor.
- Milk: A little milk makes the batter smooth and helps the bread bake to a perfect, moist consistency.
- Chocolate Chips: The stars of the show! You can use semi-sweet or milk chocolate chips, or even mix in both for a variety of sweetness. It’s the chocolatey pockets you’ll find in every slice!
(Note: the full ingredients list, including measurements, is provided in the recipe card directly below.)
Instructions
Let’s dive into the simple steps to create this heavenly chocolate chip pop bread:
1. Preheat Your Oven:
Preheat your oven to 350°F. This is the perfect temperature to get a golden-brown crust without overbaking the bread inside.
2. Mix the Dry Ingredients:
In a large bowl, whisk together the flour, baking powder, sugar, and salt. This is your dry base, and it’ll help ensure that your bread has a nice, even texture.
3. Combine Wet Ingredients:
In a separate bowl, beat the eggs and add the melted butter and milk. Mix them together until smooth. This will give your bread a lovely, rich consistency.
4. Combine Wet and Dry:
Now, slowly pour the wet mixture into the dry ingredients. Stir gently to combine. Be careful not to overmix—the key to soft bread is not to overwork the batter.
5. Add the Chocolate Chips:
Once the batter is well combined, fold in those glorious chocolate chips. You want them to be evenly distributed throughout, but again, don’t overmix!
6. Prepare the Pan:
Grease your loaf pan with butter or cooking spray, or line it with parchment paper. This makes sure your bread comes out easily once it’s baked.
7. Bake the Bread:
Pour the batter into the prepared pan and smooth the top. Bake for 50-60 minutes, or until a toothpick inserted into the center comes out clean (except for maybe a little melted chocolate, which is totally fine!). Your kitchen will smell absolutely heavenly during this time!
8. Let It Cool:
Once the bread is done, remove it from the oven and let it cool in the pan for about 10 minutes. Then, transfer it to a wire rack to cool completely. Or, if you’re like me, you can cut into it while it’s still warm—no judgment here!
9. Slice and Enjoy:
Slice the bread into thick, generous pieces. Enjoy it on its own, with a drizzle of honey, or even a smear of peanut butter for an extra treat!
Nutrition Facts
Servings: 8
Calories per serving: 320
Preparation Time
Prep Time: 10 minutes
Cook Time: 55 minutes
Total Time: 1 hour 5 minutes
How to Serve Chocolate Chip Pop Bread
This bread is so versatile, it pairs with so many things. Here are a few fun ideas to take it to the next level:
- Fresh Fruit: Serve it with fresh berries or sliced bananas for a lighter, fruity contrast to the richness of the bread.
- Cream Cheese: Spread a little cream cheese on a slice for a creamy, tangy balance to the sweetness of the chocolate.
- Hot Coffee or Tea: A warm cup of coffee or tea is the perfect companion for a slice of this bread. It’s a great way to start the day or wind down in the evening.
- Ice Cream: If you’re feeling indulgent, warm up a slice and top it with a scoop of vanilla or chocolate ice cream. Heaven!
Additional Tips
- Prep Ahead: Make the batter the night before and refrigerate it. In the morning, just pour it into the pan and bake. Breakfast is ready in no time!
- Spice It Up: Add a teaspoon of cinnamon or vanilla extract to the batter for a little extra depth of flavor. A sprinkle of sea salt on top of the baked bread can also enhance the chocolate!
- Dietary Adjustments: You can swap out regular flour for a gluten-free blend, or use dairy-free butter and milk if needed. It’ll still come out delicious!
- Storage Tips: Store leftover bread in an airtight container at room temperature for up to 3 days. If you want it to last longer, freeze individual slices and reheat in the microwave for a quick treat.
- Double the Batch: This recipe is perfect for making a double batch. You can gift a loaf to a friend or have a second one for yourself to enjoy all week long.
FAQ Section
Q1: Can I use different kinds of chocolate?
A1: Yes! You can use dark chocolate chips, white chocolate, or even mix in chopped chocolate bars. Whatever your chocolate-loving heart desires!
Q2: Can I make this bread ahead of time?
A2: Absolutely! Bake it the day before and let it cool completely. Store it in an airtight container, and it’ll still be just as delicious the next day.
Q3: How do I store leftovers?
A3: Store the bread in an airtight container for up to 3 days. You can also freeze individual slices to enjoy later!
Q4: Can I freeze this bread?
A4: Yes! Let the bread cool completely, then wrap it tightly in plastic wrap and freeze. It’ll last up to 3 months in the freezer.
Q5: Can I add nuts to this recipe?
A5: Definitely! Walnuts, pecans, or even hazelnuts would be a fantastic addition. Just fold them in with the chocolate chips.
Q6: How do I know when the bread is done?
A6: Insert a toothpick in the center of the bread. If it comes out clean (with just a little melted chocolate), it’s ready!
Q7: Can I use non-dairy milk in this recipe?
A7: Yes, any non-dairy milk like almond, oat, or coconut milk will work just fine.
Q8: Can I double this recipe?
A8: Absolutely! If you have a larger pan, just double the ingredients and bake a little longer. You’ll have twice the deliciousness!
Q9: Can I use self-raising flour instead of all-purpose flour?
A9: Yes! Just omit the baking powder if you’re using self-raising flour, since it already contains leavening.
Q10: Can I make mini loaves instead of one big loaf?
A10: Yes, mini loaves are a great idea! Just adjust the baking time to about 30-35 minutes, checking for doneness with a toothpick.
Conclusion
This Chocolate Chip Pop Bread is your new go-to for a sweet treat that’s easy to make and totally irresistible. Whether you’re serving it to friends, enjoying it with your morning coffee, or sneaking a slice as a late-night snack (we all do it!), it’s sure to bring smiles to everyone who tries it. Go ahead, give it a bake—you won’t be disappointed!
Print
Chocolate Chip Pop Bread
- Prep Time: 10 minutes
- Cook Time: 50-55 minutes
- Total Time: 1 hour
- Yield: 10 servings 1x
- Category: Dessert
- Method: baking
- Cuisine: American
- Diet: Vegetarian
Description
This Chocolate Chip Pop Bread is a sweet, indulgent treat filled with rich chocolate chips. Perfect for breakfast, snack time, or as a dessert, it pairs wonderfully with a glass of milk or a hot cup of coffee. With its simple ingredients and easy preparation, this bread is sure to be a favorite!
Ingredients
- 1 package POP Bread Mix
- 1 (12-ounce) can lemon-lime soda
- 1 cup semi-sweet chocolate chips
- 3 tablespoons butter, melted
- 2 tablespoons granulated sugar
Instructions
- Preheat the oven to 375°F (190°C).
- Prepare the batter: In a large bowl, combine the POP Bread Mix and lemon-lime soda. Stir in the chocolate chips for 20-30 seconds. The batter will be lumpy, so avoid overmixing.
- Prepare the pan: Grease a 9×5-inch loaf pan and spread the batter evenly inside.
- Add toppings: Drizzle the melted butter over the top of the batter, then sprinkle with granulated sugar.
- Bake: Bake for 50-55 minutes, or until the loaf is golden brown and a toothpick inserted into the center comes out clean.
- Cool: Allow the bread to cool in the pan for a few minutes before transferring it to a wire rack to cool completely.
Notes
- The batter will be lumpy, so don’t worry about overmixing.
- For an extra touch, you can sprinkle a few more chocolate chips on top before baking.
- Let the bread cool slightly before slicing to maintain its texture.
Nutrition
- Serving Size: 1 slice
- Calories: 250kcal
- Sugar: 18g
- Sodium: 250mg
- Fat: 12g
- Saturated Fat: 7g
- Unsaturated Fat: 4g
- Trans Fat: 0g
- Carbohydrates: 35g
- Fiber: 1g
- Protein: 2g
- Cholesterol: 25mg

