

When summer heat hits hard, few things hit the spot like a frosty treat. This coffee snow cone blends two all-time favorites into one — icy, refreshing snow cones and bold, rich coffee. The first spoonful wakes up your senses with a burst of sweet, cold energy, while the coffee syrup soaks through the fine ice, delivering that grown-up flavor twist you didn’t know you needed.
Behind the Recipe
This idea came to life during a sweltering afternoon when hot coffee just didn’t feel right, but the craving was real. The solution? Iced coffee’s cooler, crunchier cousin. I played around with different coffee syrups and shaved ice textures until I landed on the perfect combo — strong brewed coffee, a touch of sweetness, and fluffy ice that melts just slow enough for you to savor every spoonful. It became a backyard favorite that quickly spread to every get-together.
Recipe Origin or Trivia
Snow cones have roots in Japan’s kakigori and Italy’s granita, where shaved ice desserts have been cooling people off for centuries. In the United States, snow cones became iconic fair and carnival treats, often drenched in colorful syrups. Swapping out the rainbow hues for coffee syrup gives this version a more sophisticated edge. The concept echoes traditional Vietnamese iced coffee, where strong brew meets sweetness and chill — only this time, it comes in icy spoonfuls.
Why You’ll Love Coffee Snow Cone
This isn’t just a nostalgic treat — it’s a caffeinated chill-down perfect for hot days or dessert parties.
Versatile: Serve it as a cool midday pick-me-up or after dinner for a fun twist on iced coffee.
Budget-Friendly: Just a few pantry staples and you’re ready to go.
Quick and Easy: Minimal prep, no cooking, and you can make the syrup in advance.
Customizable: Adjust sweetness, add cream, or layer with flavored syrups.
Crowd-Pleasing: Kids and adults alike love snow cones — the coffee version just feels extra grown-up.
Make-Ahead Friendly: Brew and chill your coffee syrup early, then just shave and serve.
Great for Leftovers: Store any leftover coffee syrup in the fridge for quick future treats.
Chef’s Pro Tips for Perfect Results
Making a snow cone might seem simple, but a few small tricks make it taste like pure magic.
- Use strong brewed coffee or espresso for maximum flavor. Weak coffee gets lost in the ice.
- Cool your syrup completely before using. Hot syrup melts the ice too fast.
- Crush your ice finely to get that fluffy, snow-like texture that soaks up syrup beautifully.
- Chill your serving cups ahead of time to keep the snow cone from melting too fast.
- Serve immediately after assembling to preserve the perfect texture.
Kitchen Tools You’ll Need
All you need are a few basic items to build this icy beauty.
Shaved Ice Machine or Blender: To crush ice finely into snow-like texture.
Small Saucepan: For making the coffee syrup.
Measuring Cups & Spoons: For syrup accuracy.
Serving Cones or Cups: Paper cones, dessert bowls, or glasses all work well.
Spoon or Straw Spoon: Essential for scooping or sipping.
Ingredients in Coffee Snow Cone
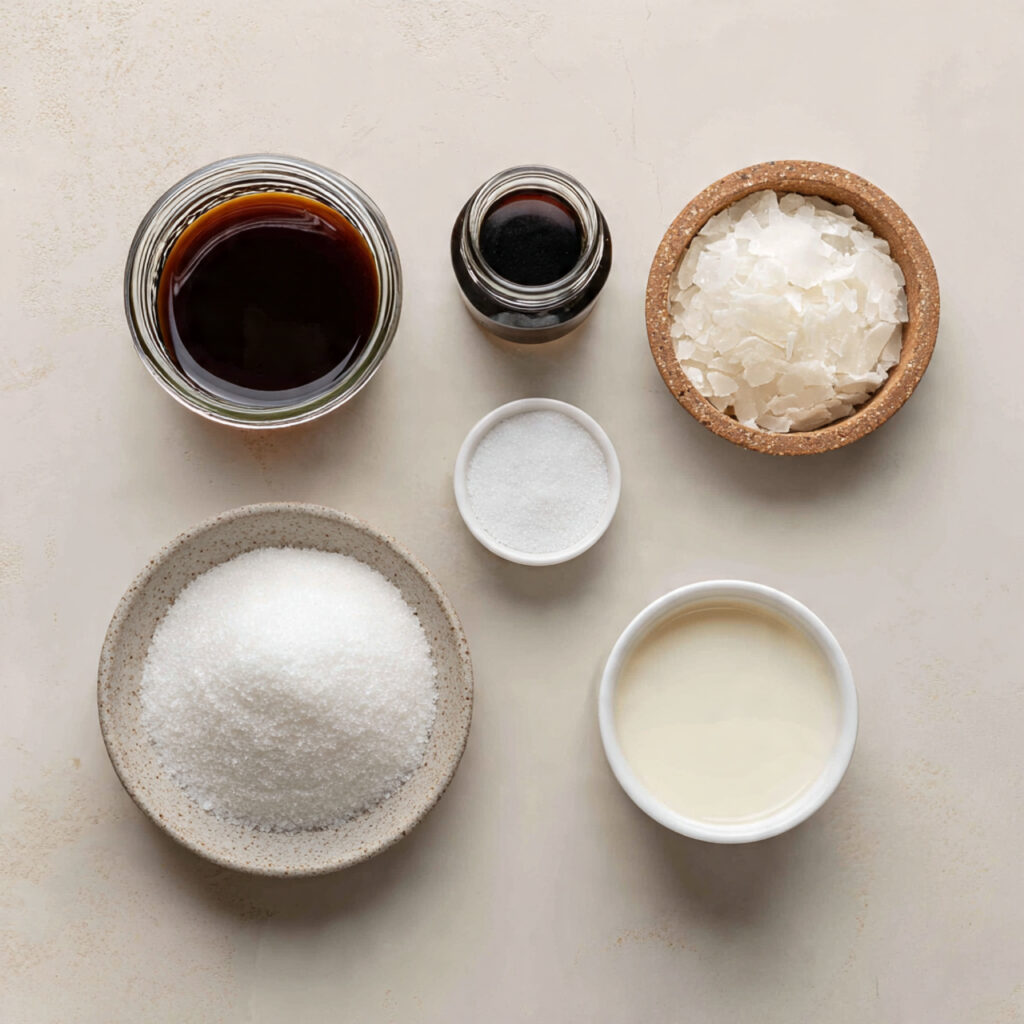
Each simple ingredient works together to deliver that chilly buzz of coffee flavor.
- Strong Brewed Coffee: 1 cup. The base of the syrup, providing bold flavor.
- Granulated Sugar: ½ cup. Balances the bitterness of the coffee and turns it into syrup.
- Vanilla Extract: ½ teaspoon. Adds warmth and smoothness to the coffee notes.
- Shaved Ice: About 4 cups. Creates the fluffy texture that makes a snow cone magical.
- Optional Sweetened Condensed Milk: 2 tablespoons. For a creamy topping and extra richness.
Ingredient Substitutions
No need to run out if you’re short on something. Try these:
Strong Brewed Coffee: Cold brew concentrate or double-strength instant coffee.
Granulated Sugar: Brown sugar or simple syrup.
Vanilla Extract: Almond or hazelnut extract for a twist.
Sweetened Condensed Milk: Evaporated milk or coconut cream for dairy-free.
Ingredient Spotlight
Strong Brewed Coffee: This is what gives the snow cone its depth. Use freshly brewed espresso or cold brew for the richest flavor.
Sweetened Condensed Milk: A drizzle on top mimics café-style drinks and adds luscious creaminess to each icy bite.
Instructions for Making Coffee Snow Cone
Ready to cool down with something seriously fun? Here are the steps you’re going to follow:
-
Preheat Your Equipment:
No preheating needed, but make sure your shaved ice machine or blender is ready and clean. -
Combine Ingredients:
In a small saucepan, combine coffee and sugar. Heat gently until sugar dissolves. Remove from heat and stir in vanilla extract. Let cool completely. -
Prepare Your Cooking Vessel:
Crush or shave your ice finely using your machine or blender. Pile it into chilled cups or snow cone holders. -
Assemble the Dish:
Drizzle the cooled coffee syrup generously over the shaved ice. Let it soak through the layers. -
Cook to Perfection:
No cooking needed here, but ensure the syrup is evenly distributed so every bite bursts with flavor. -
Finishing Touches:
Add a drizzle of sweetened condensed milk on top for a creamy, indulgent touch. -
Serve and Enjoy:
Serve immediately with a spoon or straw spoon. Best enjoyed outdoors under the sun.
Texture & Flavor Secrets
The key to texture here is ultra-fine ice — fluffy, almost powdery. It melts slowly and drinks up the syrup like a sponge. The flavor is bold yet smooth. Coffee’s deep notes balance the sweetness perfectly, and that touch of vanilla rounds it all out. Add condensed milk and you’ve got sweet, icy velvet in a cup.
Cooking Tips & Tricks
These icy treats are as fun to make as they are to eat.
- Brew your coffee in advance and chill it overnight.
- Taste the syrup and adjust sweetness before cooling.
- Crush ice in small batches for fluffier texture.
- Try layering syrup between scoops of ice for extra flavor.
What to Avoid
A few small missteps can melt the fun too fast.
- Using hot syrup: It melts the ice instantly and ruins the texture.
- Chunky ice: Hard pieces don’t soak up syrup well.
- Weak coffee: The flavor disappears under all that ice.
Nutrition Facts
Servings: 2
Calories per serving: 130 (without condensed milk)
Note: These are approximate values.
Preparation Time
Prep Time: 10 minutes
Cook Time: 5 minutes
Total Time: 15 minutes
Make-Ahead and Storage Tips
You can prep the syrup days in advance — just keep it in a sealed jar in the fridge. Shaved ice is best made fresh, but you can crush and freeze it loosely if needed. Store leftover syrup for up to a week and use it for iced coffee or more snow cones.
How to Serve Coffee Snow Cone
Serve in tall cups or traditional paper cones. Add a drizzle of condensed milk or even a sprinkle of cocoa powder. For fun, stick a tiny coffee bean or two on top. Great for garden parties or lazy afternoons on the porch.
Creative Leftover Transformations
Leftover syrup or cones? No problem:
- Pour syrup over vanilla ice cream.
- Mix syrup into milk for a quick iced latte.
- Use syrup as a drizzle for pancakes or waffles.
Additional Tips
A few extra tweaks can really elevate your coffee snow cone experience.
- Try flavored coffee like hazelnut or caramel.
- Use crushed ice molds for uniform texture.
- Add a pinch of cinnamon to the syrup for a spicy twist.
Make It a Showstopper
Presentation is part of the fun here.
- Use clear glass cups to show off the layers.
- Serve with striped straws or color-tipped spoons.
- Add a mini paper umbrella for nostalgic flair.
Variations to Try
You don’t have to stop at plain coffee. Get creative with these:
- Mocha Snow Cone: Mix cocoa powder into the syrup.
- Iced Latte Cone: Layer syrup and ice cream between ice.
- Coconut Coffee Cone: Add coconut cream on top instead of milk.
- Spiced Brew: Add cinnamon and nutmeg to the syrup.
- Vanilla Bean Cone: Use vanilla bean paste for richer flavor.
FAQ’s
Q1: Can I use instant coffee?
A1: Yes, just make it double strength for full flavor.
Q2: Do I need a special machine for shaved ice?
A2: Not necessarily. A strong blender with ice-crushing mode can work.
Q3: Can I make it dairy-free?
A3: Totally. Just skip the condensed milk or use coconut milk instead.
Q4: How long does the syrup last?
A4: About 7 days in the fridge in a sealed container.
Q5: Can I add alcohol?
A5: This version is family-friendly, so we recommend skipping that.
Q6: Is this recipe kid-friendly?
A6: If you use decaf coffee, absolutely!
Q7: What kind of coffee is best?
A7: Strong brewed espresso or cold brew concentrate works great.
Q8: Can I use flavored syrups instead?
A8: Sure, but homemade syrup gives the best coffee flavor.
Q9: Will this work with crushed ice?
A9: Yes, though the texture will be less fluffy and more slushy.
Q10: Can I make this ahead for a party?
A10: You can prep the syrup and ice separately, then assemble on demand.
Conclusion
Coffee snow cones bring together everything you love about iced coffee and summer treats into one frosty, flavorful dessert. They’re easy, eye-catching, and endlessly satisfying. Trust me, once you try it, you’ll be scooping up seconds before the ice even melts.
Print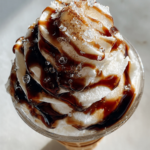
Coffee Snow Cone
- Prep Time: 10 minutes
- Cook Time: 5 minutes
- Total Time: 15 minutes
- Yield: 2 servings 1x
- Category: Dessert
- Method: No-Cook
- Cuisine: American
- Diet: Vegetarian
Description
This refreshing coffee snow cone is the perfect fusion of bold coffee flavor and icy sweetness. Made with strong brewed coffee syrup poured over fluffy shaved ice, it’s the ultimate summer pick-me-up.
Ingredients
- 1 cup strong brewed coffee
- ½ cup granulated sugar
- ½ teaspoon vanilla extract
- 4 cups shaved ice
- 2 tablespoons sweetened condensed milk (optional)
Instructions
- Brew 1 cup of strong coffee and pour it into a small saucepan.
- Add the sugar and heat gently, stirring until fully dissolved.
- Remove from heat, stir in vanilla extract, and let the syrup cool completely.
- Shave or crush the ice into fine, fluffy texture.
- Pack shaved ice into serving cups or cones.
- Drizzle cooled coffee syrup generously over the ice.
- Add sweetened condensed milk on top if desired.
- Serve immediately with a spoon or straw spoon.
Notes
- Use espresso or cold brew concentrate for deeper coffee flavor.
- Chill serving cups to keep the snow cone from melting quickly.
- Store leftover syrup in the fridge for up to a week.
- Adjust sugar based on your coffee’s strength and bitterness.
Nutrition
- Serving Size: 1 snow cone
- Calories: 130
- Sugar: 20g
- Sodium: 10mg
- Fat: 0g
- Saturated Fat: 0g
- Unsaturated Fat: 0g
- Trans Fat: 0g
- Carbohydrates: 25g
- Fiber: 0g
- Protein: 0g
- Cholesterol: 0mg