
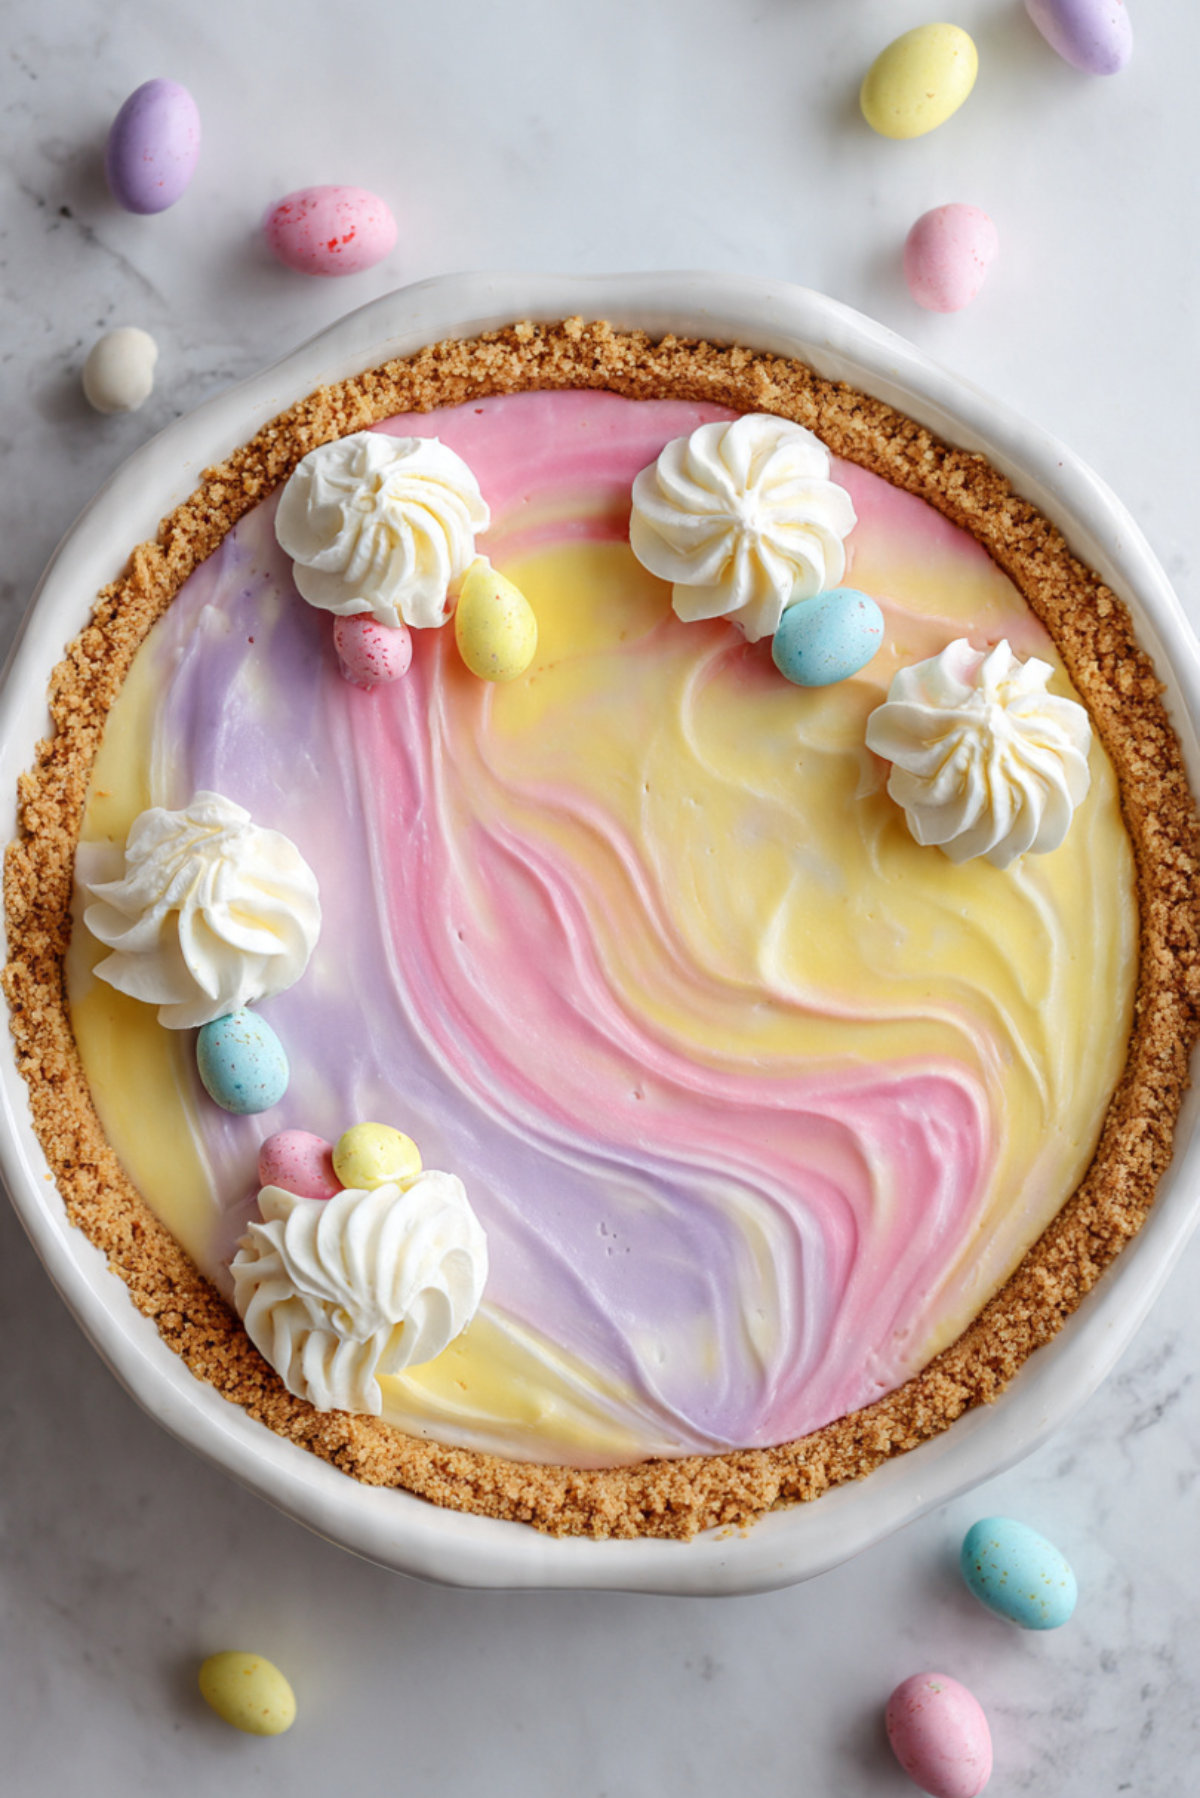
Some desserts instantly bring back the cheerful feeling of spring celebrations, and this one does it beautifully. Easter Jelly Pie is bright, colorful, creamy, and playful all at the same time. The pastel layers look almost like a basket of spring candies turned into a dessert, and the smooth texture makes every bite feel light and refreshing.
When the pie is sliced, the soft pastel layers appear like a rainbow of spring colors sitting above a buttery graham crust. The texture is silky and cool, with a gentle sweetness that melts on your tongue. Trust me, you are going to love this. It is one of those desserts that looks impressive but is surprisingly simple to make.
A Cheerful Dessert That Brings Color to the Table
Spring desserts often feel light, fresh, and joyful, and this pie captures that spirit perfectly. The soft pastel jelly layers shine through each slice, creating a dessert that looks almost too pretty to eat.
The creamy filling balances sweetness with a delicate fruity note, while the graham cracker crust adds a warm buttery crunch underneath. Every bite offers a gentle contrast between smooth filling and crumbly crust.
And the best part, it feels festive without requiring complicated baking skills.
A Sweet Tradition of Colorful Holiday Desserts
Colorful desserts have long been part of spring and holiday celebrations. As families gather to celebrate the season, bright sweets often appear on the table to reflect the cheerful colors of blooming flowers and festive decorations.
Layered jelly desserts became popular because they are easy to prepare and visually stunning. Over time, creative bakers turned them into pies, adding creamy layers and crunchy crusts to make them even more satisfying.
This pie carries that playful tradition forward with pastel colors that instantly remind people of Easter treats and spring gatherings.
Why This Recipe Is So Loved
Before we move into the kitchen, here are a few reasons this pie has become a favorite for so many home bakers.
Versatile: Perfect for holiday tables, spring gatherings, or weekend desserts.
Budget-Friendly: Most ingredients are simple pantry staples.
Quick and Easy: The recipe requires very little baking and mostly chilling time.
Customizable: You can create different color layers using your favorite jelly flavors.
Crowd-Pleasing: Kids and adults both love the bright colors and creamy texture.
Make-Ahead Friendly: This dessert actually improves after chilling overnight.
Great for Leftovers: The pie stays fresh and delicious for several days.
Helpful Tips From the Kitchen
Before you start mixing the layers, a few small tips will make the process smoother.
Allow each jelly layer to partially set before adding the next so colors stay separated.
Use clear gelatin flavors for brighter pastel colors.
Chill the pie thoroughly before slicing to achieve clean beautiful layers.
Decorate just before serving to keep toppings fresh.
Kitchen Tools That Make It Easy
Having the right tools ready makes preparation quick and enjoyable.
Mixing Bowls: Needed for preparing the jelly mixtures and cream layer.
Whisk: Helps dissolve gelatin smoothly.
Pie Dish: Holds the layered dessert and creates its classic shape.
Spatula: Useful for spreading the creamy layer evenly.
Measuring Cups: Ensures accurate liquid measurements for perfect texture.
Ingredients That Build This Colorful Dessert
The ingredients are simple, but together they create a fun and creamy layered pie.
- Graham Cracker Crumbs: 1 ½ cups. Forms the buttery crust foundation.
- Unsalted Butter: 6 tablespoons melted. Binds the crust and adds rich flavor.
- Granulated Sugar: 2 tablespoons for the crust sweetness.
- Fruit Gelatin Powder: 3 packages (3 ounces each) in different flavors for pastel layers.
- Boiling Water: 3 cups to dissolve the gelatin.
- Cold Water: 1 ½ cups to help the gelatin set properly.
- Cream Cheese: 8 ounces softened. Adds creaminess and balance.
- Heavy Cream: 1 cup whipped. Creates a light fluffy filling.
- Powdered Sugar: ½ cup to sweeten the cream layer.
- Vanilla Extract: 1 teaspoon for warmth and depth.
- Whipped Topping: 1 cup for decoration.
- Pastel Candy Eggs: ¼ cup for festive decoration.
Ingredient Substitutions If Needed
If a few ingredients are missing, simple swaps still work well.
Graham Cracker Crumbs: Crushed vanilla cookies can replace them.
Cream Cheese: Mascarpone can create a smoother texture.
Heavy Cream: Whipped topping can be used instead.
Candy Eggs: Colorful sprinkles can provide a similar festive touch.
Key Ingredients That Make the Magic
Some ingredients truly define this pie.
Fruit Gelatin Powder: This ingredient creates the vibrant pastel layers that give the pie its cheerful appearance.
Cream Cheese: It balances the sweetness and adds a smooth creamy texture that pairs perfectly with the jelly.

Let’s Make This Bright Spring Dessert
And now let’s dive into the steps you are going to follow.
- Preheat Your Equipment: No oven is needed, simply prepare your refrigerator space for chilling.
- Combine Ingredients: Mix graham cracker crumbs, melted butter, and sugar until evenly combined.
- Prepare Your Cooking Vessel: Press the crumb mixture firmly into a pie dish to form the crust and chill for 20 minutes.
- Assemble the Dish: Prepare the first gelatin flavor by dissolving it in boiling water then adding cold water. Pour a thin layer into the crust and refrigerate until partially set.
- Cook to Perfection: Repeat with the remaining gelatin flavors, allowing each layer to partially set before adding the next.
- Finishing Touches: Beat cream cheese with powdered sugar and vanilla, then fold in whipped cream. Spread gently over the final jelly layer.
- Serve and Enjoy: Chill the pie for at least four hours. Before serving, decorate with whipped topping and pastel candy eggs.
The Texture and Flavor Experience
Each slice offers a wonderful contrast of textures. The crust is slightly crunchy and buttery, while the jelly layers are smooth and refreshing.
The creamy topping adds softness that balances the fruity sweetness perfectly. Together they create a dessert that feels light yet satisfying.
Helpful Tips for the Best Results
- Allow each jelly layer to partially set before adding another.
- Chill the pie long enough for clean slices.
- Use clear flavored gelatin for brighter pastel colors.
Common Mistakes to Avoid
- Pouring new layers before the previous one sets slightly.
- Using too much water which prevents firm layers.
- Skipping the chilling time which keeps the pie from setting properly.
Nutrition Overview
Servings: 8
Calories per serving: 290
Note: These values are approximate.
Time Needed to Prepare
Prep Time: 25 minutes
Cook Time: 0 minutes
Total Time: 25 minutes plus chilling
Make Ahead and Storage Tips
This pie is perfect for preparing the day before a gathering. The layers become firmer and the flavors blend nicely overnight.
Store the pie covered in the refrigerator for up to four days.
Freezing is possible, although the texture of the jelly layers may change slightly.
Serving Suggestions
Serve chilled slices on bright dessert plates to highlight the colorful layers.
It pairs beautifully with fresh berries or a light fruit salad.
Creative Leftover Ideas
Turn leftover slices into layered dessert cups with whipped cream.
Crumble crust pieces over yogurt or ice cream for a sweet topping.
Additional Helpful Tips
Use a clear pie dish if possible so the colorful layers are visible from the side.
A warm knife helps cut clean slices through the chilled layers.
Make It a Showstopper
For an extra festive look, decorate the top with whipped cream swirls and pastel candy eggs arranged in a circular pattern. The pie instantly becomes the centerpiece of a spring dessert table.
Variations to Try
- Berry Jelly Pie: Use strawberry, raspberry, and blueberry gelatin flavors.
- Citrus Jelly Pie: Use lemon and orange gelatin for a bright citrus twist.
- Creamy Rainbow Pie: Add a thin cream layer between each gelatin layer.
- Tropical Jelly Pie: Use pineapple and mango gelatin flavors.
- Chocolate Crust Version: Replace graham crust with chocolate cookie crumbs.
FAQ’s
1. Can I make this pie ahead of time?
Yes, it is actually best when prepared a day in advance.
2. Can I use fewer layers?
Yes, two or three layers work perfectly.
3. Why are my layers mixing together?
The previous layer likely was not set enough before adding the next.
4. Can I use different flavors?
Absolutely, choose any flavors you enjoy.
5. How long should it chill?
At least four hours for proper structure.
6. Can I make mini pies?
Yes, individual cups or mini pie dishes work well.
7. How do I get clean slices?
Use a warm knife and wipe it between cuts.
8. Can I add fruit pieces?
Yes, small fruit pieces can be added between layers.
9. Can I skip the cream topping?
Yes, but it adds a nice balance to the fruity layers.
10. What makes this pie special for spring?
The pastel layers and light texture perfectly match the cheerful feeling of the season.
Conclusion
Easter Jelly Pie is bright, playful, and wonderfully refreshing. The colorful layers make it instantly eye catching, while the creamy topping and buttery crust create a delicious balance of textures.
Whether you serve it at a holiday gathering or simply enjoy it with family, this pie brings a cheerful burst of spring to the table. Let me tell you, it is worth every bite.
Print
Easter Jelly Pie
- Prep Time: 25 minutes
- Cook Time: 0 minutes
- Total Time: 25 minutes
- Yield: 8 servings 1x
- Category: Dessert
- Method: No Bake
- Cuisine: American
- Diet: Vegetarian
Description
A colorful spring dessert with pastel gelatin layers, creamy topping, and a buttery graham cracker crust.
Ingredients
- 1 ½ cups graham cracker crumbs
- 6 tablespoons unsalted butter, melted
- 2 tablespoons granulated sugar
- 3 packages fruit gelatin powder (3 ounces each)
- 3 cups boiling water
- 1 ½ cups cold water
- 8 ounces cream cheese, softened
- 1 cup heavy cream
- ½ cup powdered sugar
- 1 teaspoon vanilla extract
- 1 cup whipped topping
- ¼ cup pastel candy eggs
Instructions
- Mix graham cracker crumbs, melted butter, and granulated sugar until combined.
- Press mixture firmly into a pie dish to create the crust and chill for 20 minutes.
- Dissolve the first gelatin flavor in 1 cup boiling water then add ½ cup cold water.
- Pour a thin layer into the crust and refrigerate until partially set.
- Repeat the process with remaining gelatin flavors, allowing each layer to set slightly before adding the next.
- Beat cream cheese, powdered sugar, and vanilla extract until smooth.
- Whip heavy cream separately then fold it into the cream cheese mixture.
- Spread the cream mixture gently over the final gelatin layer.
- Refrigerate the pie for at least 4 hours until fully set.
- Decorate with whipped topping and pastel candy eggs before serving.
Notes
- Allow each gelatin layer to partially set before adding another.
- Use a warm knife for cleaner slices.
- Chilling overnight improves texture.
Nutrition
- Serving Size: 1 slice
- Calories: 290
- Sugar: 24g
- Sodium: 160mg
- Fat: 14g
- Saturated Fat: 8g
- Unsaturated Fat: 4g
- Trans Fat: 0g
- Carbohydrates: 36g
- Fiber: 1g
- Protein: 4g
- Cholesterol: 40mg