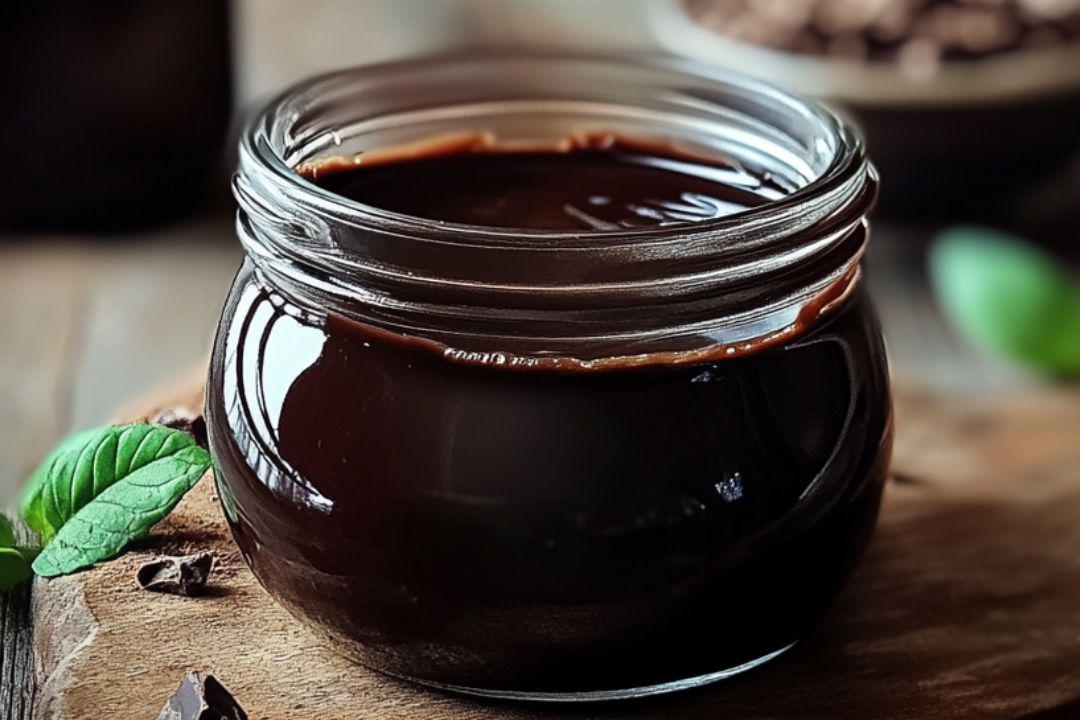
If you’ve ever craved a rich, smooth, and velvety chocolate syrup to drizzle over your ice cream, pancakes, or even stir into your milk, then you’re in for a treat. Homemade chocolate syrup is so easy to make, and trust me, once you try it, you won’t want to go back to the store-bought stuff. With just a few simple ingredients, you can whip up this silky-smooth syrup in no time. It’s perfect for those moments when you need a little extra indulgence, and it’s totally customizable to suit your taste!
Why You’ll Love Homemade Chocolate Syrup
Quick and Easy: Making your own chocolate syrup takes less than 10 minutes! It’s a great way to satisfy a chocolate craving without any fuss.
Rich and Decadent: The deep, smooth flavor of homemade chocolate syrup is beyond compare. With just the right balance of cocoa and sweetness, it’ll become your go-to topping for almost everything.
No Preservatives or Additives: Unlike store-bought versions, homemade syrup doesn’t contain any artificial ingredients. You know exactly what’s in it, making it a healthier choice.
Customizable: Want it a little sweeter? Add more sugar. Prefer a more intense chocolate flavor? Adjust the cocoa. You can easily make this syrup just the way you like it.
Versatile: From drizzling over desserts like ice cream or cake to mixing into your morning coffee, this syrup is incredibly versatile. You can even stir it into yogurt or oatmeal for a chocolatey twist.

Ingredients
Cocoa Powder: Unsweetened cocoa powder provides the deep chocolate flavor that’s the star of this syrup.
Sugar: Sweetens the syrup just right without being overpowering.
Water: Helps dissolve the sugar and cocoa and gives the syrup its smooth consistency.
Vanilla Extract: Adds a hint of warmth and complexity to the syrup’s flavor.
Salt: A pinch of salt helps balance out the sweetness and intensifies the chocolate flavor.
Cornstarch: Optional, but it helps thicken the syrup to the perfect consistency.
(Note: the full ingredients list, including measurements, is provided in the recipe card directly below.)
Instructions
Making this chocolate syrup is a breeze. Let’s dive into the steps!
Mix Dry Ingredients:
- In a medium saucepan, whisk together the cocoa powder, sugar, and salt. This will help eliminate any lumps in the cocoa and ensure an even texture in the syrup.
Add Water:
- Slowly pour in the water, whisking as you go to form a smooth mixture.
Cook the Syrup:
- Place the saucepan over medium heat and bring the mixture to a simmer. Stir constantly to ensure the sugar dissolves and the cocoa fully incorporates into the liquid. If you’re using cornstarch, whisk it in at this stage to help thicken the syrup.
Simmer:
- Let the syrup simmer for about 5-7 minutes, stirring occasionally. It should thicken slightly and have a glossy, smooth texture. If you prefer a thinner consistency, you can simmer for a shorter time; for a thicker syrup, let it cook a little longer.
Add Vanilla:
- Once the syrup has thickened to your liking, remove the saucepan from the heat and stir in the vanilla extract for added flavor.
Cool and Store:
- Let the syrup cool to room temperature. As it cools, it will continue to thicken a bit more. Transfer it to a clean bottle or jar for storage.
Serve and Enjoy:
- Drizzle the homemade chocolate syrup over ice cream, pancakes, waffles, or anything your heart desires! You can also stir it into milk for an instant chocolate milk treat.
Nutrition Facts
Servings: 10
Calories per serving: 60 (varies depending on exact ingredients)
Preparation Time
Prep Time: 5 minutes
Cook Time: 5-7 minutes
Total Time: 10-12 minutes
How to Serve Homemade Chocolate Syrup
This rich chocolate syrup is the perfect addition to almost any dessert or drink. Here are a few ideas to get you started:
Ice Cream: Drizzle it generously over vanilla ice cream for a classic treat. You can even top it with sprinkles or crushed nuts for extra crunch.
Milkshakes: Blend it with vanilla ice cream and milk to make a decadent chocolate milkshake.
Pancakes & Waffles: Pour it over pancakes or waffles for a delicious breakfast or brunch.
Hot Chocolate: Stir it into a cup of hot milk for a rich and creamy homemade hot chocolate.
Coffee or Lattes: Add a little swirl of chocolate syrup to your coffee, latte, or mocha for an extra chocolatey kick.
Additional Tips
Adjust the Sweetness: If you like your syrup sweeter, feel free to add a little more sugar to the mix. Start with a small amount and taste as you go.
Make It Thicker: If you prefer a thicker syrup, simply cook it a bit longer until it reaches your desired consistency.
Store It Properly: Keep your homemade chocolate syrup in an airtight container or bottle. It will last for about 2-3 weeks in the refrigerator.
Add Flavor Variations: Try experimenting with different flavors by adding a touch of cinnamon, chili powder, or even peppermint extract to give your syrup a unique twist.
FAQ Section
Q1: How long will the chocolate syrup last?
A1: When stored in an airtight container in the refrigerator, your homemade chocolate syrup will last for up to 2-3 weeks.
Q2: Can I use a different type of sugar?
A2: Yes, you can use brown sugar for a deeper, caramel-like flavor, or even try coconut sugar for a slightly different taste.
Q3: Can I make this syrup without cornstarch?
A3: Absolutely! The cornstarch is optional and only helps thicken the syrup. If you don’t have it on hand, you can still make a perfectly delicious syrup without it.
Q4: Can I use this syrup in baking?
A4: Yes, you can use it in place of store-bought chocolate syrup in recipes that call for it. It’s great for adding a little extra chocolate flavor to cakes or cookies.
Q5: Is this recipe vegan?
A5: Yes, this chocolate syrup is vegan, as long as you use plant-based ingredients like non-dairy milk and butter. It’s completely customizable to suit dietary preferences.
Q6: Can I freeze chocolate syrup?
A6: Yes, you can freeze chocolate syrup for up to 6 months. Just make sure to store it in a freezer-safe container, and thaw it out before using.
Q7: Can I use honey instead of sugar?
A7: Yes, you can substitute honey for sugar, but keep in mind that it will change the flavor a bit and might alter the texture. You may also need to reduce the amount of liquid.
Q8: How can I make it sugar-free?
A8: To make a sugar-free version, you can substitute the sugar with a sugar substitute like stevia or monk fruit sweetener, though the consistency and sweetness may vary.
Q9: Can I make this with dark cocoa powder?
A9: Yes, using dark cocoa powder will give your syrup a deeper, more intense chocolate flavor. Adjust the sugar if you find it too bitter.
Q10: Can I use this syrup for ice cream sundaes?
A10: Absolutely! This syrup is perfect for drizzling over ice cream sundaes and other desserts, adding that perfect chocolatey touch.
Conclusion
This Homemade Chocolate Syrup is the perfect way to satisfy your sweet tooth with minimal effort. It’s quick, customizable, and absolutely delicious. Whether you’re drizzling it over your favorite dessert or adding a swirl to your morning coffee, this syrup is bound to become a kitchen staple. Enjoy it with your family, share it with friends, or keep it all to yourself—it’s the kind of treat you can’t resist!
PrintHomemade Chocolate Syrup
This easy and quick homemade chocolate syrup is perfect for drizzling over ice cream, pancakes, or mixing into milk. With just a few simple ingredients, you can create a rich, velvety chocolate syrup at home.
- Prep Time: 5 minutes
- Cook Time: 5 minutes
- Total Time: 10 minutes
- Yield: Approximately 1 1/2 cups of syrup
- Category: dessert
- Method: Stovetop
- Cuisine: American
- Diet: Vegetarian
Ingredients
- 2 cups sugar
- 1 cup water
- 1/3 cup cocoa powder
- 1 tablespoon vanilla extract
- 1 tablespoon butter or ghee
Instructions
-
Combine the Ingredients:
- In a medium saucepan, combine sugar, water, and cocoa powder. Stir to combine.
-
Boil the Syrup:
- Bring the mixture to a boil over medium-high heat, stirring occasionally. Once it reaches a boil, reduce the heat slightly and let it boil for 3 minutes.
-
Finish the Syrup:
- Remove from heat and stir in the butter (or ghee) and vanilla extract.
-
Adjust Consistency (Optional):
- If the syrup is too runny, you can thicken it by mixing 1 tablespoon of cornstarch with a little water and stirring it into the syrup. Bring it back to a boil for a minute to thicken.
-
Serve and Store:
- Allow the syrup to cool before serving. Store any leftovers in an airtight container in the refrigerator for up to 2 weeks.
Notes
- This syrup can be used for more than just milk and ice cream! Try it in coffee, smoothies, or as a topping for cakes and brownies.
- Adjust the thickness to your liking by adding more cornstarch if you prefer a thicker syrup.
Nutrition
- Serving Size: 1 tablespoon
- Calories: 50kcal
- Sugar: 13g
- Sodium: 0mg
- Fat: 11g
- Saturated Fat: 1g
- Unsaturated Fat: 0g
- Trans Fat: 0g
- Carbohydrates: 13g
- Fiber: 0g
- Protein: 0g
- Cholesterol: 5mg


