
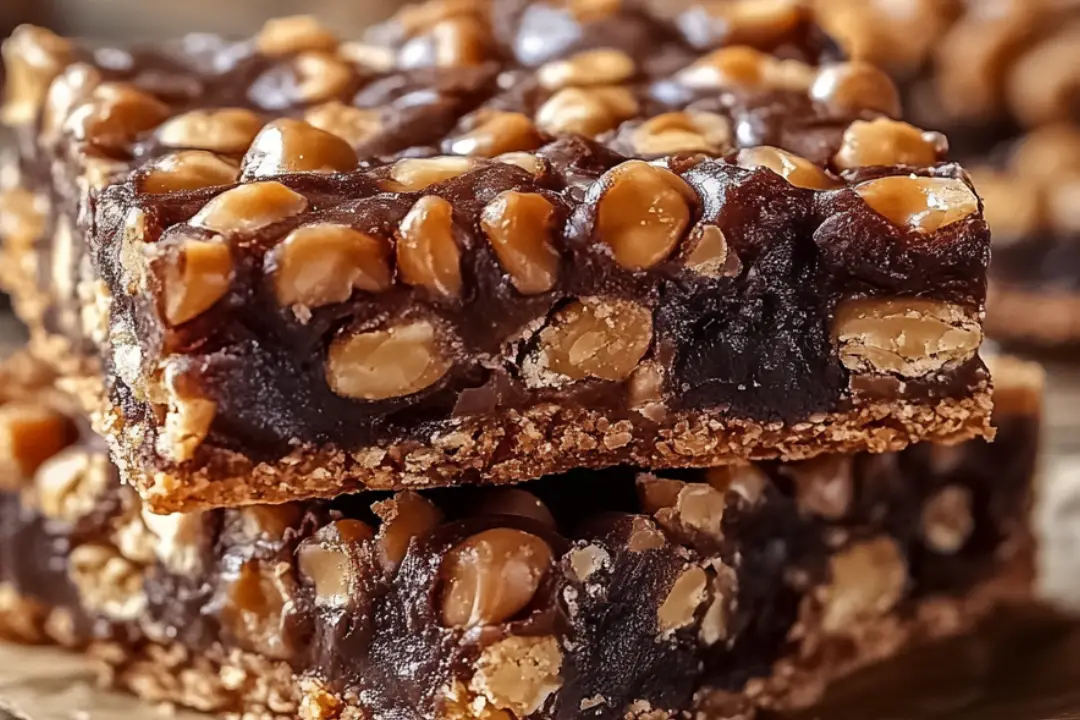
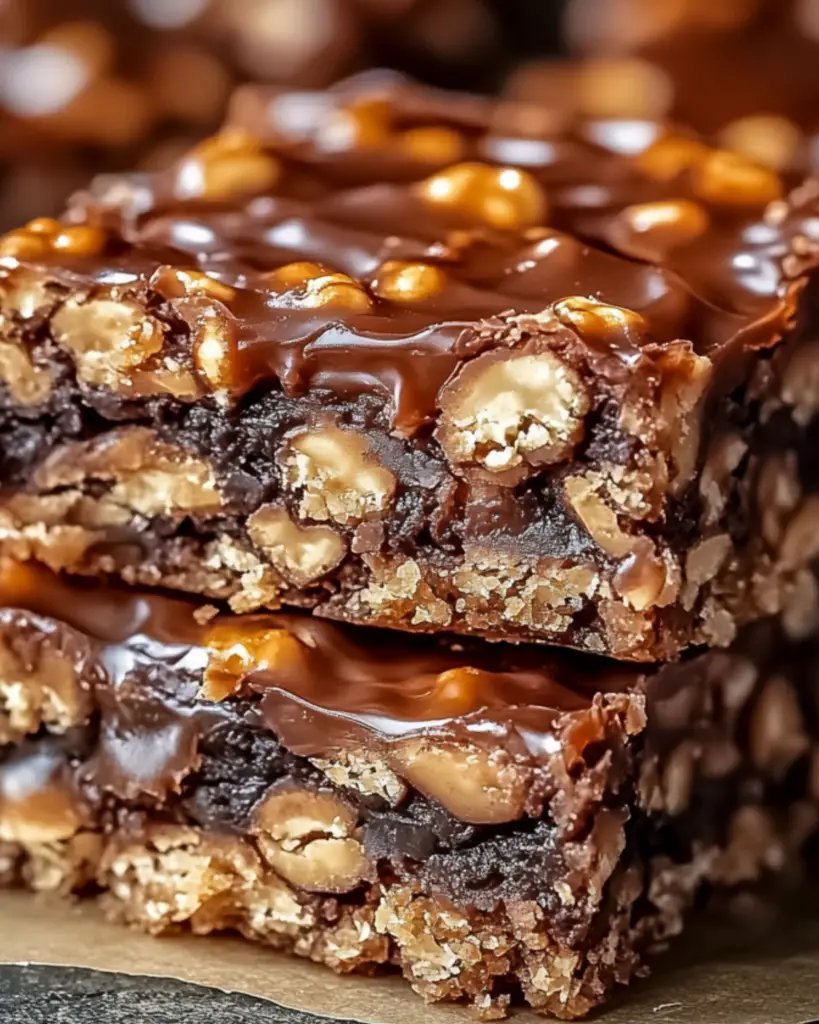
Who doesn’t love the satisfying crunch of a good treat? These Homemade Crunch Bars are the perfect balance of sweet, salty, and crispy, and they’re so simple to make. Imagine crispy rice cereal coated in rich milk chocolate and drizzled with a bit of peanut butter. It’s the kind of snack that makes you want to grab one after another. The best part? You can whip them up in no time and have a batch ready to satisfy your sweet tooth. Trust me, once you make these, you’ll never want to go back to store-bought!
Why You’ll Love Homemade Crunch Bars
- Quick and Easy: This recipe takes minimal time and effort to prepare. You only need a few ingredients, and the steps are straightforward.
- Customizable: Whether you like your crunch bars with a bit of peanut butter, extra chocolate, or a sprinkle of sea salt, you can adjust the ingredients to make them just the way you like.
- No-Bake: There’s no oven required for these, so you won’t have to worry about turning on the heat or spending too much time in the kitchen.
- Perfect for Sharing: These bars are great for parties, bake sales, or as a homemade gift. They’re always a crowd-pleaser, and you’ll definitely be asked for the recipe.
- Better Than Store-Bought: Once you try these homemade crunch bars, you’ll be hooked. They’re even better than what you get in the candy aisle, and you can control all the ingredients!
Ingredients
Let’s break down the few simple ingredients you’ll need to make these delicious crunch bars:
Rice Cereal
The crispy base of this bar! The rice cereal provides the satisfying crunch we all crave in a good treat. It’s light and airy but perfect for holding all the yummy layers together.
Chocolate Chips
For that delicious chocolate coating that makes the bars so irresistible. You can use milk chocolate, dark chocolate, or even a combination to get the flavor you like best.
Peanut Butter
Peanut butter adds a rich, creamy element that pairs beautifully with the chocolate. If you’re not a fan of peanut butter, you can substitute it with almond butter or even sunbutter for a nut-free version.
Butter
Butter helps the chocolate melt smoothly and makes the texture of the bars even more indulgent. It’s the perfect binder to keep everything together.
Vanilla Extract
Just a splash of vanilla helps enhance the flavor of the chocolate and the peanut butter, bringing everything together in a sweet harmony.
(Note: The full ingredients list, including measurements, is provided in the recipe card directly below.)
Instructions
Let’s get started on making these irresistible crunch bars:
Melt the Chocolate & Peanut Butter
In a large saucepan, melt the butter, chocolate chips, and peanut butter together over low heat. Stir continuously until everything is smooth and melted. Once melted, remove from the heat and stir in the vanilla extract.
Combine with Rice Cereal
In a large mixing bowl, add the rice cereal. Pour the melted chocolate and peanut butter mixture over the cereal and gently stir to coat the cereal evenly. Make sure all the cereal gets coated with the chocolate goodness.
Press into a Pan
Line a baking pan with parchment paper or lightly grease it to prevent sticking. Pour the mixture into the pan and press it down firmly using a spatula or the back of a spoon. You want the mixture to be evenly distributed and tightly packed.
Chill and Set
Place the pan in the refrigerator for about 1-2 hours, or until the chocolate is set and the bars hold together.
Slice and Enjoy
Once the bars are set, remove from the fridge and cut them into squares or bars. Serve them right away or store them for later!
Nutrition Facts
Servings: 12
Calories per serving: 200
Preparation Time
Prep Time: 10 minutes
Chill Time: 1-2 hours
Total Time: 1 hour 10 minutes – 2 hours
How to Serve Homemade Crunch Bars
These crunch bars are perfect for just about any occasion:
- As a Sweet Snack: Enjoy these bars on their own as a quick, indulgent snack any time of the day.
- With Coffee or Tea: Pair one of these bars with a hot cup of coffee or tea for the perfect afternoon pick-me-up.
- As a Dessert: Serve them after dinner as a sweet treat, or bring them to a party for an easy and impressive dessert.
- For a Picnic: These bars travel well, making them a great choice for a picnic or a road trip snack.
Additional Tips
- Storage Tips: Keep the bars in an airtight container at room temperature for up to a week. For longer storage, you can refrigerate them, but let them come to room temperature before eating for the best texture.
- Add-ins: Feel free to customize these bars by adding mini marshmallows, dried fruit, or even crushed pretzels for an extra twist of flavor and texture.
- Peanut Butter Alternative: If you need a nut-free version, swap the peanut butter for sunflower seed butter or even a nut-free chocolate spread.
- Make It Dairy-Free: Use dairy-free chocolate chips and swap the butter for dairy-free margarine to make these bars vegan.
FAQ Section
Q1: Can I use dark chocolate instead of milk chocolate?
A1: Absolutely! Dark chocolate will give the bars a richer flavor, so feel free to use it if that’s your preference.
Q2: Can I make these bars without peanut butter?
A2: Yes! You can use almond butter, sunflower seed butter, or even a nut-free chocolate spread for a different flavor profile.
Q3: How do I store leftover crunch bars?
A3: Store the leftover bars in an airtight container at room temperature for up to a week. You can also refrigerate them for longer freshness.
Q4: Can I add other toppings to the crunch bars?
A4: Yes, you can sprinkle some sea salt, crushed nuts, or mini chocolate chips on top for added texture and flavor.
Q5: Can I make these bars ahead of time?
A5: Absolutely! These bars store well, so they’re perfect for making ahead of time. Just let them cool and set before storing them.
Q6: Can I use coconut oil instead of butter?
A6: Yes, coconut oil will work as a substitute for butter, and it’ll give the bars a slightly tropical flavor.
Q7: Can I double the recipe?
A7: Yes, you can double the recipe if you need a larger batch. Just use a bigger pan to accommodate the extra mixture.
Q8: Can I make these bars without vanilla extract?
A8: While vanilla extract enhances the flavor, you can skip it if you don’t have it on hand. The bars will still be delicious.
Q9: Can I freeze these bars?
A9: Yes, you can freeze the bars for up to 3 months. Just wrap them tightly in plastic wrap or foil and store in an airtight container.
Q10: What size pan should I use?
A10: A 9×9-inch square pan works great for this recipe, but you can adjust the pan size if you’re doubling or halving the recipe.
Conclusion
These Homemade Crunch Bars are the ultimate treat when you’re craving something sweet, crunchy, and a little indulgent. With just a few simple ingredients, you can make a batch that’s sure to please everyone. They’re perfect for any occasion, from an afternoon snack to a party dessert. Give them a try, and get ready to enjoy the best homemade crunch bars ever!
Print
Homemade Crunch Bars
- Prep Time: 5 minutes
- Cook Time: 5 minutes
- Total Time: 20 minutes
- Yield: 8 bars 1x
- Category: Dessert
- Method: No-bake
- Cuisine: American
- Diet: Vegetarian
Description
These Homemade Crunch Bars are the perfect no-bake treat with a delicious combination of creamy peanut butter, rich chocolate, and crispy rice krispies. Super easy to make and perfect for satisfying your sweet cravings!
Ingredients
- 1 ½ cups chocolate chips
- ⅓ cup peanut butter
- 1 cup rice krispies
- Flaked sea salt (optional, for topping)
Instructions
-
Prepare the Baking Dish:
Line an 8×8 square baking dish with parchment paper for easy removal later. -
Melt Chocolate and Peanut Butter:
Place the chocolate chips and peanut butter in a medium-sized microwave-safe bowl. Microwave in 30-second intervals, stirring between each interval, until the chocolate and peanut butter are completely melted and smooth. -
Add Rice Krispies:
Once the chocolate and peanut butter mixture is smooth, add the rice krispies and stir well to coat all the cereal with the chocolate-peanut butter mixture. -
Spread in Pan:
Pour the mixture into the prepared baking dish and spread it out evenly. If desired, sprinkle with a pinch of flaked sea salt for an extra touch of flavor. -
Freeze:
Freeze for 15 minutes to set the bars. Once firm, remove from the freezer and cut into 8 bars.
Notes
- For extra crunch, you can substitute rice krispies with other crispy cereals like cornflakes.
- You can store these bars in the fridge for up to a week or freeze them for longer storage.
- Add a drizzle of melted chocolate or peanut butter on top for extra flavor!
Nutrition
- Serving Size: 1 bar
- Calories: 200mg
- Sugar: 16g
- Sodium: 50mg
- Fat: 12g
- Saturated Fat: 4g
- Unsaturated Fat: 8g
- Trans Fat: 0g
- Carbohydrates: 22g
- Fiber: 1g
- Protein: 3g
- Cholesterol: 5mg


