
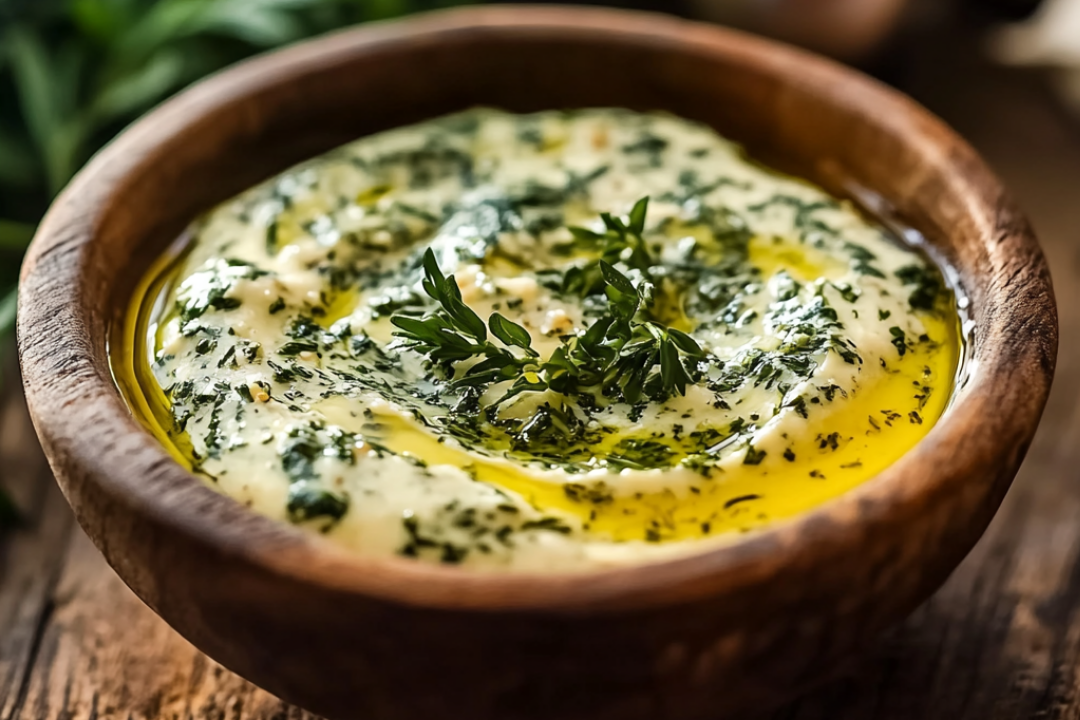
There’s nothing quite like the magic of homemade butter, especially when it’s infused with aromatic garlic and fresh herbs. Imagine slathering this rich, creamy garlic herb butter on warm, freshly baked bread or melting it over a steak—pure bliss! This Homemade Garlic Herb Butter is a game-changer for any meal, turning the simplest dishes into something special. With just a few ingredients, you’ll create a compound butter that’s perfect for spreading, sautéing, or just enjoying on its own. Trust me, once you try it, you’ll never go back to store-bought again!
Why You’ll Love Homemade Garlic Herb Butter
This isn’t just any butter. It’s rich, flavorful, and packed with personality—perfect for elevating just about anything you’re cooking. Whether you’re looking to add some zesty flair to a weeknight dinner or impress guests at your next gathering, this garlic herb butter is a must-have in your kitchen. Here’s why you’ll love it:
- Versatile: Use it on bread, steak, vegetables, or pasta. The possibilities are endless! You can even toss it into a hot pot of rice or melted over seafood.
- Budget-Friendly: You likely already have most of these ingredients in your kitchen. It’s all about taking simple ingredients and transforming them into something indulgent.
- Quick and Easy: No complicated techniques here—just blend, roll, and refrigerate. In just a few minutes, you’ll have a flavorful addition to any meal.
- Customizable: You can adjust the flavors to fit your taste. Love extra garlic? Add more! Prefer a milder, herb-forward butter? You can do that too. The power is in your hands.
- Crowd-Pleasing: Once people get a taste of this buttery goodness, you’ll have a hard time keeping it around. It’s perfect for serving at family dinners or dinner parties.
Ingredients
Here’s what you’ll need to create this herby, garlicky butter masterpiece:
Unsalted Butter
The base of any good compound butter. Using unsalted butter allows you to control the salt content, and it lets the fresh flavors of the herbs and garlic shine through.
Garlic
Fresh garlic is key here. When it’s minced and combined with the butter, it becomes wonderfully aromatic and adds that rich, savory punch we all crave.
Fresh Herbs
A combination of parsley, rosemary, and thyme gives this butter the perfect balance of freshness and earthiness. You can adjust the herbs based on what you have on hand or prefer, but these three are a classic combo.
Lemon Zest
The zest adds a subtle, zesty brightness that cuts through the richness of the butter and balances everything out. It’s the secret ingredient that takes it to the next level.
Salt and Pepper
Just a pinch of salt and freshly cracked black pepper to bring it all together.
(Note: the full ingredients list, including measurements, is provided in the recipe card directly below.)
Instructions
Making garlic herb butter is so simple—just follow these easy steps, and you’ll have a batch ready to use in no time!
Soften the Butter
Start by letting your butter soften at room temperature for about 30 minutes. Soft butter is much easier to work with and will blend more smoothly with the herbs and garlic.
Mix the Ingredients
In a medium bowl, combine the softened butter with the minced garlic, fresh herbs, lemon zest, salt, and pepper. Use a fork or spoon to mix everything together until it’s evenly distributed.
Roll and Chill
Once everything is combined, transfer the butter mixture onto a sheet of plastic wrap. Use the wrap to roll it into a log shape, twisting the ends to seal it. Refrigerate the butter for at least 2 hours, or until firm. This will help the flavors meld together and ensure it’s easy to slice when you’re ready to use it.
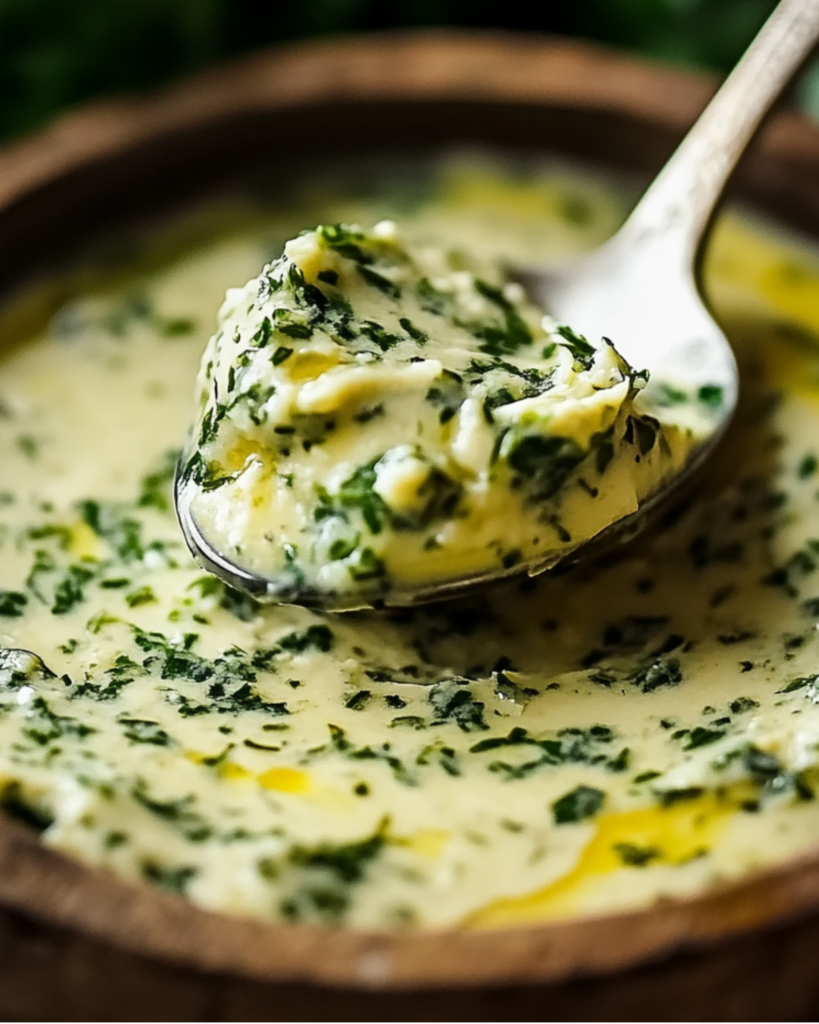
Serve and Enjoy
Once your garlic herb butter is chilled, it’s ready to serve! Slice off a piece and spread it on warm bread, melt it over roasted vegetables, or add a dollop on top of a sizzling steak. The options are endless!
Nutrition Facts
Servings: 8
Calories per serving: 100
Preparation Time
Prep Time: 5 minutes
Chill Time: 2 hours
Total Time: 2 hours 5 minutes
How to Serve Homemade Garlic Herb Butter
This compound butter is a versatile hero in the kitchen. Here are some ideas for how to serve it:
- Bread: Spread it generously on a slice of freshly baked baguette, dinner rolls, or toasted sourdough. It’s the perfect appetizer or side to any meal.
- Grilled or Roasted Vegetables: Toss your favorite veggies in a little garlic herb butter right after they come off the grill or out of the oven. The flavors will meld perfectly.
- Steak: Top your steak with a pat of garlic herb butter right before serving. The butter will melt into the meat, making each bite irresistible.
- Pasta: Toss your pasta with a bit of garlic herb butter for a simple but flavorful sauce. You don’t need much—just a little butter goes a long way.
- Fish: Serve this butter alongside grilled or pan-seared fish for an elegant touch. It complements seafood wonderfully!
Additional Tips
Want to get the most out of your garlic herb butter? Here are some extra tips to help:
- Make Ahead: This butter can be made up to a week in advance. Just keep it wrapped tightly in the fridge. You can even freeze it for longer storage (up to 3 months).
- Adjust the Flavor: If you like your butter with a bit more heat, try adding red pepper flakes or a pinch of cayenne. For a more citrusy version, you can use orange zest instead of lemon.
- Herb Variations: Feel free to mix up the herbs! Basil, oregano, or even tarragon could make an interesting twist on the classic combo.
- Storage Tips: Keep the butter tightly wrapped in the fridge, or store it in an airtight container. It will keep its best flavor and texture when used within a week.
- Gift Idea: This butter also makes a wonderful homemade gift. Simply roll it into a log, wrap it in parchment paper, and tie it with twine. Perfect for foodies!
FAQ Section
Q1: Can I use salted butter?
A1: You can, but I recommend unsalted butter so you can control the salt level. If you do use salted butter, just be mindful when adding more salt.
Q2: Can I use dried herbs instead of fresh?
A2: Absolutely! If you don’t have fresh herbs, you can use dried. Just use about one-third of the amount—dried herbs are more concentrated than fresh ones.
Q3: Can I make this butter ahead of time?
A3: Yes! This butter can be made up to a week in advance. Just keep it wrapped tightly in the fridge. You can also freeze it for longer storage.
Q4: How should I store the leftover garlic herb butter?
A4: Store leftover garlic herb butter in the fridge for up to a week. Keep it tightly wrapped or in an airtight container to maintain its freshness.
Q5: Can I make this butter without garlic?
A5: Sure! If garlic isn’t your thing, you can skip it and focus on the fresh herbs and lemon zest for a more herb-forward butter.
Q6: Can I add cheese to this butter?
A1: Yes! For a cheesy twist, mix in some grated Parmesan or another hard cheese. It adds a rich, savory flavor to the butter.
Q7: Can I use this butter for baking?
A7: Absolutely! It’s fantastic for baking, especially in savory bread or biscuits. You can also use it to coat muffins or cornbread before baking.
Q8: Can I use this butter for sautéing?
A8: Yes! This butter is perfect for sautéing vegetables, seafood, or chicken. It adds a beautiful depth of flavor to anything you cook with it.
Q9: Can I freeze this butter?
A9: Yes! Just wrap it tightly in plastic wrap, and store it in the freezer for up to 3 months. You can slice off pieces as you need them.
Q10: How do I reheat the butter?
A10: If it’s been refrigerated and you need it softened, just leave it out at room temperature for 10-15 minutes. If you want to melt it, heat it gently in the microwave in short bursts.
Conclusion
This Homemade Garlic Herb Butter is going to become your new kitchen staple. It’s the perfect blend of creamy, garlicky, herby goodness that adds a burst of flavor to everything it touches. Whether you’re spreading it on bread, melting it over vegetables, or using it to elevate your favorite dishes, this butter brings that extra special touch to your cooking. Simple to make, full of flavor, and so versatile—it’s a kitchen must-have! Once you try it, you’ll never go back to plain butter again!
Print
Homemade Garlic Herb Butter
- Prep Time: 10 minutes
- Cook Time: 1 hour
- Total Time: 1 hour 10 minutes
- Yield: Makes about 1 cup of garlic herb butter 1x
- Category: Condiments
- Method: No-Cook
- Cuisine: American
Description
This rich, flavorful garlic herb butter is perfect for slathering on steaks, bread, vegetables, or bagels. With a blend of fresh garlic, parsley, thyme, and basil, it adds a savory, aromatic touch to any dish!
Ingredients
- 1 cup butter (softened)
- 3 cloves garlic, finely minced
- ¼ cup chopped fresh parsley
- 1 tablespoon fresh thyme (chopped)
- 1 tablespoon fresh basil (chopped)
- ¼ teaspoon black pepper
Instructions
- Combine ingredients: In a large bowl, mix together softened butter, minced garlic, chopped parsley, chopped thyme, chopped basil, and black pepper until well combined.
- Form into a log: Place the butter mixture onto a piece of plastic wrap. Roll it tightly to form a log shape.
- Chill: Seal the ends of the plastic wrap and refrigerate for at least one hour to allow the flavors to meld together.
- Serve: Slice the butter into rounds and serve on your favorite foods—steaks, bread, bagels, baguette, or vegetables. Enjoy!
Notes
- You can use this butter on grilled meats, roasted vegetables, or pasta for a burst of fresh, herby flavor.
- Store the garlic herb butter in the refrigerator for up to 2 weeks, or freeze it for longer storage.
- Feel free to customize with other herbs like rosemary or oregano for your preferred flavor!
Nutrition
- Serving Size: 1 tablespoon
- Calories: 100 kcal
- Sugar: 0g
- Sodium: 70mg
- Fat: 11g
- Saturated Fat: 7g
- Unsaturated Fat: 4g
- Trans Fat: 0g
- Carbohydrates: 0g
- Fiber: 0g
- Protein: 0g
- Cholesterol: 30mg