
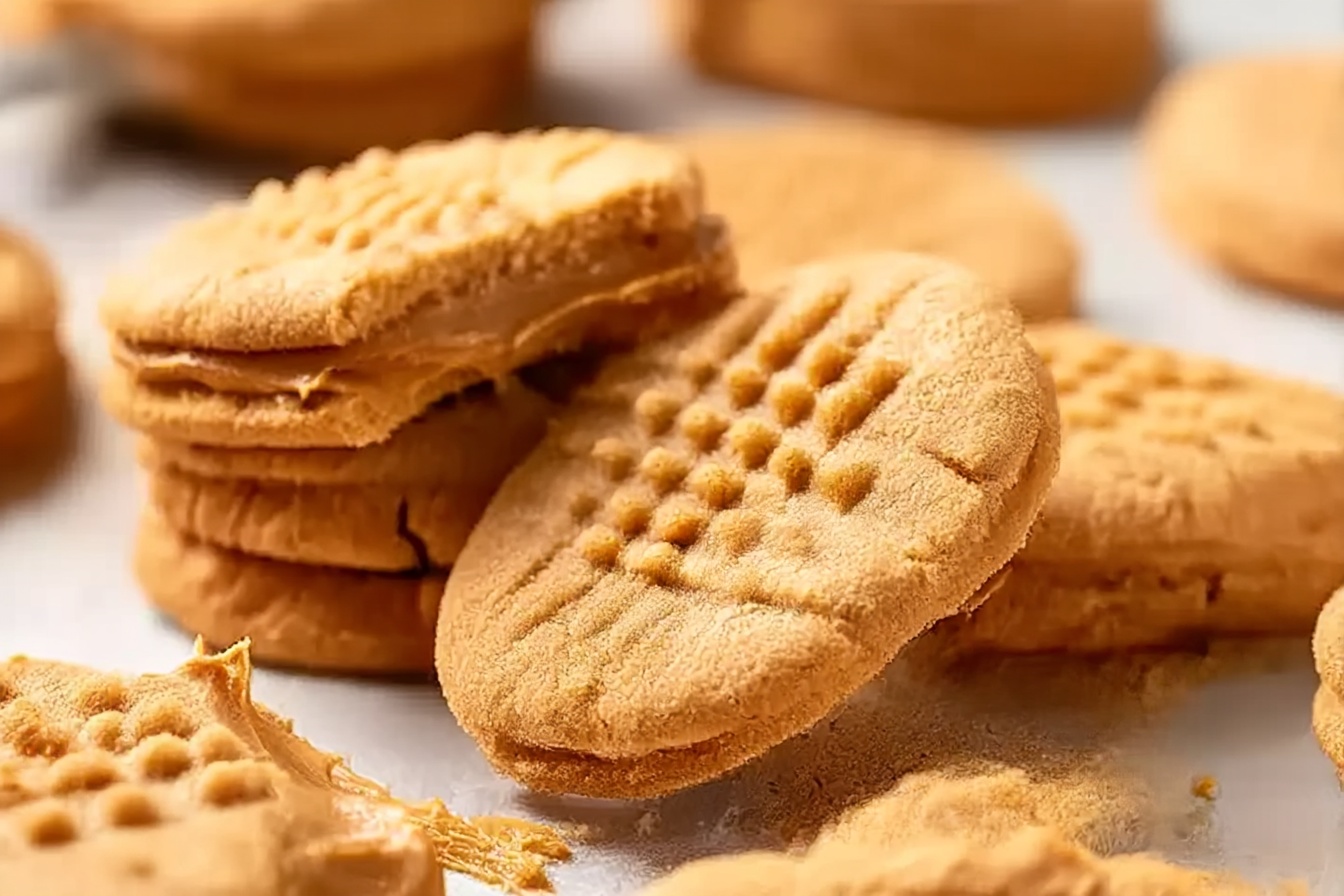
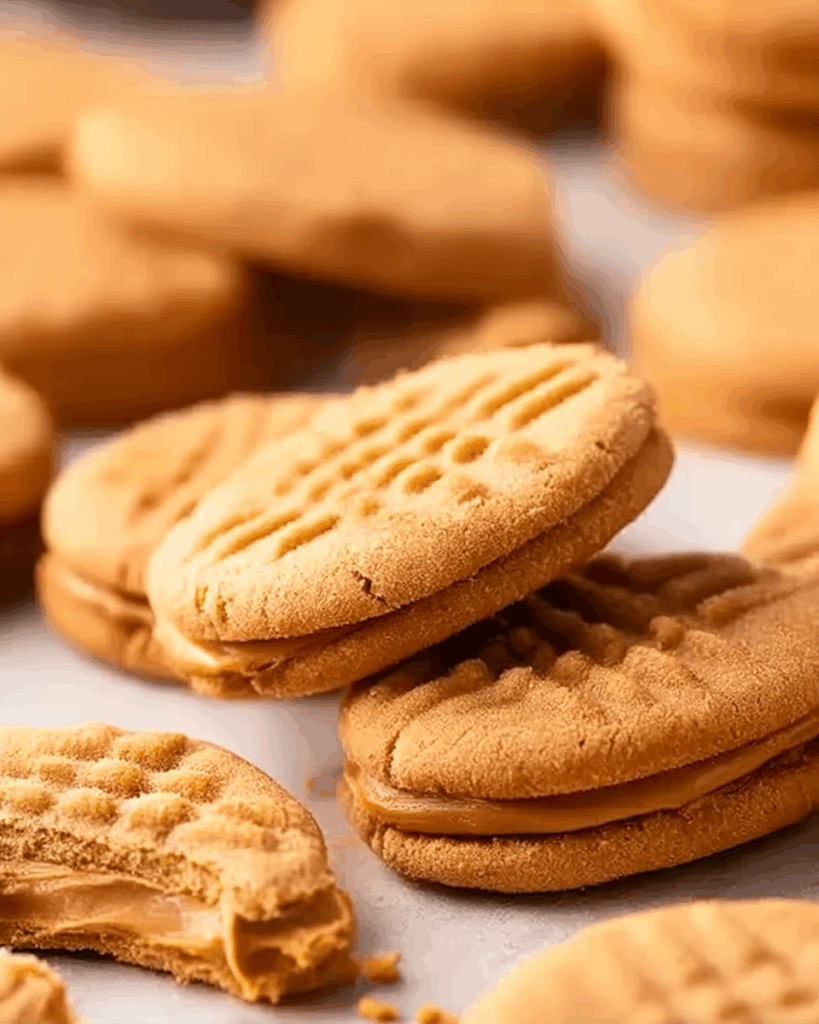
If you’ve ever craved that nostalgic bite of a soft, peanut buttery cookie with a creamy filling nestled between, let me tell you, this Homemade Nutter Butters recipe is about to become your new go-to. With golden, crisscrossed cookies that melt in your mouth and a rich, velvety peanut butter filling, each bite is a comforting throwback to childhood lunchboxes—but better, because it’s made fresh in your own kitchen. The aroma of warm roasted peanuts, the tender crunch, and that sweet-salty balance… trust me, you’re going to love this.
Behind the Recipe
This recipe was born from a lazy Sunday afternoon, a bit of nostalgia, and a jar of peanut butter begging to be turned into something delicious. I remembered the store-bought version from years past, always a treat in my school lunches, but I wanted something softer, richer, and more real. So, I got to work, mixing and matching ingredients until I found just the right balance of chew and crumble, sweet and salty. Homemade Nutter Butters aren’t just a copy—they’re an upgrade.
Recipe Origin or Trivia
Did you know the original Nutter Butter was introduced by Nabisco in 1969? Designed with its iconic peanut-shaped cookie and ridged texture, it quickly became an American classic. While the store-bought version is a pantry staple, homemade renditions allow for more control over the sweetness, texture, and ingredient quality. Plus, you can shape them traditionally or use a simple round cutter—no judgment here. And in case you’re wondering, yes, peanut lovers have their own cult following of this treat!
Why You’ll Love Homemade Nutter Butters
Whether you’re baking for a crowd or just indulging solo, this recipe has something for everyone.
Versatile: You can shape them traditionally or with a cookie cutter, and even play with flavored fillings.
Budget-Friendly: Made with pantry staples—no fancy ingredients needed.
Quick and Easy: From dough to oven to sandwiching, it’s all done in under an hour.
Customizable: Add a swirl of honey, a dash of cinnamon, or a chocolate drizzle for flair.
Crowd-Pleasing: These always disappear fast at bake sales, parties, and family get-togethers.
Make-Ahead Friendly: Bake the cookies ahead and assemble when ready to serve.
Great for Leftovers: Store well in airtight containers and taste even better the next day.
Print
Homemade Nutter Butters
Description
Soft, creamy, and irresistibly peanut buttery, these Homemade Nutter Butters are a nostalgic favorite made better. Perfectly golden cookies with a rich filling in every bite.
Ingredients
- All-Purpose Flour: 1 ½ cups – Provides structure and balance.
- Baking Soda: ½ teaspoon – Helps the cookies rise and puff slightly.
- Salt: ¼ teaspoon – Enhances and balances the sweetness.
- Unsalted Butter: ½ cup (1 stick), softened – Adds richness and moisture.
- Granulated Sugar: ½ cup – Sweetens and helps with the cookie’s slight crisp.
- Brown Sugar: ½ cup, packed – Adds depth of flavor and chewiness.
- Egg: 1 large – Binds the dough together.
- Vanilla Extract: 1 teaspoon – Adds a warm, aromatic touch.
- Creamy Peanut Butter: ¾ cup – The star of the show, providing that signature flavor.
- Filling – Creamy Peanut Butter: ½ cup – Rich and nutty base.
- Filling – Powdered Sugar: 1 cup – Adds sweetness and smooth texture.
- Filling – Butter: ¼ cup, softened – Helps blend and adds creaminess.
- Filling – Milk: 1–2 tablespoons – Adjusts consistency to perfect spreadability.
Instructions
- Preheat Your Equipment: Preheat your oven to 350°F (175°C) and line a baking sheet with parchment paper.
- Combine Ingredients: In a large bowl, cream together the butter, peanut butter, granulated sugar, and brown sugar until fluffy. Add the egg and vanilla, mixing until smooth. In a separate bowl, whisk together the flour, baking soda, and salt. Gradually mix dry ingredients into the wet until a dough forms.
- Prepare Your Cooking Vessel: Scoop tablespoon-sized portions of dough onto the lined baking sheet. Flatten gently with a fork to create a crisscross pattern.
- Assemble the Dish: Bake for 9–11 minutes or until edges are lightly golden. Let cool on the tray for 5 minutes, then transfer to a cooling rack.
- Cook to Perfection: While cookies cool, make the filling: beat peanut butter, butter, and powdered sugar until fluffy. Add milk one spoon at a time until creamy.
- Finishing Touches: Pair up cookies by size, spread filling on the flat side of one, and sandwich with the other.
- Serve and Enjoy: Let them rest for a few minutes to set, then enjoy with a cold glass of milk or your favorite warm drink.
Notes
- Chill the dough for cleaner shapes and better flavor.
- Don’t overbake—cookies should be soft in the center.
- Use creamy peanut butter for best texture and baking results.
- Cookies taste even better the next day after flavors meld.
Chef’s Pro Tips for Perfect Results
Making these cookies is easy, but a few expert tricks can take them from good to unforgettable.
- Use creamy peanut butter: It gives the cookies a smoother texture and bakes more evenly.
- Chill your dough: Letting it rest for 30 minutes helps it hold its shape and deepens flavor.
- Don’t overbake: Take them out when the edges are golden—they’ll continue to set as they cool.
- Go generous with the filling: The creamy center is the star, so don’t be shy!
- Let them sit: After sandwiching, wait 10 minutes before serving for the flavors to meld beautifully.
Kitchen Tools You’ll Need
Before we get into the fun part, make sure you’ve got these tools ready.
Mixing Bowls: For combining the wet and dry ingredients separately.
Hand or Stand Mixer: Helps cream the butter and sugar to fluffy perfection.
Measuring Cups & Spoons: Precision matters, especially for baking.
Cookie Sheet: A flat surface ensures even baking.
Parchment Paper: Prevents sticking and makes cleanup a breeze.
Cooling Rack: Allows cookies to cool evenly without getting soggy bottoms.
Ingredients in Homemade Nutter Butters
This peanut buttery delight starts with a few simple ingredients that come together in perfect harmony.
- All-Purpose Flour: 1 ½ cups – Provides structure and balance.
- Baking Soda: ½ teaspoon – Helps the cookies rise and puff slightly.
- Salt: ¼ teaspoon – Enhances and balances the sweetness.
- Unsalted Butter: ½ cup (1 stick), softened – Adds richness and moisture.
- Granulated Sugar: ½ cup – Sweetens and helps with the cookie’s slight crisp.
- Brown Sugar: ½ cup, packed – Adds depth of flavor and chewiness.
- Egg: 1 large – Binds the dough together.
- Vanilla Extract: 1 teaspoon – Adds a warm, aromatic touch.
- Creamy Peanut Butter: ¾ cup – The star of the show, providing that signature flavor.
For the filling:
- Creamy Peanut Butter: ½ cup – Rich and nutty base.
- Powdered Sugar: 1 cup – Adds sweetness and smooth texture.
- Butter: ¼ cup (softened) – Helps blend and adds creaminess.
- Milk: 1–2 tablespoons – Adjusts consistency to perfect spreadability.
Ingredient Substitutions
Don’t worry if you’re missing an item—here are easy swaps.
All-Purpose Flour: Use whole wheat flour for a nuttier flavor.
Granulated Sugar: Coconut sugar works for a natural sweetness.
Butter: Margarine or dairy-free butter for a vegan version.
Egg: Use a flax egg (1 tbsp flaxseed + 3 tbsp water) for egg-free.
Milk: Any plant-based milk like almond or oat works great.
Ingredient Spotlight
Creamy Peanut Butter: Choose a smooth, well-blended peanut butter for consistent flavor and texture throughout the cookies and filling.
Brown Sugar: Its molasses content brings depth and chewiness that complements the peanut butter perfectly.
Instructions for Making Homemade Nutter Butters
Let’s get baking! These steps will walk you through from mixing bowl to bite-worthy cookies.
-
Preheat Your Equipment:
Preheat your oven to 350°F (175°C) and line a baking sheet with parchment paper. -
Combine Ingredients:
In a large bowl, cream together the butter, peanut butter, granulated sugar, and brown sugar until fluffy. Add the egg and vanilla, mixing until smooth. In a separate bowl, whisk together the flour, baking soda, and salt. Gradually mix dry ingredients into the wet until a dough forms. -
Prepare Your Cooking Vessel:
Scoop tablespoon-sized portions of dough onto the lined baking sheet. Flatten gently with a fork to create a crisscross pattern. -
Assemble the Dish:
Bake for 9–11 minutes or until edges are lightly golden. Let cool on the tray for 5 minutes, then transfer to a cooling rack. -
Cook to Perfection:
While cookies cool, make the filling: beat peanut butter, butter, and powdered sugar until fluffy. Add milk one spoon at a time until creamy. -
Finishing Touches:
Pair up cookies by size, spread filling on the flat side of one, and sandwich with the other. -
Serve and Enjoy:
Let them rest for a few minutes to set, then enjoy with a cold glass of milk or your favorite warm drink.
Texture & Flavor Secrets
These cookies strike the perfect balance between crisp edges and soft centers. The creamy filling melts slightly into the cookie for a buttery mouthfeel, while the roasted peanut aroma carries through each bite. Sweet, salty, and melt-in-your-mouth tender—this one’s a total game-changer.
Cooking Tips & Tricks
Here are a few extra nuggets of advice to make your cookies shine:
- Let your butter soften fully for better creaming.
- Chill the dough for cleaner fork patterns.
- If using natural peanut butter, stir thoroughly to avoid oil separation.
- Add a pinch of cinnamon to the dough for a warm twist.
What to Avoid
Steer clear of these common missteps to guarantee cookie bliss:
- Don’t overmix your dough, or cookies may turn tough.
- Avoid using chunky peanut butter, which disrupts texture.
- Don’t overbake—they’ll seem soft at first but firm up as they cool.
- Resist sandwiching while warm, or your filling will melt and slide.
Nutrition Facts
Servings: 12 sandwich cookies
Calories per serving: 290
Note: These are approximate values.
Preparation Time
Prep Time: 20 minutes
Cook Time: 10 minutes
Total Time: 30 minutes
Make-Ahead and Storage Tips
You can make the cookie dough up to two days in advance and refrigerate it. Baked cookies last up to a week in an airtight container at room temperature. Freeze them (assembled or unassembled) for up to 2 months. To serve, thaw at room temperature and enjoy like they’re fresh out of the oven.
How to Serve Homemade Nutter Butters
These cookies shine on their own but are lovely with a drizzle of melted chocolate or dipped halfway in dark chocolate for a decadent finish. Serve alongside coffee, tea, or crushed into ice cream for next-level indulgence.
Creative Leftover Transformations
Have extra cookies? Here’s how to remix them:
- Cookie Crumble Parfait: Layer with whipped cream and bananas.
- Nutter Butter Milkshake: Blend with vanilla ice cream and milk.
- Peanut Butter Crust: Crush into a pie base for a peanut butter pie.
Additional Tips
- Store cookies with parchment between layers to avoid sticking.
- For a gluten-free version, swap in 1:1 gluten-free flour.
- Try sandwiching with Nutella for a twist.
Make It a Showstopper
To wow your guests, press the cookies into a classic peanut shape using a spoon edge before baking. Dust lightly with powdered sugar before serving or wrap in wax paper for rustic presentation at parties.
Variations to Try
- Chocolate-Dipped: Dip half the cookie in melted dark chocolate.
- Salted Caramel Filling: Mix in caramel sauce for a sweet-salty kick.
- Mini Version: Make bite-size cookies for lunchboxes or parties.
- Jelly Twist: Add a dollop of jam with the filling for a PB&J flavor.
- Oatmeal Nutter Butters: Add rolled oats to the dough for a hearty texture.
FAQ’s
Q1: Can I freeze these cookies?
Yes, both filled and unfilled cookies freeze well for up to 2 months.
Q2: What kind of peanut butter works best?
Creamy, processed peanut butter offers the best texture and stability.
Q3: Can I make these gluten-free?
Absolutely, use a 1:1 gluten-free baking flour blend.
Q4: How long do they stay fresh?
Stored properly, they remain delicious for up to 7 days.
Q5: Can I add chocolate chips to the dough?
Sure! Just keep them small so they don’t disrupt the texture.
Q6: Do I need to chill the dough?
It’s optional but recommended for best shape and flavor.
Q7: Can I use almond butter instead?
Yes, it works well and offers a slightly different flavor.
Q8: Are they overly sweet?
Not at all—the balance of sweet and salty is just right.
Q9: Can I double the recipe?
Definitely! Just be sure to bake in batches.
Q10: Can kids help make these?
Of course—pressing the dough and sandwiching is perfect for little hands.
Conclusion
There’s something magical about recreating a beloved classic from scratch. These Homemade Nutter Butters are not only a delightful blast from the past but also a delicious upgrade with tender cookies and a lusciously creamy center. Whether you’re making a batch for a special occasion or just because you’re craving something comforting and nostalgic, this recipe is worth every bite.