
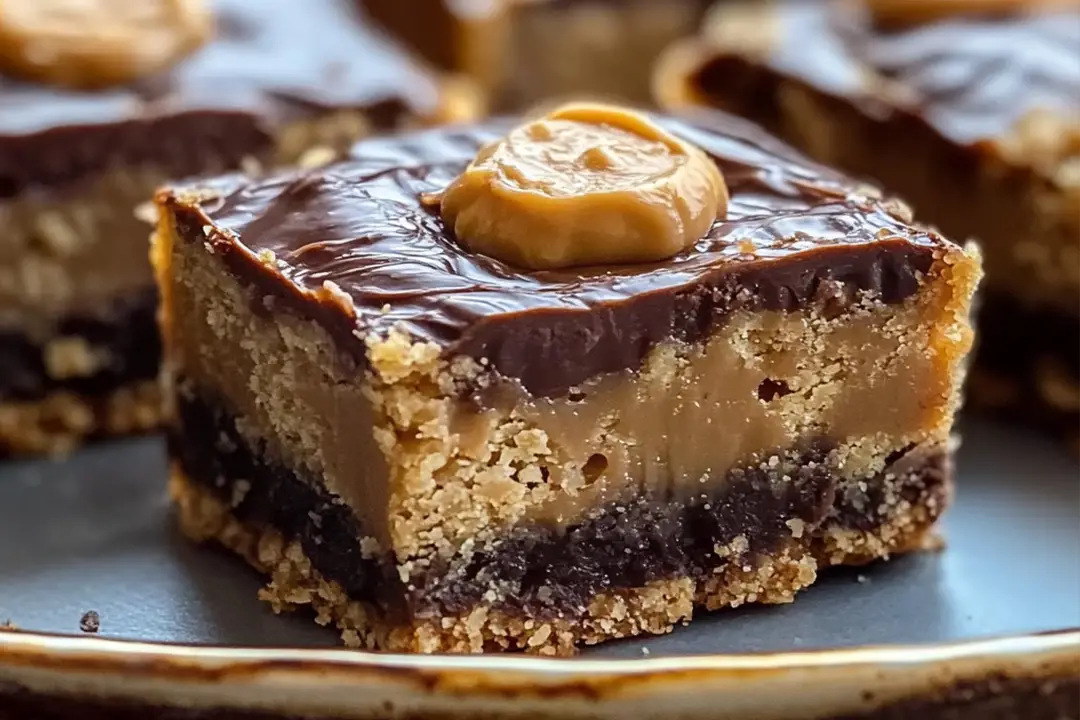
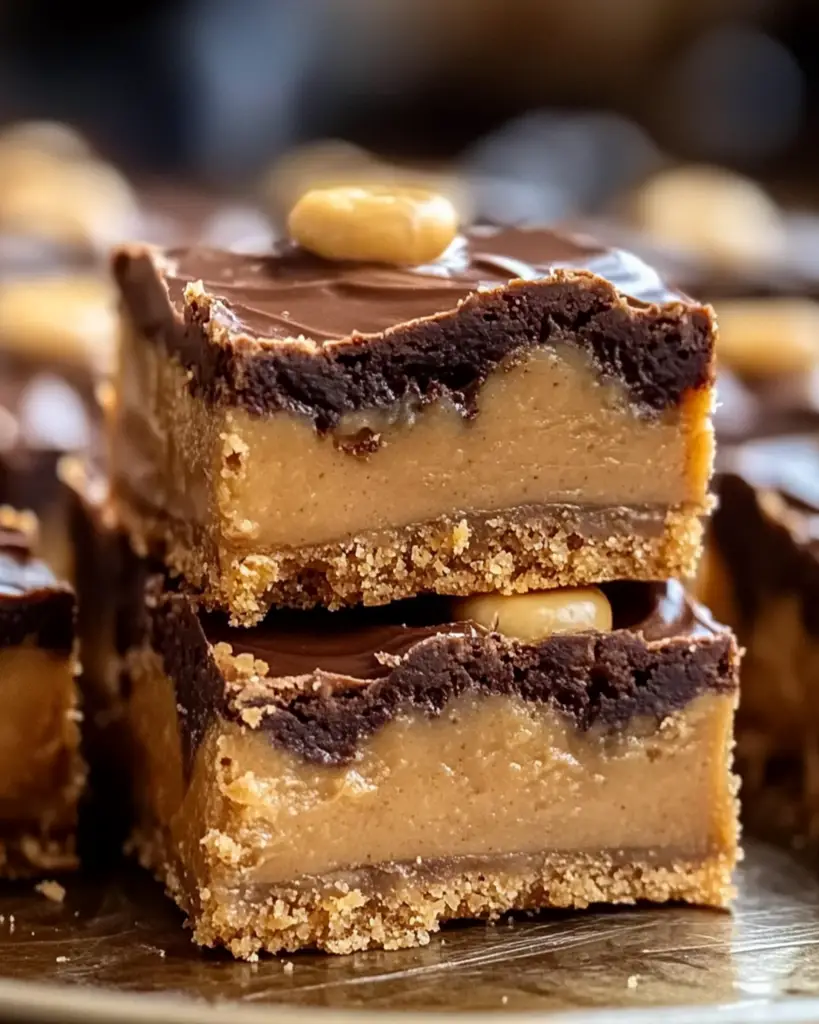
These Peanut Butter Blossom Bars are pure joy in dessert form. Imagine sinking your teeth into a soft, chewy peanut butter base crowned with a perfectly melted chocolate kiss. It’s like a warm hug from your favorite childhood treat, but in bar form! Trust me, this recipe is a game-changer, whether you’re baking for a party, a holiday tray, or just because you need something sweet after a long day. Let’s dive in and create some delicious memories, shall we?
Why You’ll Love Peanut Butter Blossom Bars
This recipe isn’t just about the ingredients—it’s about creating moments. Whether you’re baking for a casual family gathering, a holiday celebration, or just indulging in some peanut buttery goodness for yourself, this dish is versatile enough to fit the occasion. Here’s why it’s a favorite:
- Versatile: Perfect for holiday cookie swaps, potlucks, or as a quick treat to share with friends. These bars will be a hit no matter where you take them.
- Budget-Friendly: Uses pantry staples like peanut butter, sugar, and eggs. No need for fancy ingredients—this recipe proves that simple can be extraordinary.
- Quick and Easy: Straightforward steps and minimal prep make it beginner-friendly. Even if you’re not an experienced baker, you’ll nail this recipe.
- Customizable: Add a sprinkle of sea salt, drizzle of caramel, or even use dark chocolate kisses for a twist. Make it your own!
- Crowd-Pleasing: A guaranteed hit with kids and adults alike. It’s the kind of dessert that disappears before you know it.
Ingredients in Peanut Butter Blossom Bars
Here’s the magic of these bars—they’re made with just a few simple ingredients, but the result is so much more than the sum of its parts. Let’s break it down:
- Peanut Butter: The star ingredient, giving these bars their rich, nutty flavor. Go for smooth or crunchy, depending on your texture preference.
- Butter: Adds a luscious, melt-in-your-mouth quality to the bars.
- Granulated Sugar: Sweetens the bars while helping to create that iconic chewy texture.
- Brown Sugar: Adds depth and a caramel-like note that complements the peanut butter beautifully.
- Eggs: Help bind everything together for a perfectly soft and chewy bar.
- Vanilla Extract: Enhances the overall flavor with its warm, aromatic notes.
- All-Purpose Flour: The base that holds everything together.
- Baking Soda: Ensures the bars rise just enough for that perfect texture.
- Chocolate Kisses: The iconic topping that makes these bars irresistible.
(Note: The full ingredients list, including measurements, is provided in the recipe card directly below.)
Instructions
Let’s dive into the steps to create this flavorful masterpiece:
- Preheat Your Oven: Start by preheating your oven to [temperature]. This ensures even baking and a perfectly golden finish.
- Prepare Your Baking Dish: Line a baking dish with parchment paper or grease it lightly. This will make removing the bars a breeze.
- Make the Dough: In a large mixing bowl, cream together the peanut butter, butter, granulated sugar, and brown sugar until light and fluffy. Beat in the eggs and vanilla extract until smooth. Gradually add the flour and baking soda, mixing until just combined.
- Assemble the Bars: Spread the dough evenly into the prepared baking dish, smoothing the top with a spatula. Bake for [time] or until the edges are golden and the center is set.
- Add the Chocolate Kisses: While the bars are still warm, gently press a chocolate kiss into the center of each square. The residual heat will soften the chocolate slightly, creating that iconic glossy finish.
- Cool to Set: Allow the bars to cool completely in the pan before slicing into squares. This step ensures clean cuts and perfect presentation.
- Serve and Enjoy: Plate them up and watch them disappear. These bars are perfect on their own or with a glass of cold milk.
Nutrition Facts
- Servings: 36
- Calories per serving: 150
Preparation Time
- Prep Time: 15 minutes
- Cook Time: 20 minutes
- Total Time: 45 minutes
How to Serve Peanut Butter Blossom Bars
These bars are a showstopper on their own, but here are some ideas to elevate your presentation:
- Drizzle with Chocolate: Melt some additional chocolate and drizzle it over the bars for extra decadence.
- Pair with Ice Cream: Serve with a scoop of vanilla ice cream for a dreamy dessert pairing.
- Add a Sprinkle of Sea Salt: A pinch of flaky sea salt on top enhances the sweet and nutty flavors.
- Festive Touch: Decorate with holiday-themed sprinkles for a seasonal twist.
Additional Tips
Here are some extra tips to help you get the most out of this recipe:
- Prep Ahead: Make the dough in advance and refrigerate it for up to 24 hours. Bake when you’re ready for fresh bars.
- Dietary Adjustments: Swap regular flour for gluten-free flour to make this recipe gluten-free. Use dairy-free butter and chocolate for a vegan option.
- Storage Tips: Store leftovers in an airtight container at room temperature for up to 3 days. For longer storage, freeze the bars for up to 1 month.
- Double the Batch: These bars are so popular, you might want to make a double batch from the start. They freeze beautifully, so you’ll always have a treat on hand.
FAQ Section
Q1: Can I use a different type of nut butter?
A1: Absolutely! Almond butter or sunflower seed butter works wonderfully as alternatives, though the flavor will be slightly different.
Q2: Can I make this recipe ahead of time?
A2: Yes! You can bake the bars a day in advance and store them in an airtight container. Add the chocolate kisses just before serving for the freshest look.
Q3: How do I store leftovers?
A3: Store leftovers at room temperature in an airtight container for up to 3 days. For longer storage, freeze and thaw as needed.
Q4: Can I freeze these bars?
A4: Yes! Wrap them tightly in plastic wrap and store in a freezer-safe bag for up to 1 month. Thaw at room temperature before serving.
Q5: What’s the best way to cut clean squares?
A5: Use a sharp knife dipped in warm water, wiping it clean between cuts for sharp, even edges.
Q6: Can I use mini chocolate kisses or chips?
A6: Definitely! Mini kisses or chocolate chips work well for smaller bars or a different texture.
Q7: Can I make this recipe without eggs?
A7: Yes! Use an egg substitute like flax eggs or applesauce for an egg-free version.
Q8: What’s the best way to soften butter quickly?
A8: Cut the butter into small cubes and let it sit at room temperature for about 10 minutes, or microwave it in short bursts at low power.
Q9: Can I add mix-ins to the dough?
A9: Absolutely! Try adding chopped peanuts, chocolate chips, or even toffee bits for extra flavor and texture.
Q10: Can I double this recipe for a larger crowd?
A10: Yes! Use a larger baking dish and adjust the baking time slightly. Keep an eye on the bars to ensure they don’t overbake.
Conclusion
And there you have it—Peanut Butter Blossom Bars, your new go-to treat for any occasion. They’re easy to make, endlessly customizable, and absolutely irresistible. So, grab your apron, preheat that oven, and get ready to bake up some magic. Happy baking!
Print
Peanut Butter Blossom Bars
- Prep Time: 15 minutes
- Cook Time: 20 minutes
- Total Time: 45 minutes
- Yield: 36 bars 1x
- Category: Dessert
- Method: Baking
- Cuisine: American
- Diet: Vegetarian
Description
Discover the deliciousness of these Peanut Butter Blossom Bars! Soft, chewy, and perfectly decadent, each bite is topped with a rich Hershey’s Kiss for the ultimate treat. Perfect for parties or just because!
Ingredients
- 1 cup creamy peanut butter
- 1 cup unsalted butter, softened
- 1 cup granulated sugar
- 1 large egg
- 1 tsp vanilla extract
- 2 cups all-purpose flour
- 1 tsp baking soda
- 1/2 tsp salt
- 1/4 cup milk
- For the Topping:*
- 36 Hershey’s Kisses, unwrapped
Instructions
Prepare the Cookie Bars:
- Preheat the oven to 350°F (175°C). Grease a 9×13-inch baking pan or line it with parchment paper.
- In a large mixing bowl, beat together the peanut butter, butter, and granulated sugar until light and fluffy (about 2-3 minutes).
- Add the egg and vanilla extract, beating until combined.
- In another bowl, whisk together the flour, baking soda, and salt. Gradually mix this into the wet ingredients until fully incorporated.
- Slowly add the milk and stir until the dough comes together. The dough should be thick but spreadable.
- Spread the cookie dough into the prepared baking pan, smoothing the top with a spatula.
- Bake the Bars:
- Bake in the preheated oven for 18-20 minutes, or until golden brown and a toothpick inserted in the center comes out clean.
- Allow to cool in the pan for 10-15 minutes. While cooling, unwrap the Hershey’s Kisses.
- Add the Topping:
- Once the bars are slightly cooled but still warm, gently press one Hershey’s Kiss into the center of each bar, securing it lightly.
- Let the bars cool completely in the pan before slicing into squares.
- Serve and Enjoy:
- Slice the bars into squares and serve. Enjoy the chewy peanut butter goodness paired with the melty chocolate center!
Notes
- Add-ins: Add chopped peanuts or chocolate chips to the dough for extra crunch.
- Chocolate Options: Substitute with milk chocolate, dark chocolate kisses, or Peanut Butter Kisses for variety!
- Storage: Keep in an airtight container at room temperature for up to 1 week or refrigerate for longer storage.
Nutrition
- Serving Size: 1 bar
- Calories: 150
- Sugar: 10g
- Sodium: 120mg
- Fat: 8g
- Saturated Fat: 4g
- Unsaturated Fat: 3g
- Trans Fat: 0g
- Carbohydrates: 16g
- Fiber: 1g
- Protein: 3g
- Cholesterol: 15mg