
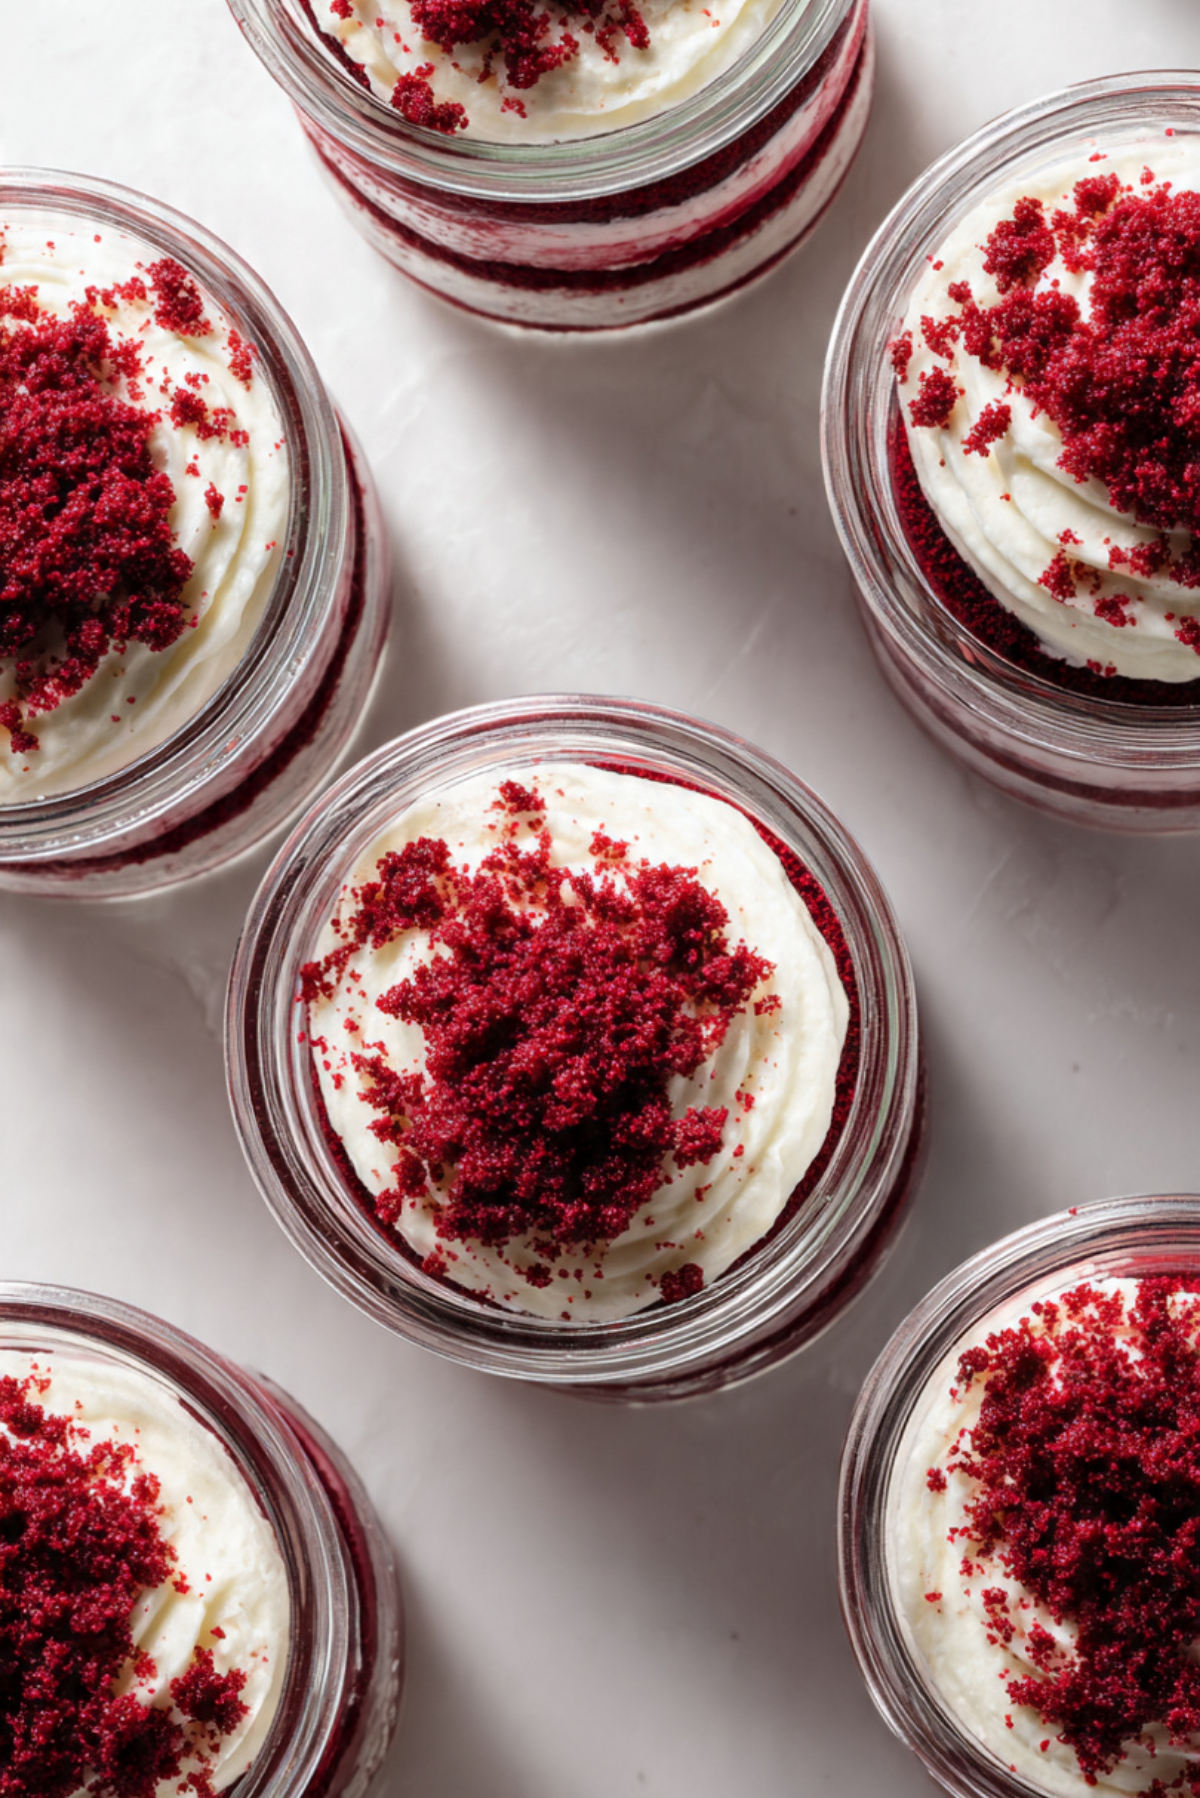
Layered, luscious, and completely irresistible, Red Velvet Jar Cakes are the dessert equivalent of love at first bite. With their striking red layers of moist cake and swirls of creamy frosting, all tucked neatly inside glass jars, they’re as stunning to look at as they are indulgent to eat. Whether you’re prepping for a party, gifting something sweet, or just treating yourself, these jar cakes are a total win.
Behind the Recipe
It all started with a leftover batch of red velvet cupcakes and a stack of empty mason jars. Instead of frosting each cupcake, I crumbled them up, added a few spoonfuls of cream cheese frosting, and stacked them into jars. What came out was pure magic—a portable, no-mess dessert that looked fancy without the fuss. From that moment on, jar cakes became my go-to for sweet celebrations and cozy nights in.
Recipe Origin or Trivia
Red velvet cake is believed to have Southern American roots, originally made with natural cocoa and vinegar that gave it a reddish hue before food coloring came into play. It gained popularity in the mid-20th century and has remained a bakery staple ever since. Jar cakes, on the other hand, are a modern twist—born from the need for portable, giftable desserts with a wow factor. The combo? A perfect harmony of nostalgia and trendiness.
Why You’ll Love Red Velvet Jar Cake
These jar cakes don’t just look good—they deliver on every level. Here’s why they’re sure to become a favorite:
Versatile: Great for parties, picnics, gifts, or individual treats.
Budget-Friendly: Uses pantry staples and simple ingredients.
Quick and Easy: Bake, layer, and go—no elaborate decorating needed.
Customizable: Swap in different frostings or fillings to mix things up.
Crowd-Pleasing: Everyone loves the rich flavor and stunning presentation.
Make-Ahead Friendly: Store well in the fridge and taste even better the next day.
Great for Leftovers: Perfect way to repurpose extra cake or frosting.
Chef’s Pro Tips for Perfect Results
These tips will help you get flawless, bakery-worthy jars every time:
- Use even layers: Spoon in measured amounts for that picture-perfect look.
- Let the cake cool fully: Warm cake will melt your frosting and make things messy.
- Pipe the frosting: A zip-top bag with the corner snipped gives clean, controlled layers.
- Use wide-mouth jars: Easier to fill, easier to eat.
- Chill before serving: Helps flavors meld and gives a firmer, more satisfying texture.
Kitchen Tools You’ll Need
No fancy gadgets required, just a few everyday tools:
- Mixing Bowls: For batter and frosting prep.
- Electric Mixer: To make the batter and whip up the frosting.
- Baking Pan: A standard 9×13-inch pan works well.
- Cooling Rack: To let the cake cool completely.
- Mason Jars (8 oz): Perfect size for individual servings.
- Piping Bag or Zip-Top Bag: For neat frosting layers.
- Spatula or Spoon: For assembling and smoothing layers.
Ingredients in Red Velvet Jar Cake
These classic ingredients come together for rich flavor, vibrant color, and creamy indulgence:
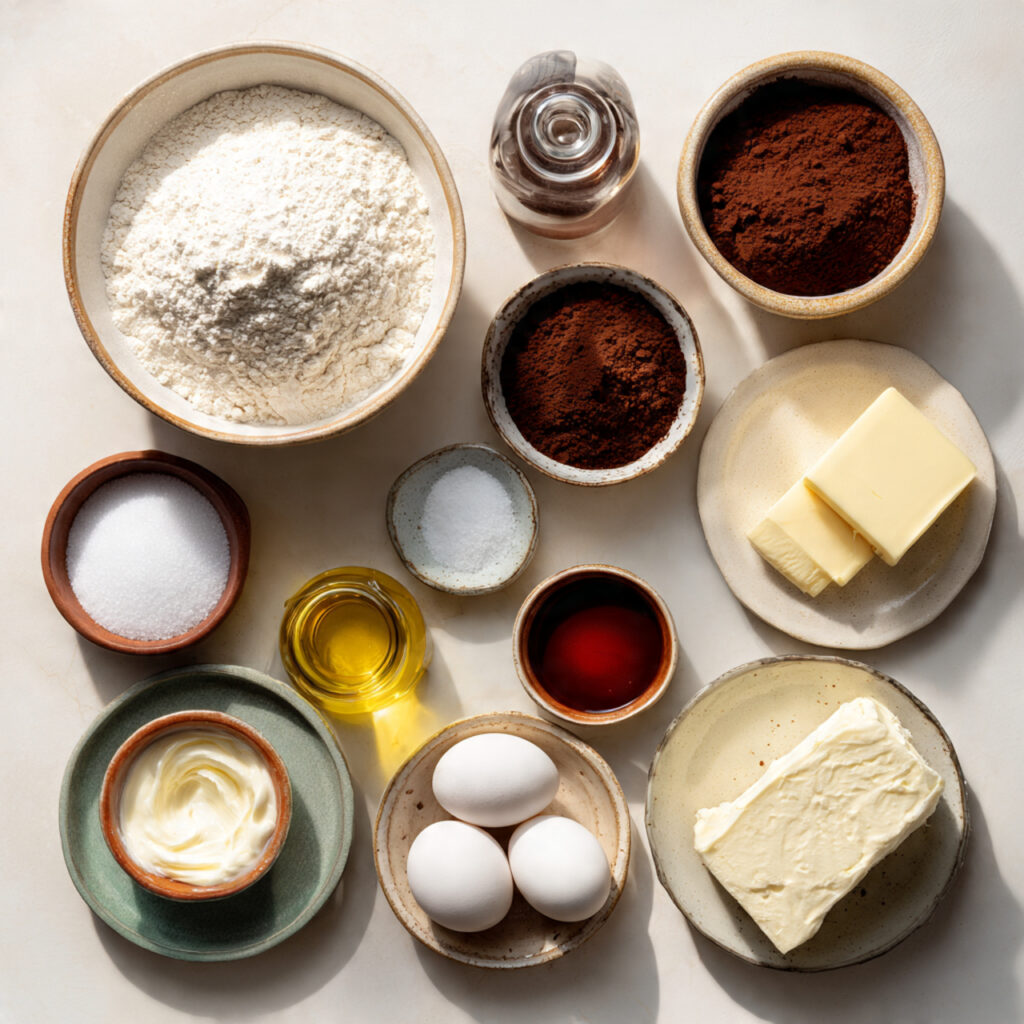
- All-Purpose Flour: 2 ½ cups, provides structure and softness.
- Granulated Sugar: 1 ½ cups, for sweetness and moisture.
- Unsweetened Cocoa Powder: 2 tablespoons, gives a mild chocolatey depth.
- Baking Soda: 1 teaspoon, helps the cake rise.
- Salt: ½ teaspoon, balances the sweetness.
- Buttermilk: 1 cup, adds tang and tenderness.
- Vegetable Oil: 1 cup, keeps the cake moist.
- Eggs: 2 large, for structure and richness.
- Red Food Coloring: 1 tablespoon, for that signature red hue.
- Vanilla Extract: 2 teaspoons, enhances the flavor.
- White Vinegar: 1 teaspoon, reacts with baking soda for lift.
- Cream Cheese: 8 oz (softened), base for the frosting.
- Butter: ½ cup (softened), adds richness to the frosting.
- Powdered Sugar: 3 cups, for sweetness and texture in the frosting.
- Vanilla Extract (for frosting): 1 teaspoon, ties it all together.
Ingredient Substitutions
Make it work with what you have:
Buttermilk: Substitute with milk + 1 tablespoon vinegar or lemon juice.
Vegetable Oil: Use canola oil or melted coconut oil.
Red Food Coloring: Beet juice or natural food dye can be used for a cleaner option.
Cream Cheese: Use mascarpone or a dairy-free alternative if needed.
Butter: Margarine or plant-based butter works fine in the frosting.
Ingredient Spotlight
Buttermilk: This adds that essential tangy flavor and also keeps the crumb tender. It’s the unsung hero in most red velvet cakes.
Cream Cheese: Tangy, creamy, and just the right amount of rich—it’s the frosting that makes red velvet truly iconic.
Instructions for Making Red Velvet Jar Cake
This is where the fun begins. Let’s build these gorgeous layered jars step by step:
- Preheat Your Equipment: Preheat your oven to 350°F. Grease and flour a 9×13-inch baking pan.
- Combine Ingredients: In a bowl, whisk together flour, cocoa powder, baking soda, and salt. In another bowl, beat sugar, oil, eggs, food coloring, vanilla, vinegar, and buttermilk until smooth. Gradually add dry ingredients to wet, mixing just until combined.
- Prepare Your Cooking Vessel: Pour batter into prepared pan and smooth the top. Bake for 30–35 minutes or until a toothpick comes out clean. Cool completely on a wire rack.
- Assemble the Dish: While cake cools, beat cream cheese and butter until fluffy. Add powdered sugar gradually, then vanilla. Mix until smooth.
- Cook to Perfection: Once cake is cool, cut into small pieces or crumble. Pipe or spoon frosting into the bottom of each jar, then add a layer of cake. Repeat layers until jars are full, ending with frosting.
- Finishing Touches: Sprinkle cake crumbs or red sprinkles on top. Chill for 30 minutes to set if desired.
- Serve and Enjoy: Serve with a spoon and enjoy straight from the jar!
Texture & Flavor Secrets
The combination of velvety cake and fluffy frosting creates layers of texture—moist and airy, creamy and tangy. Each spoonful is soft but with just enough body to make every bite deeply satisfying. Chilling the jars enhances the flavor and gives it that dreamy, bakery-fresh feel.
Cooking Tips & Tricks
Make the most of your jar cakes with these helpful tips:
- Bake the cake a day ahead for easier crumbling and cooler layers.
- Use a piping bag for cleaner lines and neater layers.
- Keep frosting slightly chilled before layering to hold its shape.
- Try using different sized jars for variety.
What to Avoid
Avoid these easy mistakes for best results:
- Overmixing the batter: Leads to a dense cake.
- Hot cake with frosting: Melted frosting = mess.
- Too much food coloring: Can turn bitter—stick to the suggested amount.
- Underfilled jars: Fill jars neatly to just below the rim for best look and portion.
Nutrition Facts
Servings: 8 jars
Calories per serving: 450
Note: These are approximate values.
Preparation Time
Prep Time: 25 minutes
Cook Time: 35 minutes
Total Time: 1 hour
Make-Ahead and Storage Tips
These jars store beautifully in the fridge for up to 5 days. Just seal the lids and chill. You can also freeze the unfrosted cake pieces, then assemble fresh later. Great for prepping a day or two ahead of a party or event.
How to Serve Red Velvet Jar Cake
Serve straight from the jar with a spoon—no plates needed. Add a ribbon around the jar and a label for a beautiful edible gift. You can also pop them into a picnic basket or pack them for a road trip dessert treat.
Creative Leftover Transformations
Extra cake or frosting? Here’s how to make them shine:
- Roll cake and frosting into truffles, chill, and coat in chocolate.
- Layer leftovers in a bowl for an impromptu trifle.
- Spread on toast or cookies for a cheeky dessert sandwich.
Additional Tips
- Use a serrated knife to slice the cake cleanly for neat layers.
- Add a surprise center layer—jam, chocolate chips, or marshmallow fluff.
- Decorate jar tops with edible glitter or mini heart sprinkles for holidays.
Make It a Showstopper
Stack the jars on a cake stand or rustic wooden board. Tie ribbons or attach mini spoons with twine. Add a small tag with the name and flavor for parties or events. Use see-through jars so the beautiful layers really pop.
Variations to Try
- Chocolate Red Velvet: Add a tablespoon of melted dark chocolate to the batter.
- Berry Swirl: Layer with raspberry jam or macerated strawberries.
- Cookies & Cream: Add crushed chocolate cookies between layers.
- Nutty Delight: Sprinkle chopped pecans or walnuts in each layer.
- Mini Mocha: Add a hint of espresso powder to the batter or frosting.
FAQ’s
Q1: Can I use store-bought cake?
Yes, store-bought red velvet cake works great for a shortcut.
Q2: Do I have to use jars?
Nope! Use clear cups, glasses, or even plastic containers.
Q3: How long do they last?
Up to 5 days in the fridge, tightly sealed.
Q4: Can I freeze the jars?
It’s best to freeze the cake only. Assemble jars fresh for best texture.
Q5: Can I make it dairy-free?
Yes, use plant-based milk, vegan cream cheese, and dairy-free butter.
Q6: Do I need to use food coloring?
It’s optional. You’ll still get a tasty cake without the red hue.
Q7: What size jar is best?
8 oz mason jars are perfect for individual servings.
Q8: Can I make it gluten-free?
Yes, use a gluten-free flour blend designed for baking.
Q9: Can I make a big batch?
Absolutely. Double the recipe and use a sheet pan for easier baking.
Q10: Do I need to refrigerate them?
Yes, because of the cream cheese frosting.
Conclusion
Red Velvet Jar Cakes are everything you love about classic red velvet—in a fun, modern, and totally Instagram-worthy format. With layers of color, texture, and rich flavor, they’re perfect for gifting, celebrating, or sneaking a spoonful when no one’s looking. Trust me, these little jars will steal the show.
Print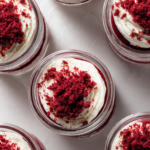
Red Velvet Jar Cake
- Prep Time: 25 minutes
- Cook Time: 35 minutes
- Total Time: 1 hour
- Yield: 8 servings 1x
- Category: Dessert
- Method: Baking
- Cuisine: American
- Diet: Vegetarian
Description
These Red Velvet Jar Cakes are a beautiful, portable dessert layered with moist red velvet cake and creamy cream cheese frosting. Perfect for parties, gifting, or an indulgent treat.
Ingredients
- 2 ½ cups all-purpose flour
- 1 ½ cups granulated sugar
- 2 tablespoons unsweetened cocoa powder
- 1 teaspoon baking soda
- ½ teaspoon salt
- 1 cup buttermilk
- 1 cup vegetable oil
- 2 large eggs
- 1 tablespoon red food coloring
- 2 teaspoons vanilla extract
- 1 teaspoon white vinegar
- 8 oz cream cheese, softened
- ½ cup butter, softened
- 3 cups powdered sugar
- 1 teaspoon vanilla extract (for frosting)
- 8 mason jars (8 oz size)
Instructions
- Preheat oven to 350°F. Grease and flour a 9×13-inch baking pan.
- In a bowl, whisk together flour, cocoa, baking soda, and salt.
- In a separate bowl, beat sugar, oil, eggs, food coloring, vanilla, vinegar, and buttermilk until smooth.
- Gradually add dry ingredients to wet, mixing until just combined.
- Pour batter into prepared pan and bake for 30–35 minutes or until a toothpick comes out clean.
- Cool completely on a wire rack. Once cooled, crumble or cut the cake into small pieces.
- Beat cream cheese and butter until fluffy. Add powdered sugar gradually and beat until smooth. Stir in vanilla extract.
- Layer frosting and cake pieces alternately into jars, ending with a layer of frosting.
- Top with cake crumbs or sprinkles. Chill for 30 minutes before serving.
Notes
- Cool cake completely before layering to avoid melting the frosting.
- Use a piping bag for neater frosting layers.
- Jars can be made ahead and stored in the fridge for up to 5 days.
- Customize layers with jam, chocolate chips, or nuts for variety.
Nutrition
- Serving Size: 1 jar
- Calories: 450
- Sugar: 38g
- Sodium: 270mg
- Fat: 24g
- Saturated Fat: 10g
- Unsaturated Fat: 12g
- Trans Fat: 0g
- Carbohydrates: 54g
- Fiber: 1g
- Protein: 4g
- Cholesterol: 55mg