
Oh, my dear friend, get ready to have your taste buds do a happy dance with these Stuffed Cheesecake Fried Apple Pies! Picture this: a golden, flaky crust hugging a warm, cinnamon-spiced apple filling, with a creamy, dreamy cheesecake surprise tucked inside. It’s like an apple pie and a cheesecake decided to elope and create the ultimate handheld dessert. These pies are crispy, gooey, and bursting with fall flavors that’ll make your kitchen smell like a cozy autumn dream. Perfect for sharing (or not— I won’t judge!), these treats are about to steal the show at your next gathering. Let’s dive into this indulgent, fry-tastic adventure!
Why You’ll Love Stuffed Cheesecake Fried Apple Pies
These pies aren’t just dessert—they’re a love letter to comfort food. Here’s why they’re going to be your new obsession:
Versatile: Perfect for cozy nights in, holiday parties, or impressing your picnic crew. They’re portable, so you can take them anywhere—think tailgates or potlucks!
Budget-Friendly: Made with pantry staples and a few fresh apples, these pies prove you don’t need fancy ingredients to create something extraordinary.
Quick and Easy: The steps are simple, and even if you’re not a pro in the kitchen, you’ll feel like one when you bite into these beauties.
Customizable: Swap apples for pears, tweak the spices, or drizzle with caramel—make them your own!
Crowd-Pleasing: From kids to grandparents, everyone will be begging for seconds. These pies are a universal hug in dessert form.

(Note: the full ingredients list, including measurements, is provided in the recipe card above.)
Ingredients
These pies are a symphony of simple ingredients that come together for pure magic. Here’s the lineup:
Apples
The star of the show! Granny Smith apples bring a tart zing that balances the sweet cheesecake, while Honeycrisp adds a touch of sweetness. They cook down into a tender, juicy filling that screams fall. Peel and dice them small for the perfect texture.
Cream Cheese
The creamy heart of the cheesecake filling. Softened cream cheese whips up into a velvety base that’s rich but not too heavy. It’s the secret weapon that makes every bite irresistible.
Pie Crust
Your flaky, buttery canvas. Use store-bought for convenience (Pillsbury is a champ) or go homemade for extra love. Either way, it’s the crispy shell that holds all the goodness together.
Sugar
Granulated sugar sweetens the cheesecake filling, while brown sugar in the apple filling adds a warm, caramel-like depth. It’s all about that cozy sweetness.
Cinnamon
The warm, spicy soul of the apple filling. A pinch of cinnamon transforms the apples into a classic pie flavor that’ll make your kitchen smell like a bakery.
Butter
A little melted butter in the apple filling adds richness and helps create that luscious, saucy texture. Use unsalted to control the flavor.
Vanilla Extract
A splash in the cheesecake filling elevates it with a subtle, aromatic sweetness. Pure vanilla extract is the way to go for the best flavor.
Egg
An egg wash gives the pies that gorgeous golden shine when fried. It’s the finishing touch for picture-perfect pies.
Vegetable Oil
For frying! It creates that crispy, golden crust that makes these pies so addictive. Canola oil works too if that’s what you have.
Instructions
Let’s roll up our sleeves and make these heavenly pies. Here’s how to bring them to life:
Prepare the Apple Filling
Peel and dice your apples into small ½-inch cubes. In a medium saucepan, melt butter over medium heat, then add apples, brown sugar, cinnamon, and a splash of water. Cook for 8–10 minutes, stirring occasionally, until the apples are tender and the sauce is thickened. Set aside to cool completely—nobody wants a melty mess!
Make the Cheesecake Filling
In a medium bowl, beat softened cream cheese with granulated sugar and vanilla extract until smooth and fluffy. This takes about 1–2 minutes with a hand mixer. Pop the filling in the fridge to chill while you prep the dough—it’ll be easier to work with.
Roll Out the Dough
On a lightly floured surface, roll out your pie crust to about ⅛-inch thickness. Use a 4-inch round cutter (or a glass) to cut out circles. Gather scraps, re-roll, and cut again—you should get about 10–12 circles from a double crust.
Assemble the Pies
Place a tablespoon of apple filling slightly off-center on each dough circle. Add a teaspoon of cheesecake filling on top of the apples. Brush the edges with a little water, fold the dough over to form a half-moon, and press the edges with a fork to seal tightly. No leaks allowed!
Fry the Pies
Heat 2 inches of vegetable oil in a deep skillet or Dutch oven to 350°F (175°C). Fry the pies in batches, 2–3 at a time, for 2–3 minutes per side until golden brown and crispy. Use a slotted spoon to transfer them to a paper towel-lined plate to drain excess oil.
Finishing Touches
Brush the warm pies with an egg wash (beaten egg with a splash of water) for a glossy finish, or dust with powdered sugar for extra sweetness. Let them cool slightly—hot filling can burn!
Serve and Enjoy
Serve these babies warm for maximum gooeyness, or let them cool to room temperature for a firmer bite. Either way, they’re pure bliss!
Nutrition Facts
Servings: 10–12 pies
Calories per serving: 320–350 kcal
Total Carbs: 35–40g
Net Carbs: 33–38g
Protein: 4–5g
Fat: 18–20g
Preparation Time
Prep Time: 20 minutes
Cook Time: 20 minutes
Total Time: 40 minutes
How to Serve Stuffed Cheesecake Fried Apple Pies
These pies are a star on their own, but here’s how to make them shine even brighter:
With Ice Cream: Pair with a scoop of vanilla ice cream for a classic pie à la mode experience. The cold creaminess against the warm pie is perfection.
Caramel Drizzle: Drizzle with homemade or store-bought caramel sauce for a decadent touch. It’s like a caramel apple in pie form!
Whipped Cream: A dollop of whipped cream adds a light, fluffy contrast to the rich filling.
As a Dessert Platter: Serve alongside other fall treats like pumpkin cookies or cinnamon rolls for a show-stopping dessert spread.
On the Go: Wrap in parchment for a portable treat—perfect for picnics, lunchboxes, or road trips.
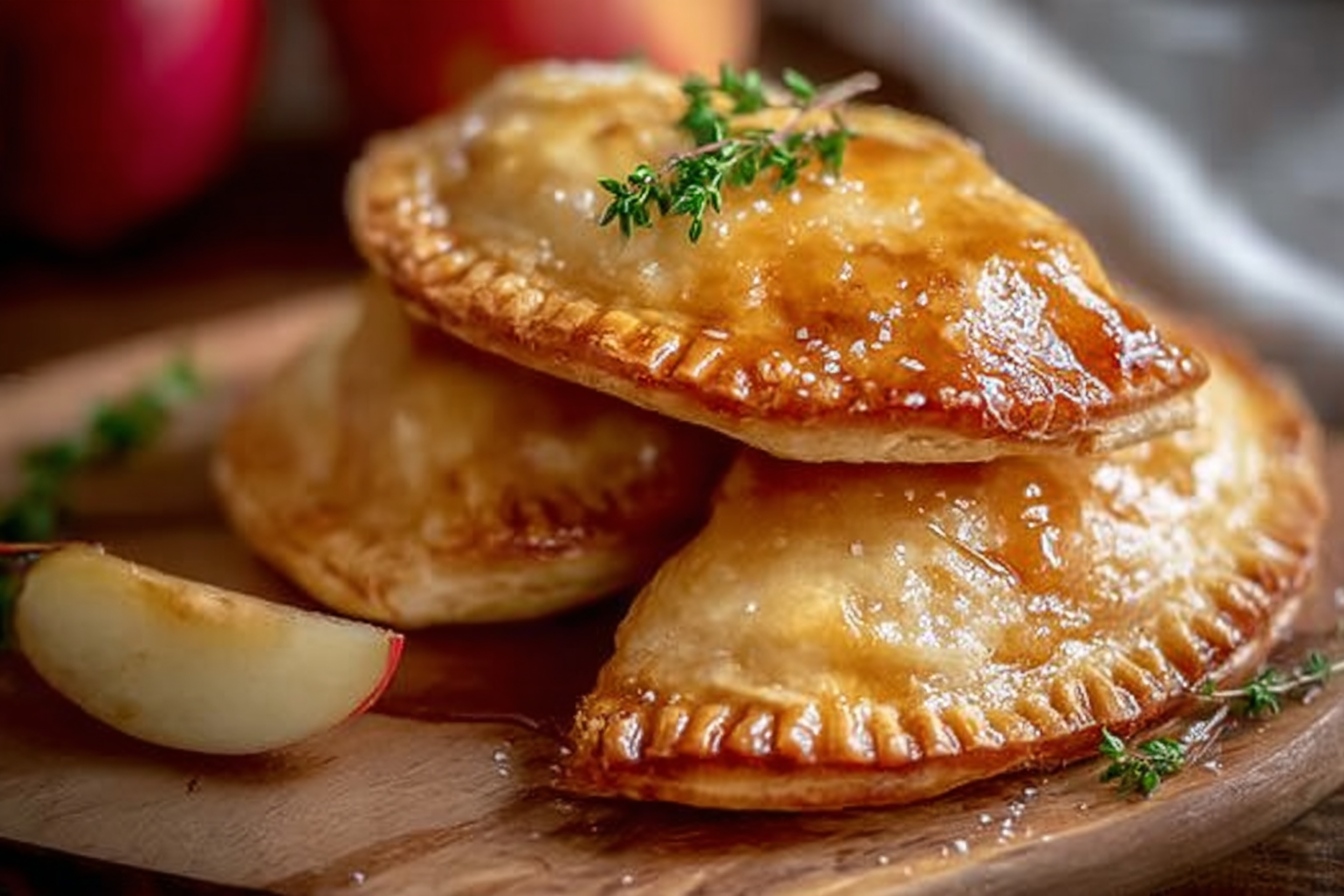
Presentation is key! Arrange the pies on a rustic wooden board or a pretty platter, and sprinkle with powdered sugar for that bakery vibe. A few apple slices or cinnamon sticks as garnish make it Instagram-worthy.
Additional Tips
Here’s how to nail these pies every time:
Prep Ahead: Make the apple and cheesecake fillings a day in advance and store in the fridge. Assemble and fry when ready for fresh, hot pies.
Spice It Up: Add a pinch of nutmeg or ginger to the apple filling for extra warmth.
Dietary Adjustments: Use gluten-free pie crust for a GF version, or swap cream cheese for a dairy-free alternative if needed.
Storage Tips: Store cooled pies in an airtight container in the fridge for up to 3 days. Reheat in a 350°F oven for 5–7 minutes to restore crispiness.
Double the Batch: These freeze beautifully! Freeze unfried pies on a baking sheet, then transfer to a freezer bag for up to 2 months. Fry from frozen, adding an extra minute or two.
FAQ Section
Q1: Can I use canned apple pie filling instead of homemade?
A1: Totally! It’s a great shortcut. Just drain excess liquid to avoid soggy pies.
Q2: Can I make these pies ahead of time?
A2: Yes! Assemble the pies, refrigerate for up to a day, then fry when ready. Or freeze unfried pies for later.
Q3: How do I store leftovers?
A3: Keep in an airtight container in the fridge for up to 3 days. Reheat in the oven to keep the crust crispy.
Q4: Can I freeze these pies?
A4: Absolutely! Freeze unfried pies in a single layer, then store in a freezer bag for up to 2 months. Fry straight from frozen.
Q5: What’s the best way to reheat these pies?
A5: Pop them in a 350°F oven for 5–7 minutes. Microwaving can make the crust soggy.
Q6: Can I double the recipe?
A6: Yes! Double the ingredients and make sure you have enough oil and space to fry in batches.
Q7: Can I bake these instead of frying?
A7: Sure! Brush with egg wash and bake at 375°F for 15–20 minutes until golden. They won’t be as crispy but still delicious.
Q8: What apples are best for this recipe?
A8: Granny Smith for tartness or Honeycrisp for sweetness. A mix of both is amazing!
Q9: Can I use puff pastry instead of pie crust?
A9: Yep! Puff pastry will give a flakier, lighter texture. Cut and seal the same way.
Q10: Why did my pies leak during frying?
A10: Overfilling or not sealing the edges tightly can cause leaks. Use less filling and press firmly with a fork.
Conclusion
These Stuffed Cheesecake Fried Apple Pies are the ultimate indulgence—a crispy, golden hug filled with warm apples and creamy cheesecake that’ll make your heart sing. They’re surprisingly easy to whip up, endlessly customizable, and guaranteed to bring smiles to every face at the table. Whether you’re frying up a batch for a holiday feast or sneaking one as a midnight snack, these pies are pure comfort food magic. So grab your apples, fire up that skillet, and let’s make some dessert memories. You’re going to love every crunchy, gooey bite!
Print
Stuffed Cheesecake Fried Apple Pies
- Prep Time: 15 minutes
- Cook Time: 10 minutes
- Total Time: 25 minutes
- Yield: 6–8 pies 1x
- Category: Dessert
- Method: Frying
- Cuisine: American
- Diet: Vegetarian
Description
A delightful fusion of creamy cheesecake and sweet apple pie filling encased in a golden, crispy fried crust, offering a delectable treat for dessert enthusiasts and a standout addition to any gathering.
Ingredients
- 1 cup apple pie filling (chopped small)
- ½ cup cream cheese, softened
- 2 tbsp powdered sugar
- ½ tsp cinnamon
- 1 package refrigerated pie dough (or biscuit dough)
- Oil for frying
- Optional: caramel sauce or powdered sugar for topping
Instructions
- Mix cream cheese with powdered sugar and set aside.
- Roll out dough and cut into 4–6 inch circles.
- Spoon 1 tsp cheesecake filling + 1 tbsp apple filling into each circle.
- Fold dough over to form a half-moon and crimp edges with a fork.
- Heat oil to 350°F (175°C) in a deep skillet or fryer.
- Fry pies 2–3 minutes per side until golden brown.
- Drain on paper towels and top with powdered sugar or drizzle with caramel.
Notes
- Chill pies before frying to help them seal better.
- Air fry at 375°F for 8–10 mins if avoiding oil.
- Use canned crescent rolls if you don’t have pie dough.
Nutrition
- Serving Size: 1 pie
- Calories: 290
- Sugar: 20g
- Sodium: 150mg
- Fat: 15g
- Saturated Fat: 5g
- Unsaturated Fat: 8g
- Trans Fat: 0g
- Carbohydrates: 35g
- Fiber: 2g
- Protein: 3g
- Cholesterol: 20mg


