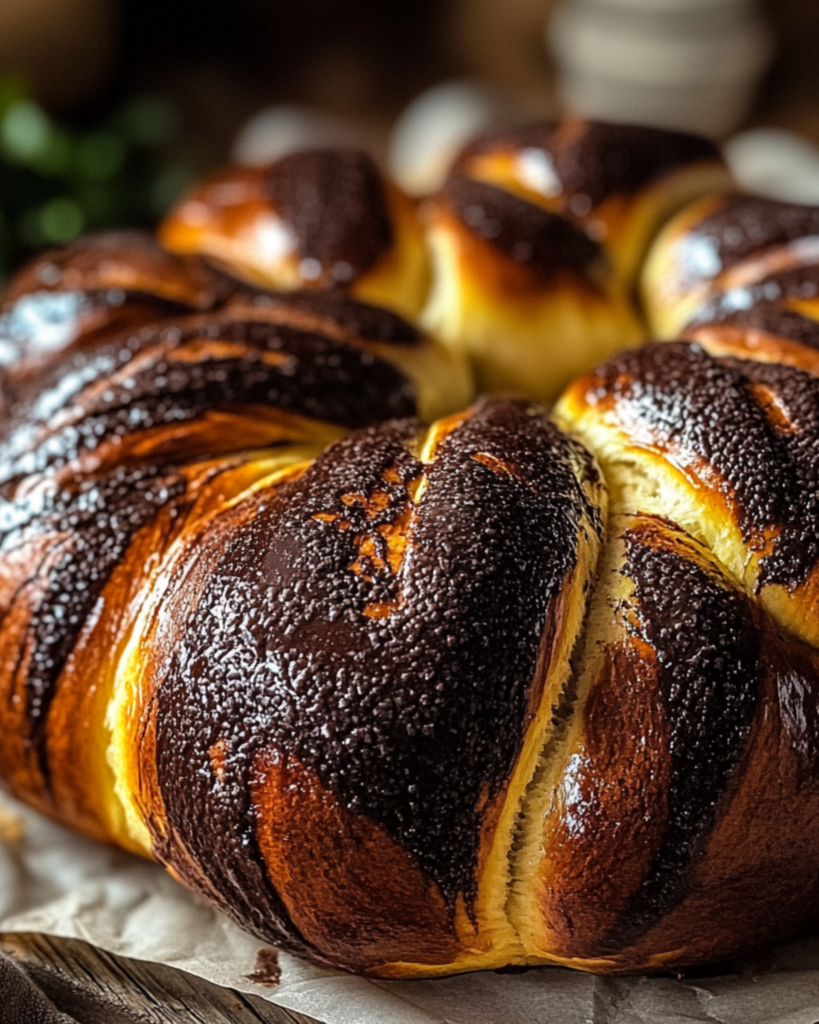
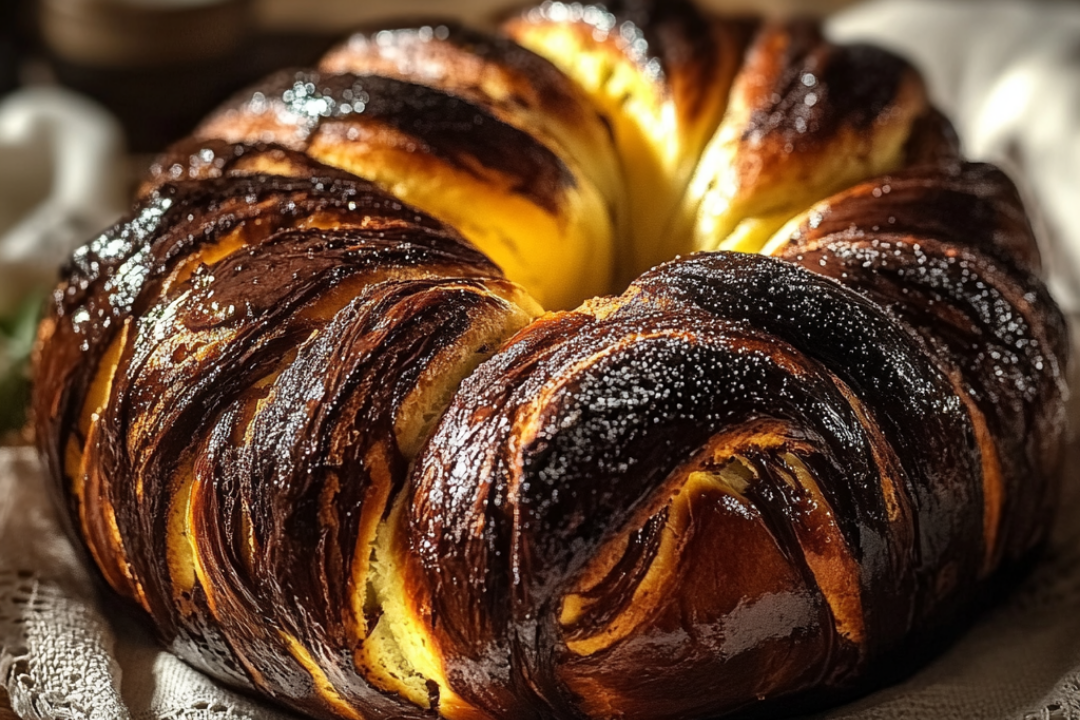
Okay, friends, brace yourselves—this Swirled Chocolate Challah Bread is about to become your new favorite thing to bake! Imagine soft, fluffy, pillowy bread with just the right amount of sweet, melty chocolate running through it. It’s a dream to make and even more of a dream to eat. Whether you’re savoring it warm out of the oven, or spreading a little butter on a slice for a cozy breakfast, trust me, you’ll be hooked. Plus, the swirl? It’s like a little surprise in every bite!
Why You’ll Love Swirled Chocolate Challah Bread
This recipe isn’t just about the ingredients—it’s about creating moments. Whether you’re baking for a family brunch, preparing something special for a holiday, or simply treating yourself on a lazy weekend, this bread is the ultimate comfort food. Here’s why it’s such a favorite:
Versatile: Perfect for a special occasion or a weekend treat, this bread is great for breakfast, dessert, or a snack with coffee. It also makes an unforgettable gift if you wrap it up in a cute package for a friend.
Budget-Friendly: Despite its decadent, bakery-worthy taste, this recipe is made with everyday pantry staples. No need to spend a fortune on fancy ingredients, just simple, affordable goodness!
Quick and Easy: This bread might look fancy, but it’s surprisingly straightforward to make. If you’re a beginner, don’t worry—this recipe is easy to follow, and the result will impress everyone.
Customizable: While this recipe is already pretty perfect, you can make it your own by adding different chocolate (dark, milk, or even white!), or experimenting with a hint of cinnamon or orange zest in the dough for a fun twist.
Crowd-Pleasing: Whether you’re sharing it with your family or bringing it to a gathering, this bread is always a hit. The swirls of chocolate make it look like a showstopper, and it tastes as good as it looks.

Ingredients
Here’s the magic of this Swirled Chocolate Challah Bread—simple ingredients that come together to make something absolutely irresistible. Let’s break it down:
All-Purpose Flour: The foundation of the bread. Soft, tender, and just right for creating that fluffy texture we all crave. This is the dough’s best friend.
Instant Yeast: The secret to that perfect rise! Instant yeast works quickly and gives the bread its signature airy, light texture.
Warm Water: Just the right temperature to activate the yeast. It brings everything together and helps the dough get nice and soft.
Sugar: This isn’t just for sweetness; sugar also feeds the yeast, helping it rise to its full potential. It gives the bread a beautiful golden color, too.
Salt: A pinch of salt to balance out all the sweetness and bring the flavors together. It’s the little thing that makes a big difference!
Eggs: The eggs are the key to the bread’s rich, tender crumb. They give it that soft texture and beautiful golden color.
Butter: Rich, creamy butter brings flavor and a little luxury to the dough. It also helps with texture, making the bread even more tender.
Chocolate: The star of the show! Whether you use chocolate chips, chunks, or your favorite bar, this adds a decadent, gooey swirl that will make your heart skip a beat.
(Note: The full ingredients list, including measurements, is provided in the recipe card directly below.)
Instructions
Let’s dive into making this beautiful bread together!
Activate the Yeast: Start by warming the water to about 110°F. Sprinkle the instant yeast and a little sugar over the warm water, stirring gently. Let it sit for about 5 minutes until it’s nice and foamy.
Make the Dough: In a large mixing bowl, combine the flour, sugar, and salt. Add in the activated yeast mixture, eggs, and melted butter. Mix everything together until it forms a soft, sticky dough.
Knead the Dough: Turn the dough out onto a lightly floured surface and knead for about 8-10 minutes until it’s smooth and elastic. This step is key to developing that soft, pillowy texture.
Let the Dough Rise: Place the dough in a lightly oiled bowl and cover with a clean kitchen towel. Let it rise for about 1-2 hours, or until it doubles in size. Be patient—this step will give your bread that lovely, airy texture.
Prepare the Chocolate Filling: While the dough is rising, melt the chocolate and set it aside. You can use a double boiler or microwave it in short bursts, stirring in between. Let it cool slightly.
Shape the Dough: Punch down the dough and turn it out onto a lightly floured surface. Roll the dough into a rectangle, spread the melted chocolate over the surface, and then roll it up tightly from one edge.
Form the Loaf: Cut the dough roll in half lengthwise, then twist the two halves together into a braid, making sure the chocolate is swirling through the dough. Tuck the ends in to create a loaf shape.
Second Rise: Place the loaf onto a parchment-lined baking sheet, cover it with a kitchen towel, and let it rise for another 30 minutes to an hour.
Bake to Perfection: Preheat your oven to 350°F. Bake the loaf for 25-30 minutes, or until the top is golden brown, and a toothpick comes out clean.
Cool and Enjoy: Let the bread cool for about 15 minutes before slicing. Trust me, it’s hard to wait, but the texture is so much better when it’s allowed to cool slightly.
Nutrition Facts
Servings: 12
Calories per serving: 250
Preparation Time
Prep Time: 30 minutes
Cook Time: 30 minutes
Total Time: 2 hours 30 minutes
How to Serve Swirled Chocolate Challah Bread
This Swirled Chocolate Challah Bread is perfect on its own, but here are a few ideas to make it even more irresistible:
With Coffee or Tea: Serve a warm slice with your morning coffee or afternoon tea for the ultimate cozy treat.
With Butter: Add a little pat of butter to a fresh slice—just the right amount of richness to enhance the chocolate swirl.
As French Toast: If you have any leftovers (and that’s a big “if”), turn them into the best French toast you’ve ever had. The chocolate will melt beautifully when you fry it up.
With Fresh Berries: Add some fresh fruit, like strawberries or raspberries, on the side for a touch of freshness to balance out the sweetness of the bread.
As a Dessert: If you’re serving this as a dessert, try topping it with a drizzle of chocolate ganache or whipped cream.
Additional Tips
Here are some extra tips to help you get the most out of this recipe:
Prep Ahead: You can make the dough ahead of time and store it in the fridge overnight for a slower rise. This will add extra flavor and texture!
Swap the Chocolate: You can experiment with different kinds of chocolate. Dark chocolate adds a rich, slightly bitter flavor, while milk chocolate gives a sweeter, more classic taste.
Don’t Skip the Second Rise: Letting the dough rise twice gives the bread its soft, airy texture. Don’t rush this step!
Store Leftovers: Store any leftover bread in an airtight container for up to 3 days. Reheat it gently before serving to bring back its soft, warm texture.
Freezing: This bread freezes well! Wrap it tightly in plastic wrap or foil, and freeze for up to 3 months. Thaw it at room temperature before serving.
FAQ Section
Q1: Can I use regular yeast instead of instant yeast?
A1: Yes, you can use regular active dry yeast, but you’ll need to proof it in warm water first before adding it to the dough. Instant yeast doesn’t need to be activated in advance.
Q2: Can I use a bread machine to make the dough?
A2: Absolutely! You can use the dough setting on your bread machine for an easy, hands-off approach.
Q3: Can I use a different kind of filling besides chocolate?
A3: Definitely! Try using cinnamon sugar, Nutella, or even fruit preserves for a different twist.
Q4: Can I make this bread in a loaf pan instead of braiding it?
A4: Yes! If you don’t want to braid it, you can simply roll the dough and place it in a greased loaf pan before baking.
Q5: How do I know when the bread is done baking?
A5: The bread is done when the top is golden brown, and a toothpick inserted into the center comes out clean.
Q6: Can I make this ahead of time for a brunch?
A6: Yes! You can make the dough the night before and refrigerate it overnight. Let it come to room temperature and rise before baking the next morning.
Q7: Can I freeze the dough?
A7: Yes, you can freeze the dough before baking. Let it rise and shape it, then freeze it. Bake it straight from the freezer, adding a few extra minutes to the baking time.
Q8: Can I use dark chocolate instead of milk chocolate?
A8: Absolutely! Dark chocolate will give the bread a more intense flavor, so feel free to adjust based on your preference.
Q9: Can I double the recipe?
A9: Yes! Just be sure to adjust the baking time as needed, and make sure you have enough space on your baking sheet.
Q10: Can I make this bread without butter?
A10: You can substitute the butter with oil or a dairy-free butter alternative for a vegan-friendly version.
Conclusion
There you have it—Swirled Chocolate Challah Bread that will have you coming back for more. It’s soft, it’s sweet, and that chocolate swirl is downright dreamy. Whether you’re baking for a crowd or treating yourself, this bread is guaranteed to impress. So go ahead, get your hands in that dough, and enjoy the magic that happens when you combine chocolate and bread! You won’t regret it.
Print
Swirled Chocolate Challah Bread
- Prep Time: 20 minutes
- Cook Time: 25-35 minutes
- Total Time: 2.5-3 hours (including rising time)
- Yield: 2 loaves (or 1 loaf if halved) 1x
- Category: bread
- Method: baking
- Cuisine: American
- Diet: Vegetarian
Description
This Swirled Chocolate Challah Bread features a beautiful swirl of chocolate dough and plain dough, creating a rich, slightly sweet, and soft loaf that’s perfect for breakfast, brunch, or dessert.
Ingredients
For the Plain Dough:
- 1 heaped tsp instant yeast
- 1 tsp sugar
- ½ cup warm water
- ⅛ cup honey
- ¼ cup canola oil
- 1 egg (at room temperature)
- 1 tsp pure vanilla extract
- 2 cups bread flour or all-purpose flour
- 1 tsp sea salt
For the Cocoa Dough:
- 100g warm water
- 1 tsp sugar
- 1 ¼ tsp instant yeast
- ⅛ cup canola oil
- 2 eggs
- ⅛ cup honey
- 1 tsp vanilla extract
- ½ tsp sea salt
- 280g bread flour or all-purpose flour
- ¼ cup Dutch process cocoa powder
Instructions
-
Make Doughs:
For each dough, combine the yeast, sugar, and warm water. Let sit for 5 minutes.
For the plain dough: Add honey, oil, vanilla, egg, flour, and salt. Knead until the dough comes together.
For the cocoa dough: Repeat the same steps but add cocoa powder with the flour.
Oil two bowls, place the dough in them, and cover with plastic wrap. Let both doughs rise until doubled in size (about 1-2 hours). -
Roll Out Doughs:
Flour a surface and roll out both doughs to the same size. Place the plain dough on a floured parchment paper-lined cookie sheet. -
Swirl Doughs:
Roll out the cocoa dough and place it on top of the plain dough. Roll it up like a cinnamon roll.
Fold the dough in half and twist the sides together to create a swirl effect. -
Bake:
Place the twisted dough into a loaf pan lined with parchment paper. Let it rise for 45-60 minutes.
Preheat the oven to 375°F (190°C). Bake for 25-35 minutes, or until the bread is fully baked and golden on top.
Notes
- This recipe makes two loaves. If you prefer to make only one loaf, halve each dough recipe.
- For a richer chocolate flavor, you can increase the amount of cocoa powder slightly.
Nutrition
- Serving Size: 1 slice (based on 16 slices per loaf)
- Calories: 200kcal
- Sugar: 10g
- Sodium: 120mg
- Fat: 7g
- Saturated Fat: 1g
- Unsaturated Fat: 6g
- Trans Fat: 0g
- Carbohydrates: 30g
- Fiber: 2g
- Protein: 4g
- Cholesterol: 40mg

