
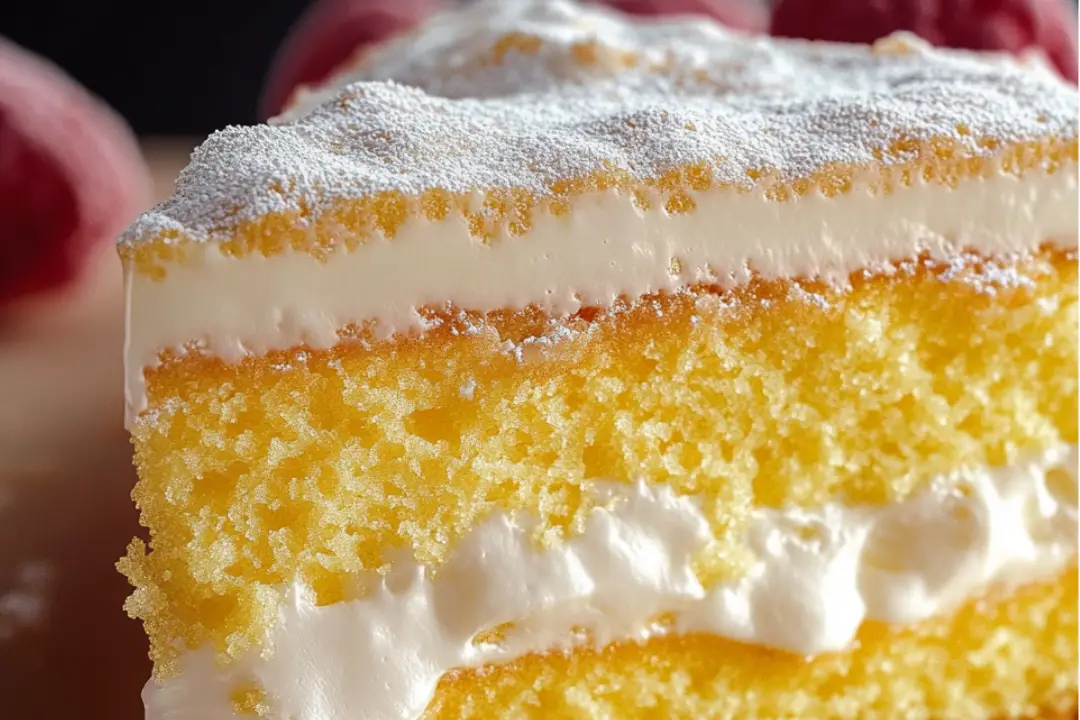
If you’re looking for a dessert that’s both indulgent and incredibly easy to make, look no further! This Twinkie Cake (No-Bake) is the perfect sweet treat for any occasion. It combines the familiar, nostalgic flavor of Twinkies with a smooth, creamy layer and a light, fluffy texture that will have everyone coming back for seconds. It’s the kind of dessert that’s as fun to make as it is to eat. Trust me, you’re going to love this one!
Why You’ll Love Twinkie Cake! (No-Bake)
- No Baking Required: Yup, no oven needed! This no-bake cake saves you time and keeps the kitchen cool, making it perfect for hot days or whenever you just want a stress-free dessert.
- Twinkie Flavor: It brings that classic, beloved Twinkie flavor right to your table. If you love Twinkies, you’re going to adore this cake—it’s like the classic snack but in cake form!
- Quick and Easy: With just a few ingredients and simple steps, you’ll have this delicious dessert ready to go in no time. It’s the perfect recipe for beginners or busy bakers.
- Perfect for Any Occasion: Whether it’s a family dinner, a picnic, or a special celebration, this cake is sure to impress. It’s versatile and crowd-pleasing, making it ideal for potlucks or get-togethers.
- No Fuss, All Flavor: Simple ingredients like Twinkies, pudding, and whipped cream come together to create a mouthwatering dessert that tastes as rich and decadent as it looks.
Ingredients
Let’s break down the ingredients that make this cake so irresistible:
Twinkies
The star of the show! These iconic, spongy cakes add texture and that signature Twinkie flavor we all know and love.
Vanilla Pudding Mix
A rich and creamy filling for the cake, giving it that classic pudding texture that blends so perfectly with the Twinkies.
Whipped Topping (Cool Whip)
This light and fluffy topping gives the cake its smooth and airy texture, while adding just the right amount of sweetness.
Milk
To prepare the pudding mix and make it nice and creamy. Full-fat milk works best for the richest flavor.
Vanilla Extract
A touch of vanilla extract enhances the overall flavor of the cake, making it even more delicious.
(Note: the full ingredients list, including measurements, is provided in the recipe card directly below.)
Instructions
Let’s dive into the steps to create this Twinkie Cake masterpiece:
Prepare the Pudding
In a large bowl, whisk together the vanilla pudding mix and milk. Stir until the mixture thickens to the consistency of pudding. This should take about 2 minutes. Once thickened, set it aside to cool for a few minutes.
Layer the Twinkies
Arrange a layer of Twinkies in the bottom of a 9×13-inch baking dish. Make sure they cover the entire base, fitting snugly together.
Spread the Pudding
Once the pudding has thickened, spread it evenly over the layer of Twinkies. Use a spatula to smooth it out so it covers every corner.
Add the Whipped Topping
Top the pudding layer with a generous amount of whipped topping, spreading it evenly over the entire surface.
Chill the Cake
Cover the cake with plastic wrap or aluminum foil and refrigerate it for at least 4 hours, or until it’s set. The chilling time helps the flavors meld together and allows the cake to firm up.
Serve and Enjoy
Once chilled, slice and serve this creamy, decadent cake. It’s best when it’s nice and cold!
Nutrition Facts
Servings: 12
Calories per serving: 300
Preparation Time
Prep Time: 15 minutes
Chill Time: 4 hours
Total Time: 4 hours 15 minutes
How to Serve Twinkie Cake! (No-Bake)
This Twinkie Cake is so delicious, it’s a treat all on its own, but it pairs wonderfully with:
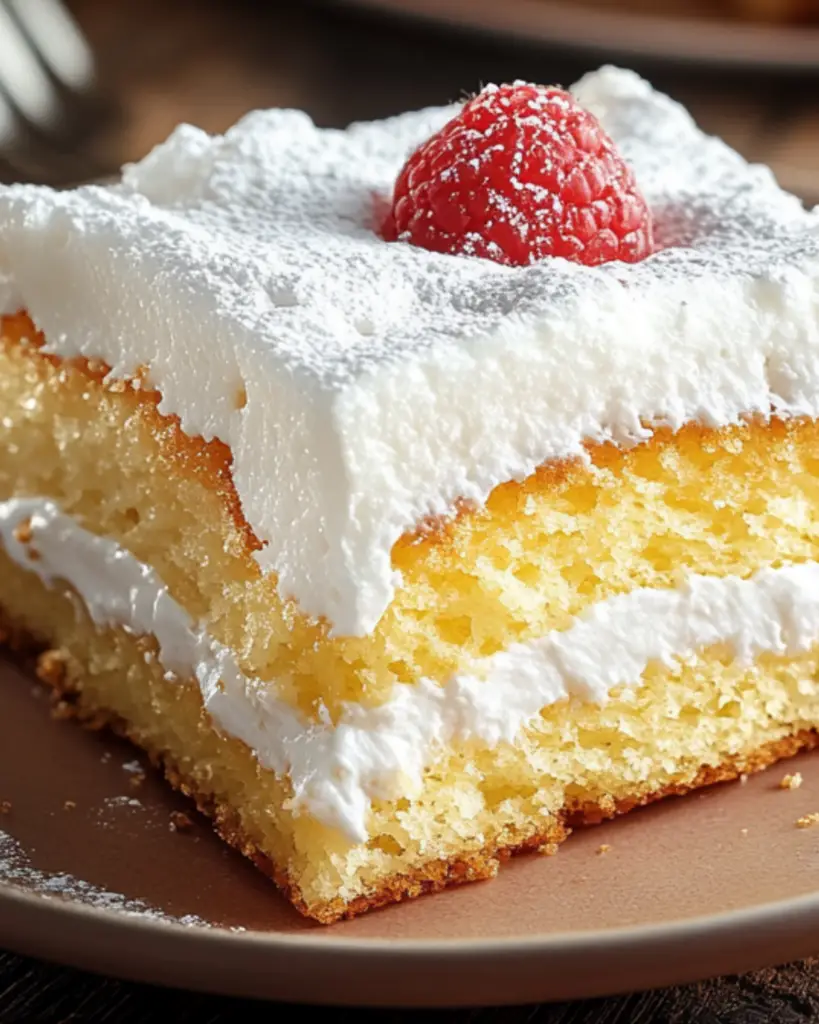
- Fresh Berries: Add a handful of fresh strawberries, raspberries, or blueberries on top for a burst of color and a touch of tartness that balances the sweetness.
- Whipped Cream: Serve with a dollop of fresh whipped cream for a richer, more indulgent dessert.
- Chocolate Drizzle: For a twist, drizzle some melted chocolate over the top before serving for an extra layer of flavor.
Additional Tips
- Make Ahead: This cake needs some time to set, so it’s great for making ahead of time. In fact, it tastes even better the next day!
- Twinkie Variations: If you want to experiment, try using different flavors of Twinkies (like chocolate or strawberry) to give the cake a unique twist.
- Storage Tips: Store any leftovers in the refrigerator for up to 2 days. Just be sure to cover it tightly to keep it fresh.
- Lighter Version: Use sugar-free pudding and whipped topping for a lighter version of this dessert while still keeping all the creamy goodness.
FAQ Section
Q1: Can I use homemade pudding instead of the pudding mix?
A1: Absolutely! If you prefer homemade pudding, just make sure it’s thick enough to hold up the layers.
Q2: Can I freeze this cake?
A2: While this cake is best served fresh, you can freeze it for up to 1 month. Just cover it tightly with plastic wrap and foil, and defrost it in the fridge before serving.
Q3: Can I make this cake with chocolate pudding instead of vanilla?
A3: Definitely! Chocolate pudding will give this cake a whole new flavor profile and still be just as delicious.
Q4: Can I add fruit to this dessert?
A4: Yes! Fresh fruit, such as strawberries or bananas, would be a great addition. You can layer them between the Twinkies and the pudding for added flavor and texture.
Q5: How do I store leftovers?
A5: Store any leftover Twinkie cake in the refrigerator, covered with plastic wrap or in an airtight container, for up to 2 days.
Q6: Can I use a different whipped topping instead of Cool Whip?
A6: Sure! You can use homemade whipped cream or any other whipped topping of your choice.
Q7: How can I make this cake more decadent?
A7: Add a layer of chocolate chips or drizzle some caramel sauce on top for a richer dessert experience.
Q8: Can I make this cake without Twinkies?
A8: If you don’t have Twinkies, you can use sponge cake or ladyfingers as an alternative. The texture will be slightly different, but it’ll still be delicious!
Q9: How long does this cake need to chill?
A9: This cake should chill for at least 4 hours to allow the flavors to meld together and the texture to set properly.
Q10: Can I double the recipe for a larger crowd?
A10: Definitely! Simply double the ingredients and use a larger baking dish. The process will be the same.
Conclusion
This Twinkie Cake (No-Bake) is the ultimate easy dessert that’s sure to become a new favorite. It’s simple, indulgent, and guaranteed to impress at any gathering. Whether you’re serving it at a party or just treating yourself, this cake is everything you want in a dessert—no oven required! Give it a try, and you’ll be hooked!
Print
Twinkie Cake (No-Bake!)
- Prep Time: 10 minutes
- Cook Time: 1-2 hours
- Total Time: 1 hour 10 minutes – 2 hours 10 minutes
- Yield: 9 servings (1 per Twinkie) 1x
- Category: Dessert
- Method: No-bake
- Cuisine: American
- Diet: Vegetarian
Description
This No-Bake Twinkie Cake is a fun and easy dessert that layers Twinkies with a creamy vanilla pudding filling, fresh strawberries, and whipped topping. It’s a sweet, fluffy treat that requires no baking and is perfect for any occasion.
Ingredients
- 9 Twinkies, unwrapped
- 3.4 ounces box of instant vanilla pudding
- 1½ cups whole milk
- 16 ounce container of fresh strawberries, divided into ½ cup and the remainder
- 8 ounces whipped topping, thawed
Instructions
- Prepare the Twinkies: Place the unwrapped Twinkies into the bottom of an 8×8 baking dish.
- Prepare the Pudding: In a medium bowl, whisk together the instant pudding mix and whole milk for 3 minutes or until thickened.
- Layer the Pudding: Spread the vanilla pudding evenly over the Twinkies in the baking dish.
- Prepare the Strawberries: Dice 3-4 of the strawberries into small pieces. You should have about ⅓-½ cup of diced berries. Set aside.
- Arrange the Sliced Strawberries: Slice the remaining strawberries into ¼-inch thick slices. Arrange the sliced strawberries in a single layer covering the entire surface of the Twinkie cake.
- Top with Whipped Topping: Top the layer of strawberry slices with the thawed whipped topping. You can use an offset spatula to smooth the whipped topping into an even layer.
- Finish with Diced Strawberries: Sprinkle the reserved small diced strawberries evenly over the surface of the no-bake Twinkie cake.
- Chill: Refrigerate for 1-2 hours to allow the pudding layer to firm up before slicing and serving.
Notes
- If you want to make this cake ahead of time, you can refrigerate it overnight for extra firmness.
- You can substitute the whipped topping with homemade whipped cream if preferred.
Nutrition
- Serving Size: 1 piece (1/9 of the cake)
- Calories: 250kcal
- Sugar: 26g
- Sodium: 150mg
- Fat: 12g
- Saturated Fat: 7g
- Unsaturated Fat: 4g
- Trans Fat: 0g
- Carbohydrates: 33g
- Fiber: 2g
- Protein: 3g
- Cholesterol: 30mg