
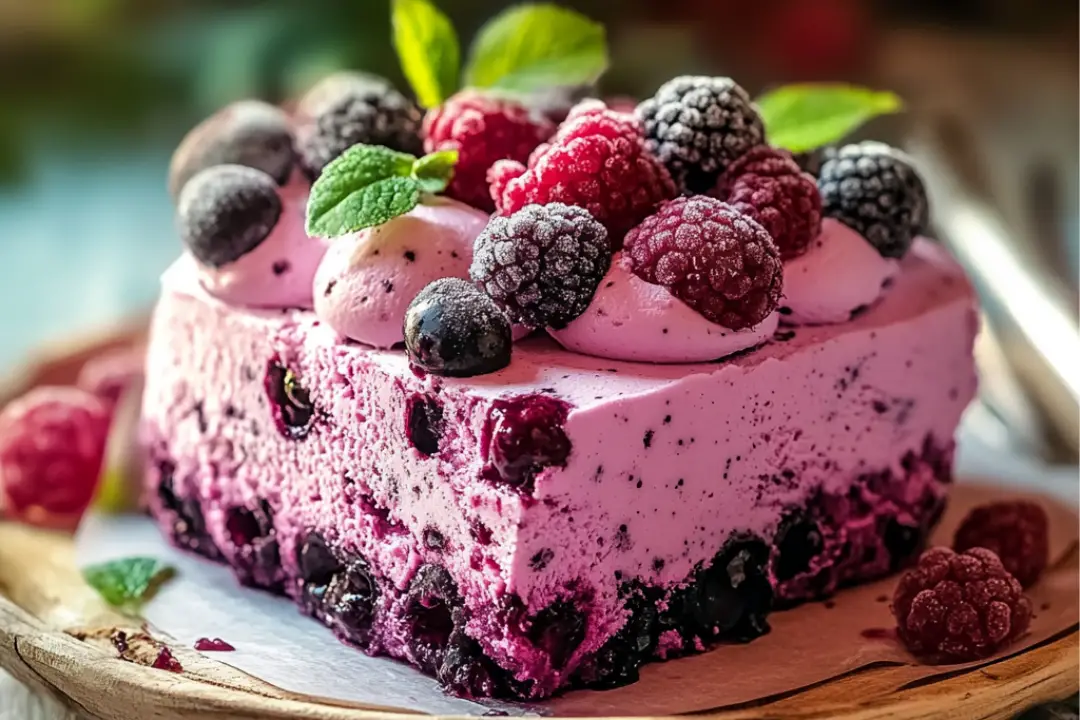
Is there anything better than dessert that’s both indulgent and refreshing? I don’t think so! This Vegan Berry Ice Cream Cake is an absolute game-changer. Picture layers of creamy, fruity ice cream topped with a crumbly, sweet crust, and packed with vibrant berries that burst with flavor. It’s an easy, no-bake dessert that’s perfect for any occasion, from a backyard BBQ to a cozy night in. Trust me when I say—this dessert is a total crowd-pleaser. You’re going to fall in love with the combination of creamy and fruity textures. It’s cool, refreshing, and 100% vegan! Let’s dive in and make something truly delightful together.
Why You’ll Love Vegan Berry Ice Cream Cake
This isn’t just another ice cream cake. It’s fresh, it’s vibrant, and it’s got that perfect balance of sweet and tart from the berries. Whether you’re celebrating a birthday, summer, or just treating yourself on a random Tuesday, here’s why this recipe will become your go-to:
- No-Bake Delight: The best part? You don’t even need to turn on the oven! It’s all about layering up delicious ingredients and letting the freezer do the magic.
- Fruity & Refreshing: Packed with fresh berries and a light coconut milk base, this ice cream cake is both indulgent and refreshing—a perfect treat for warmer weather.
- Vegan-Friendly: It’s completely dairy-free and made with wholesome, plant-based ingredients. Even non-vegans will be hooked after the first bite!
- Customizable: Want to switch up the berries? Go for raspberries, blackberries, or even add some chocolate chips to the mix! The beauty of this recipe is how easy it is to adjust.
- Easy to Make: The steps are simple, and you don’t need any fancy equipment—just a freezer and a bit of patience while it freezes!
Ingredients
Let’s break down the ingredients you’ll need to create this ice cream cake:
Berries:
These are the stars of the show. Fresh or frozen, berries like strawberries, blueberries, and raspberries bring a pop of flavor and color to the cake. They’re packed with vitamins and antioxidants, and they’re just bursting with natural sweetness!
Coconut Milk:
A creamy, rich base for your ice cream cake that’s completely dairy-free! Full-fat coconut milk gives the dessert its smooth and luscious texture. If you want it even creamier, you can use canned coconut cream.
Coconut Sugar or Maple Syrup:
For the perfect natural sweetness without being overwhelming. Coconut sugar has a lovely caramel-like taste, and maple syrup is perfect if you’re after a little extra maple flavor. Feel free to adjust the sweetness based on your taste!
Cashews:
These soaked cashews add creaminess and richness to the ice cream base. Blended into a smooth mixture, they bring all the dairy-free decadence you’re after in a creamy dessert.
Vanilla Extract:
This little ingredient elevates the whole flavor profile, adding a touch of warmth to the ice cream and balancing out the sweetness of the berries and coconut milk.
Crust (Optional but Delicious):
Made from crushed graham crackers or oat biscuits, this adds a delightful crunch and a bit of texture to the cake. You could also use gluten-free graham crackers if that’s your preference!
(Note: the full ingredients list, including measurements, is provided in the recipe card directly below.)
Instructions
Ready to create this delicious masterpiece? Here’s how:
Blend the Ice Cream Base:
In a blender or food processor, combine your soaked cashews, coconut milk, coconut sugar (or maple syrup), and vanilla extract. Blend until smooth and creamy—this will be your ice cream base.
Prepare the Crust (Optional):
If you’re using a crust, crush your graham crackers or oat biscuits in a food processor until they form fine crumbs. Mix with melted coconut oil or vegan butter to form a sticky, crumbly mixture. Press this mixture into the bottom of a springform pan or a cake pan lined with parchment paper, and set aside.
Add the First Layer of Ice Cream:
Pour half of the ice cream base into your prepared crust (or directly into your pan if you’re skipping the crust). Smooth the surface with a spatula, then add a generous handful of your chosen berries on top. You can gently press them into the ice cream for a more uniform distribution.
Freeze the First Layer:
Pop the pan into the freezer for about 2-3 hours, or until the first layer has firmed up nicely.
Layer and Freeze Again:
After the first layer is firm, pour the remaining ice cream base over the top, smooth it out, and add another layer of berries. You can alternate the types of berries for extra color and flavor. Freeze again for another 2-3 hours, or until fully set.
Serve and Enjoy:
Once your ice cream cake is fully frozen and set, remove it from the freezer. Let it sit at room temperature for about 5 minutes to soften slightly before serving. Slice and enjoy the refreshing, creamy goodness!
Nutrition Facts
Servings: 8
Calories per serving: 290
Preparation Time
Prep Time: 20 minutes
Cook Time: 0 minutes
Total Time: 5 hours
How to Serve Vegan Berry Ice Cream Cake
This dessert is perfect for any occasion, but here are a few ways to make it even more special:
Serve with Extra Berries:
Top each slice with a handful of fresh berries for an added burst of flavor and a beautiful touch.
Pair with a Fruit Salad:
Serve this cake alongside a light fruit salad to complement the sweetness and make the whole dessert experience feel even fresher.
Drizzle with Chocolate Sauce:
Want to make it extra indulgent? Drizzle some melted dairy-free chocolate sauce over the top before serving. You won’t regret it!
As a Standalone Treat:
Sometimes, this cake is perfect all on its own. Just slice and enjoy the creamy, berry-packed goodness!
Additional Tips
Here are a few extra tips to make sure your ice cream cake turns out perfect:
- Soak Cashews: Be sure to soak your cashews for at least 4 hours before blending to ensure they blend into a smooth, creamy texture. If you’re in a rush, use hot water to soak them for 30 minutes.
- Customization: Feel free to experiment with different fruits. Mango, peaches, or even kiwi could work wonderfully in place of the berries!
- Make Ahead: This cake freezes well, so it’s perfect for making ahead of time. Just pull it out of the freezer when you’re ready to serve.
- Gluten-Free Option: Use gluten-free graham crackers or make your own oat crust to keep this cake gluten-free.
- Freezer Storage: Store leftover cake in the freezer for up to a week. Just wrap it in plastic wrap or store it in an airtight container to keep it fresh.
FAQ Section
Q1: Can I make this without a crust?
A1: Absolutely! The crust is optional, and you can skip it if you prefer a simpler, lighter dessert.
Q2: Can I use almond milk instead of coconut milk?
A2: You can! Keep in mind that coconut milk provides a creamier texture, but almond milk will work as a lighter alternative.
Q3: Can I add chocolate chips to the ice cream?
A3: Yes! Chocolate chips would be a delicious addition to the ice cream layers. Just fold them in after blending the ice cream base.
Q4: How do I store leftover cake?
A4: Keep leftovers in an airtight container or wrap the cake tightly in plastic wrap, and store it in the freezer for up to a week.
Q5: Can I use other nuts instead of cashews?
A5: Cashews are great for a smooth, creamy texture, but you can try using soaked almonds or macadamia nuts for a different flavor.
Q6: Can I make this cake ahead of time?
A6: Yes! It’s actually a perfect make-ahead dessert. Just freeze it until you’re ready to serve.
Q7: Can I make this in individual portions?
A7: Yes! You can easily make this cake in muffin tins or small ramekins for individual servings.
Q8: Can I use frozen berries?
A8: Yes, frozen berries work perfectly fine. Just let them thaw a little before using them in the layers for better texture.
Q9: Can I make this gluten-free?
A9: Yes! Just use gluten-free graham crackers or another gluten-free crust option.
Q10: How long should I let the cake sit out before serving?
A10: Let the cake sit at room temperature for about 5-10 minutes before slicing to make it easier to cut and serve.
Conclusion
This Vegan Berry Ice Cream Cake is the ultimate treat that’ll wow your taste buds while keeping it light and refreshing. The combination of creamy, dairy-free ice cream with the burst of fresh berries makes every bite feel like a little celebration. Whether it’s for a special occasion or just because, this dessert is sure to steal the show. With a few simple ingredients and just a little patience, you’ll have a beautiful, decadent dessert that’s perfect for anyone—vegan or not. So go ahead, give it a try, and enjoy the sweet satisfaction of making something so incredibly delicious!
Print
Vegan Berry Ice Cream Cake
- Prep Time: 25 minutes
- Cook Time: 6+ hours
- Total Time: 6 hours 25 minutes
- Yield: 8–10 slices 1x
- Category: Dessert
- Method: No-bake
- Cuisine: American
- Diet: Vegan
Description
This Vegan Berry Ice Cream Cake is a refreshing, fruity, and creamy dessert perfect for any special occasion or summer celebration!
Ingredients
Ice Cream Cake Layers:
- 2 cups raspberries (fresh or frozen)
- 2 cups blueberries (fresh or frozen)
- Zest and juice of 1 lemon, divided
- 1.5 quarts vegan vanilla ice cream, softened
- 1/3 cup raspberry jam
To Decorate:
- Fresh raspberries and blueberries
- Optional: Vegan whipped cream or edible flowers
Instructions
-
Prepare the Loaf Pan:
Line an 8-inch (20 cm) loaf pan with parchment paper, leaving enough overhang on the sides to easily lift the cake out later. -
Make the Raspberry Ice Cream Layer:
Add the raspberries and half of the lemon zest and juice to a food processor. Process until as smooth as possible.
Add 1/3 of the softened vegan vanilla ice cream to the food processor and pulse until fully combined.
Spread the raspberry mixture evenly into the bottom of the prepared loaf pan. Use a spatula to smooth the layer. Place in the freezer for 30 minutes to firm up. -
Make the Vanilla Ice Cream Layer:
Spread 1/3 of the softened vanilla ice cream directly over the raspberry layer. Smooth the top with a spatula.
Drizzle the raspberry jam over the vanilla layer and gently swirl it with a knife for a marbled effect. Freeze for another 30 minutes. -
Make the Blueberry Ice Cream Layer:
Add the blueberries and the remaining lemon zest and juice to a food processor. Process until as smooth as possible.
Add the remaining softened vanilla ice cream to the food processor and pulse until fully combined.
Spread the blueberry mixture evenly on top of the vanilla layer and smooth the surface. -
Freeze the Cake:
Cover the top with plastic wrap or foil, and freeze for at least 4-6 hours or overnight until the cake is fully set. -
Decorate and Serve:
Once the cake is firm, use the parchment paper overhang to lift it out of the pan. Place it on a serving plate.
Decorate the top with fresh raspberries, blueberries, and optional vegan whipped cream or edible flowers. -
Slice and Enjoy:
Slice with a sharp knife, running it under warm water between cuts for clean slices. Serve immediately!
Notes
- Make sure to freeze the cake for enough time to set properly.
- Feel free to customize with different berries or add-ins like granola or crushed nuts for extra texture.
Nutrition
- Serving Size: 1 slice
- Calories: 200kcal
- Sugar: 20g
- Sodium: 10mg
- Fat: 12g
- Saturated Fat: 5g
- Unsaturated Fat: 5g
- Trans Fat: 0g
- Carbohydrates: 25g
- Fiber: 3g
- Protein: 3g
- Cholesterol: 0mg