
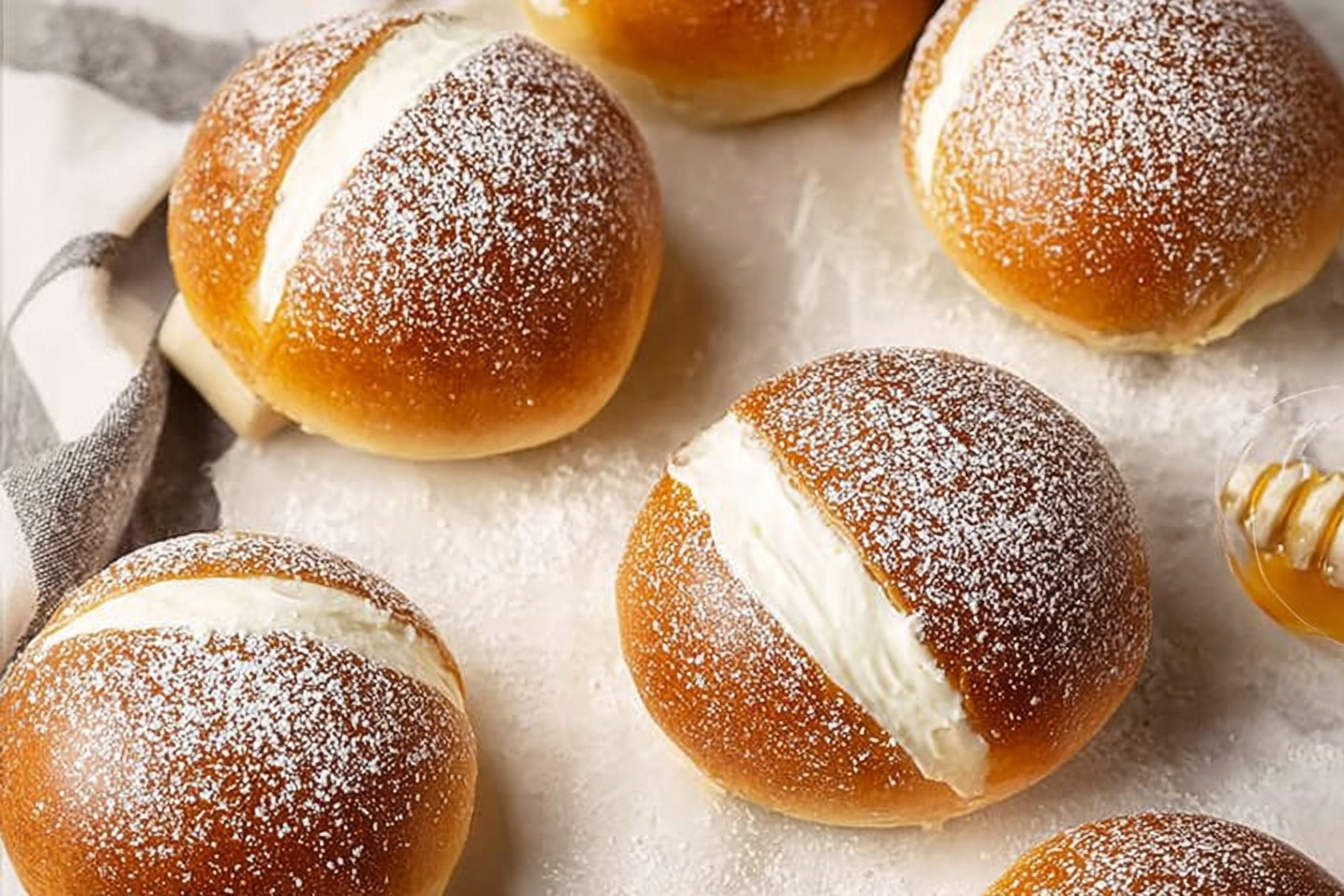
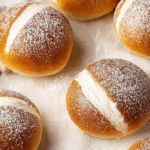
Indulge in the delightful experience of savoring soft and fluffy Italian Cream Buns, a sweet sensation that melts in your mouth. These buns are perfect for any dessert lover, offering a delightful combination of flavors and textures that will leave you craving more.
Why You’ll Love This Recipe
- Irresistibly Soft: These buns are incredibly soft and fluffy, making each bite a dream.
- Perfectly Sweet: The balance of sweetness in Italian Cream Buns is just right, satisfying your sweet tooth without overwhelming it.
- Versatile Treat: Enjoy them as a dessert, snack, or even breakfast treat; they fit any occasion beautifully.
- Easy to Make: With straightforward steps, you’ll find the process enjoyable and rewarding.
- Customizable: You can adapt the recipe to suit your taste or dietary needs, making it your own!
Ingredients You’ll Need
Creating the perfect Italian Cream Buns requires a few simple but essential ingredients, each contributing to the delightful taste and texture. From the fluffy goodness of flour to the rich flavor of cream, every element plays a vital role.
- All-Purpose Flour: This is the foundation of the buns, providing structure and lightness.
- Granulated Sugar: Adds sweetness and helps the buns rise beautifully.
- Yeast: The key ingredient for a fluffy texture, it makes the buns rise and become airy.
- Buttermilk: Adds moisture and a slight tang, enhancing the flavor profile.
- Butter: Brings richness and a lovely soft texture, making every bite melt in your mouth.
- Eggs: They provide richness and help bind the ingredients together.
- Vanilla Extract: Adds a warm, sweet aroma that enhances the overall flavor.
- Shredded Coconut: Brings a delightful texture and tropical flavor to the buns.
- Chopped Pecans: Adds crunch and a nutty taste that complements the sweetness.
Note: The full ingredients list, including measurements, is provided in the recipe card directly below.
Variations for Italian Cream Buns
Feel free to customize your Italian Cream Buns to match your personal preferences or dietary needs. The versatility of this recipe allows for easy adaptations, so get creative!
- Gluten-Free: Use a gluten-free flour blend to make these buns suitable for those with gluten sensitivities.
- Nut-Free: Omit the pecans or substitute them with sunflower seeds for a nut-free option.
- Coconut-Free: Replace shredded coconut with chocolate chips for a different flavor twist.
- Vegan: Substitute eggs with flax eggs and use plant-based butter and milk for a vegan version.
- Flavor Infusions: Experiment with different extracts like almond or lemon to give a unique spin to the flavor.

How to Make Italian Cream Buns
Step 1: Prepare the Dough
In a mixing bowl, combine warm buttermilk, sugar, and yeast. Let it sit for about 10 minutes until it becomes frothy. This process activates the yeast, which is crucial for the buns to rise.
Step 2: Mix Ingredients
Add melted butter, eggs, vanilla extract, and flour to the yeast mixture. Stir until a dough forms, ensuring all ingredients are well combined.
Step 3: Knead the Dough
Transfer the dough to a floured surface and knead for about 5-7 minutes until it is smooth and elastic. This step develops the gluten, giving the buns their fluffy texture.
Step 4: Let it Rise
Place the dough in a greased bowl, cover it with a clean cloth, and let it rise in a warm place until it doubles in size, which usually takes about 1 hour.
Step 5: Shape the Buns
Once risen, punch down the dough and turn it out onto a floured surface. Divide it into equal portions and shape each piece into a bun. Place them on a baking sheet lined with parchment paper.
Step 6: Second Rise
Cover the shaped buns with a cloth and let them rise again for about 30 minutes. This step allows them to become even fluffier.
Step 7: Bake
Preheat your oven to 350°F (175°C). Bake the buns for 15-20 minutes, or until they are golden brown and sound hollow when tapped on the bottom. The aroma will be heavenly!
Step 8: Cool and Serve
Remove the buns from the oven and let them cool on a wire rack. Once they are cool, you can frost or glaze them as desired.
Pro Tips for Making Italian Cream Buns
- Check Yeast Freshness: Always ensure your yeast is fresh for optimal rising.
- Room Temperature Ingredients: Use ingredients at room temperature for better mixing and rising.
- Don’t Over-Knead: Knead just until smooth to avoid dense buns.
- Warm Rising Environment: Place the dough in a warm, draft-free area to encourage rising.
- Adjust Baking Time: Keep an eye on the buns as ovens can vary; they should be golden brown.
How to Serve Italian Cream Buns
Garnishes
These buns are delightful on their own, but a light dusting of powdered sugar or a drizzle of cream cheese frosting elevates them to a whole new level. Fresh berries can also add a pop of color and flavor.
Side Dishes
Pair your Italian Cream Buns with a scoop of vanilla ice cream or a dollop of whipped cream for a decadent dessert. They also go wonderfully with a cup of coffee or tea.
Creative Ways to Present
Present your Italian Cream Buns on a beautiful cake stand or platter, garnished with mint leaves or edible flowers for an elegant touch. You could even serve them in individual muffin liners for a fun twist.
Make Ahead and Storage
Storing Leftovers
To keep your Italian Cream Buns fresh, store them in an airtight container at room temperature for up to 2 days. If you want to keep them longer, refrigeration is an option, but they may lose some softness.
Freezing
If you want to enjoy your Italian Cream Buns later, freeze them individually in a freezer-safe bag. They can last up to 3 months in the freezer, allowing you to enjoy a fresh bun whenever the craving strikes!
Reheating
To reheat frozen buns, simply thaw them in the refrigerator overnight. Then warm them in the oven at 350°F (175°C) for about 10 minutes. This will restore their soft and fluffy texture.
FAQs
Can I use whole wheat flour instead of all-purpose flour?
Yes, you can substitute whole wheat flour, but it may result in denser buns. Consider blending it with all-purpose flour for better texture.
How do I know if my yeast is active?
When you mix yeast with warm water and sugar, it should become frothy within 10 minutes. If not, the yeast may be inactive.
Can I make the dough the night before?
Absolutely! Just prepare the dough, let it rise once, then refrigerate overnight. Bring it to room temperature and shape it the next day.
What can I use instead of buttermilk?
You can make a simple substitute by mixing regular milk with a tablespoon of vinegar or lemon juice and letting it sit for a few minutes.
How do I make them more flavorful?
Consider adding spices like cinnamon or nutmeg to the dough or incorporating flavored extracts to enhance the overall taste.
Final Thoughts
Now that you have the recipe for these delightful Italian Cream Buns, it’s time to roll up your sleeves and start baking! Each bite is a heavenly experience you will want to share with friends and family. Happy baking!
Related Posts
- Decadent Strawberry Butter Cake for Sweet Cravings
- Delightful Blueberry Curd Bars for Sweet Moments
- Refreshing Summer Solstice Sun Cookies with Lemon Curd
Italian Cream Buns
- Prep Time: 30 minutes
- Cook Time: 20 minutes
- Total Time: 1 hour 50 minutes
- Yield: 12 buns 1x
- Category: Dessert
- Method: Baking
- Cuisine: Italian
- Diet: Vegetarian
Description
Indulge in the delightful experience of savoring soft and fluffy Italian Cream Buns, a sweet sensation that melts in your mouth. Perfect for any dessert lover, offering a delightful combination of flavors and textures.
Ingredients
Dry Ingredients
- 4 cups All-Purpose Flour
- 1 cup Granulated Sugar
- 2 1/4 teaspoons Yeast
- 1 cup Shredded Coconut
- 1/2 cup Chopped Pecans
Wet Ingredients
- 1 cup Buttermilk
- 1/2 cup Butter (melted)
- 2 Eggs
- 2 teaspoons Vanilla Extract
Instructions
- Prepare the Dough: In a mixing bowl, combine warm buttermilk, sugar, and yeast. Let it sit for about 10 minutes until it becomes frothy. This process activates the yeast, which is crucial for the buns to rise.
- Mix Ingredients: Add melted butter, eggs, vanilla extract, and flour to the yeast mixture. Stir until a dough forms, ensuring all ingredients are well combined.
- Knead the Dough: Transfer the dough to a floured surface and knead for about 5-7 minutes until it is smooth and elastic. This step develops the gluten, giving the buns their fluffy texture.
- Let it Rise: Place the dough in a greased bowl, cover it with a clean cloth, and let it rise in a warm place until it doubles in size, which usually takes about 1 hour.
- Shape the Buns: Once risen, punch down the dough and turn it out onto a floured surface. Divide it into equal portions and shape each piece into a bun. Place them on a baking sheet lined with parchment paper.
- Second Rise: Cover the shaped buns with a cloth and let them rise again for about 30 minutes. This step allows them to become even fluffier.
- Bake: Preheat your oven to 350°F (175°C). Bake the buns for 15-20 minutes, or until they are golden brown and sound hollow when tapped on the bottom. The aroma will be heavenly!
- Cool and Serve: Remove the buns from the oven and let them cool on a wire rack. Once they are cool, you can frost or glaze them as desired.
Notes
- Check Yeast Freshness: Always ensure your yeast is fresh for optimal rising.
- Room Temperature Ingredients: Use ingredients at room temperature for better mixing and rising.
- Don’t Over-Knead: Knead just until smooth to avoid dense buns.
- Warm Rising Environment: Place the dough in a warm, draft-free area to encourage rising.
- Adjust Baking Time: Keep an eye on the buns as ovens can vary; they should be golden brown.
Nutrition
- Serving Size: 1 bun
- Calories: 220
- Sugar: 10g
- Sodium: 180mg
- Fat: 8g
- Saturated Fat: 5g
- Unsaturated Fat: 2g
- Trans Fat: 0g
- Carbohydrates: 34g
- Fiber: 1g
- Protein: 4g
- Cholesterol: 40mg